
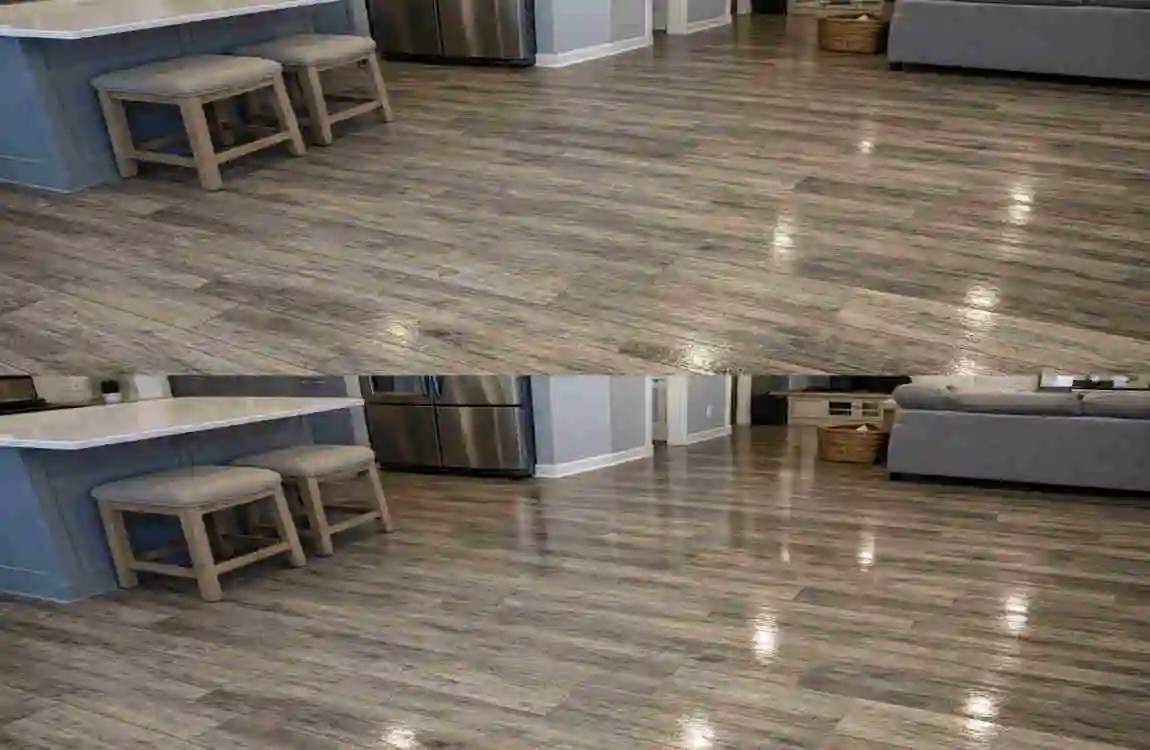
Picture this: It is a Sunday afternoon in 2026, and you are staring down at your living room floor. Between the kids running through the house, the dog chasing its favorite toy, and the general chaos of a busy modern lifestyle, your once-gorgeous floors have lost their sparkle. You want that glossy, magazine-cover finish back. You head to the cleaning cabinet, grab a bottle of traditional floor wax, and pause. A critical question pops into your mind: can you wax vinyl flooring without ruining it?
Let us give you the direct answer right out of the gate. No, you generally should not use traditional wax on modern vinyl flooring. In fact, applying old-school wax to a modern luxury vinyl plank can cause a sticky, cloudy mess. However, do not let that discourage you! You can absolutely restore that beautiful, factory-fresh shine with targeted, modern alternatives that protect your floor safely.
Over the last few years, luxury vinyl plank (LVP) has become increasingly popular. From bustling households to sleek, contemporary apartments in New York, homeowners love this material. Why? It offers the breathtaking look of real hardwood or natural stone but remains incredibly affordable and exceptionally durable. But this unique durability also means it requires a distinct maintenance approach. Many homeowners mistakenly treat their new vinyl like an old hardwood floor, applying heavy waxes that eventually cause the top layer to bubble or peel.
| Aspect | Recommendation | Risks if Wax Used | House-Safe Alternatives | Notes |
|---|---|---|---|---|
| Modern LVP/Sheet Vinyl | No—factory no-wax finish | Slippery buildup, wear layer damage, peeling | Acrylic sealer (e.g., Clear-Coat 3040), pH-neutral mop | Test small area for dulled spots only |
| Vintage/High-Traffic | Rarely, sparingly | Yellowing, attracts dirt, moisture trap | Vinegar mix (1:10), baking soda paste | Avoid high-speed buffers |
| Shine Duration | Short-term (weeks) | Frequent reapplication needed | 3-5 years with polish | Use microfiber for buffing |
| Cost per 100 sq ft | $20-50 (DIY wax) | Repairs: $100+ if damaged | $10-30 (sealer kits) | Cheaper long-term |
| Safety in Homes | Unsafe for kids/pets | Slip hazards, VOCs | Non-toxic, pet-proof options | Mats at entrances prevent wear |
Understanding Vinyl Flooring Basics
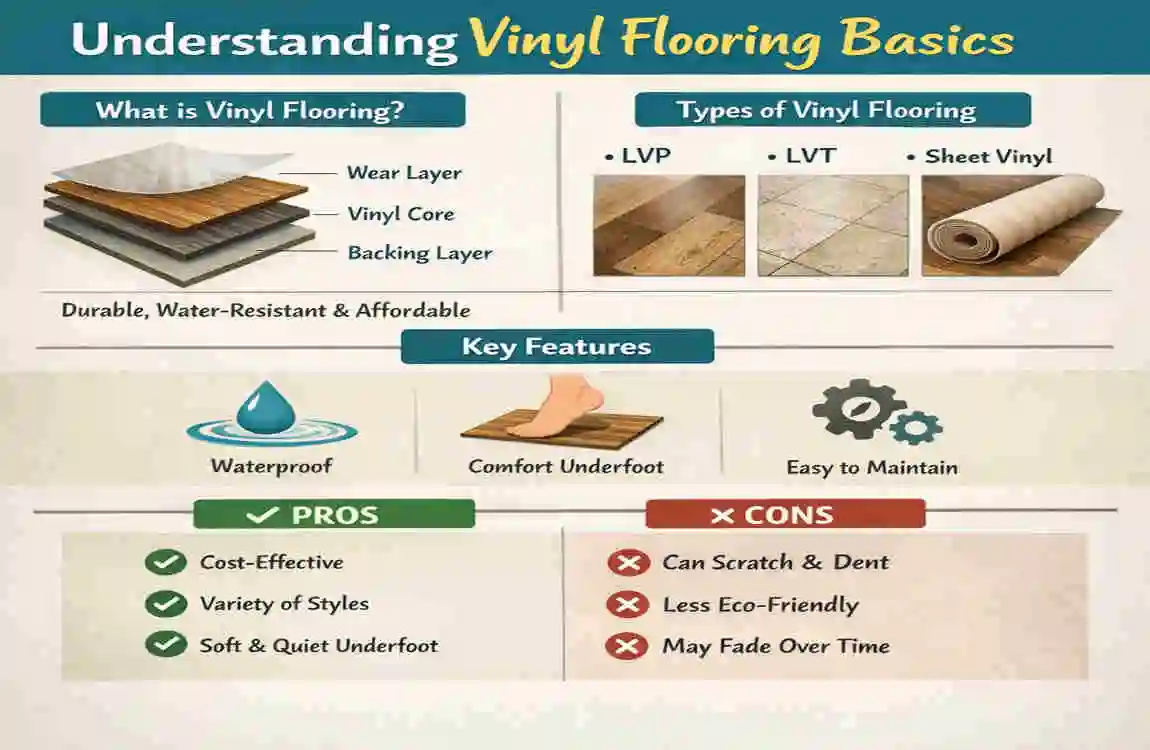
Before you can properly clean a floor, you need to understand exactly what you are walking on. Not all floors are created equal, and the flooring industry has changed dramatically over the last couple of decades. Let us break down the basic types of vinyl floors and why their construction dictates how you must treat them.
The Two Main Types of Vinyl
When you go shopping for floors, you generally encounter two main categories: sheet vinyl and luxury vinyl plank (LVP). Sheet vinyl comes in massive rolls and is rolled out flat, like a giant carpet. It is fantastic for bathrooms because it has zero seams for water to slip through. On the other hand, LVP comes in individual planks that snap together, mimicking the exact size, texture, and grain of real wood.
Both of these modern options share a secret weapon: a tough, invisible top layer.
The Magic of the Wear Layer
Modern vinyl flooring does not have bare plastic sitting exposed to the open air. Instead, the factory bakes on a clear, super-tough urethane wear layer. Think of this wear layer like the clear-coat paint on a brand-new car. It is specifically designed to repel stains, resist water, and bounce back from scratches.
Because of this built-in armor, no-wax factory finishes absolutely dominate the 2026 flooring markets. The manufacturer has already done the heavy lifting for you. The floor is designed to shine all on its own.
Why Old-School Wax is Outdated
What happens if you try to put a traditional paste wax or liquid wax on top of this urethane shield? It completely fails.
Traditional floor wax was designed for old, porous materials—like raw wood or old-fashioned vinyl composition tile (VCT) you might see in a grocery store. Wax needs to soak into the floor’s pores to anchor itself. Because your modern LVP has a sealed, non-porous protective coating, the wax cannot soak in. Instead, it just sits right on top of the floor like a greasy layer of lotion.
As you walk across this soft wax, it acts like a magnet. It grabs onto dust, pet hair, and microscopic dirt from your shoes. Over time, it builds up into a thick, hazy, yellow crust that completely ruins the look of your beautiful floor.
Here is a quick breakdown of how different floor types handle wax:
Vinyl vs. Other Floors: Maintenance Guide
Floor Type: Wax Needed?Best Maintenance Hack
Modern Vinyl Rarely / Never Use a liquid acrylic sealer
Commercial Tile: Yes, strip and re-wax every 6-12 months
Real Hardwood No Use an oil-based wood polish
Your vinyl floor has a tough shield. If you pile wax on top of it, you are just hiding its natural beauty under a layer of sticky yellow residue.
Can You Wax Vinyl Flooring? The Expert Answer
Let us ask the big question one more time: can you wax vinyl flooring?
If you ask any flooring manufacturer, professional installer, or cleaning expert in 2026, their direct verdict is a resounding NO. You should never use traditional wax on a factory-finished, no-wax luxury vinyl plank.
Many people think that if their floor looks a little dull, a heavy wax and a high-speed buffing machine will fix it. This is a massive mistake. High-speed buffing machines generate significant friction and heat. When you apply that spinning heat to a vinyl plank, you can literally burn right through the urethane wear layer. In extreme cases, the heat can melt the underlying plastic, creating ugly, permanent bubbles across your floor.
The Dangerous Risks of Waxing Vinyl
If you ignore the warnings and apply standard paste or liquid wax to your modern floor, you open your home up to several frustrating problems:
- Destroys the Protective Layer: Heavy waxes contain chemical solvents that can slowly eat away at your floor’s factory finish, leading to permanent peeling.
- The Yellowing Effect: As wax builds up layer upon layer in high-traffic areas of your home, it oxidizes and turns a gross, dingy yellow color.
- Creates Slip Hazards: Wax sitting on top of a non-porous urethane finish does not dry correctly. It remains slick and slippery, creating a dangerous surface for kids running in socks or older family members.
- Voids Your Warranty: Almost all major flooring brands explicitly ban the use of wax. If you use it, you instantly void your manufacturer’s warranty.
Are There Any Exceptions?
Yes, but they are very rare. The only time an expert will tell you to apply a finish to a modern vinyl floor is if you have accidentally damaged the factory finish.
For example, if you spilled harsh chemicals, dragged heavy furniture, or used the wrong cleaner, you might notice a dull, flat spot on the floor. In this specific case, you still do not use wax. Instead, you use a specialized acrylic floor finish (often called a clear-coat sealer). Acrylic finishes are formulated completely differently from wax. They bond chemically to the urethane layer, restoring the shine without creating a sticky, yellow mess.
As we navigate through 2026, we see a massive trend shifting away from heavy chemicals. Eco-sealers and water-based acrylics now vastly outperform old-school wax, giving you an incredible shine without any of the toxic fumes or sticky residue.
When Waxing Might Work (and When It Won’t)
We have established that modern LVP hates wax. But what if you do not have modern floors? What if you live in a beautiful historic home, or you just bought a charming fixer-upper with vintage floors? There are a few scenarios where traditional methods are necessary.
The Vintage Vinyl Exception
If your home features original vinyl sheet flooring from the 1980s or 1990s, you are dealing with a completely different beast, before the invention of the super-tough urethane wear layer, old linoleum and vintage vinyl required regular waxing to maintain a barrier against water and dirt.
If you have these vintage, pre-waxed floors that look dull from years of harsh cleaners, a fresh coat of wax is exactly what they need to come back to life. However, you must always test a small, hidden patch first—perhaps inside a closet or behind a door—to ensure the wax adheres properly.
The Quick Decision Checklist
How do you know what to do? If you are staring at your floor right now, feeling confused, run through this simple checklist to make your decision:
- Does the box say “No-Wax Factory Finish”? If you have the original boxes or you know the brand, check the label. If it says no-wax, absolutely skip the wax.
- Is it a high-traffic area looking worn? If your hallway has lost its shine but the floor is relatively new, opt for a liquid acrylic polish instead of a paste wax.
- Did you install the floor? If you just laid down new LVP, do not put anything on it! You must wait at least 30 days before applying any acrylic sealers so the planks can settle and acclimate to your home’s temperature.
Warnings From the Pros: Avoid Carnauba
If you do decide to polish an older floor, you must read the ingredients on the bottle. Experts strongly warn against using anything containing carnauba wax. Carnauba is fantastic for making your car shine, but it is far too solid for interior flooring. It requires a heavy, professional buffing machine to smooth out, and as we learned earlier, machines will melt your vinyl.
If you determine that your specific vintage floor truly needs wax, follow this safe, step-by-step exception process: First, clean the floor entirely with a pH-neutral cleaner. Second, test a tiny drop of the wax in a dark corner. Third, apply the wax in a paper-thin layer using a microfiber mop. Finally, buff it very lightly by hand using a dry microfiber cloth. Do not rush or use heavy machinery.
Step-by-Step Guide: Safe Alternatives to Waxing
You now know that you need to maintain luxury vinyl plank without reaching for the wax jar. So, how do you actually achieve that glossy, mirror-like finish? The secret lies in a consistent, gentle routine. You want a shiny, durable floor without the headache.
Here is your ultimate step-by-step guide to keeping your floors looking pristine every single day.
The Daily Sweep: Stopping Scratches
You should aim to perform a daily sweep, but put away that stiff-bristled outdoor broom. You want to use a soft dust mop or a microfiber sweeper. Your biggest enemy is not spilled juice; it is microscopic grit. Sand and dirt act like tiny pieces of sandpaper. Every time you take a step, you grind that dirt into the clear protective layer, causing thousands of microscopic scratches that make the floor look dull. A quick, two-minute daily sweep removes this grit and stops the dullness before it even begins.
The Weekly Clean: Gentle and Damp
Once a week, you need to mop. But here is the trick: modern floors hate heavy puddles of water. You should only use a slightly damp mop. Fill a bucket with warm water and add just a few drops of mild dish soap. Dish soap is designed to cut through grease on your plates, and it does the same thing for the oily footprints on your floor. Ring your mop out until it is barely wet, and glide it across the floor.
Never use harsh chemicals like ammonia, bleach, or heavy-duty degreasers. These aggressive chemicals will literally strip the factory shine right off the vinyl, leaving it looking cloudy and permanently damaged.
The Monthly Shine Boost: Polishing Properly
Once a month, you can give your floors a spa treatment to restore that Premium gloss.
- Vacuum the Edges: Start by using a vacuum (ensure the spinning beater bar is turned off) to suck up all the dust hiding in the corners and baseboards.
- Apply a Vinyl-Safe Polish: Grab a liquid acrylic sealer or a dedicated vinyl polish (like the popular Quick Shine brand). Squirt a small “S” shape onto a small section of the floor.
- Buff with Microfiber: Use a clean, flat microfiber mop pad to evenly spread the liquid. Work in small sections, moving the mop along the wood grain. Do not use any buffing machines! Let it dry for about 45 minutes before walking on it.
Natural Remedies for Everyday Spills
If you love natural home hacks, you do not need a closet full of expensive chemicals. Check out this table of natural remedies for keeping your floors flawless:
Home Hack: How to Use It: Expected Shine Level
Baking Soda Paste Mix with a little water to form a paste. Rub gently on stubborn food stains or scuffs, then wipe clean. Medium (Cleans without scratching)
Vinegar Water Mix: Mix 1 cup of apple cider vinegar into a gallon of hot water. The acidity removes sticky residue safely. High (Leaves a streak-free, clear finish)
Satin Acrylic Sealer: Apply a dedicated water-based acrylic sealer once a year to fill in micro-scratches. Premium (Restores factory gloss for 3-5 years)
If you follow this routine and your floor still looks dull, troubleshoot your environment. Are people wearing dirty shoes inside? Put heavy-duty floor mats at all your entrances. Are your dining chairs scratching the floor? Stick felt pads onto the bottom of all your furniture legs. A little prevention goes a long way.
Home Hacks for Lasting Vinyl Shine
The world of home maintenance is evolving rapidly. As we settle into 2026, smart technology and advanced chemistry are making it easier than ever to maintain a beautiful home. If you want to stay ahead of the curve, try incorporating these trending home flooring hacks into your routine.
Embrace Nano-Sealers
If you have a home filled with large dogs and active kids, standard polish might not cut it. The newest trend is the nano-sealer. These advanced liquids contain microscopic particles that dive deep into the tiny scratches on your LVP. They create a pet-proof, hyper-durable shield that resists scratches far better than older acrylic polishes. They are dry and crystal clear, leaving a brilliant shine.
Upgrade Your Robot Vacuum
Robot vacuums have become a staple in modern homes, but using the wrong one can ruin your vinyl. In 2026, the best hack is to invest in a robot vacuum specifically designed for hard floors. You want a model equipped with soft silicone rollers or fluffy microfiber brush rolls. Avoid any robot with stiff nylon bristles, as they will slowly wear down your floor’s protective layer over time. Let the robot handle the daily sweeping so you do not have to!
The Olive Oil Micro-Layer (DIY Polish)
Here is a fun, natural trick making the rounds in the DIY community. If you have a specific dull spot that needs a quick shine before guests arrive, try the olive oil hack. Place 2 drops of olive oil on a microfiber cloth, then rub it vigorously into the dull spot. The natural oil hydrates the microscopic scratches. Warning: You must buff it completely dry so it does not become a slip hazard, and always test a tiny hidden spot first!
Pro Tips for the Ultimate Floor
Want to know what the professional cleaners do? Steal these pro tips for your own home:
- Strategic Rug Placement: Placing area rugs in your highest traffic zones (like the main hallway or in front of the kitchen sink) reduces wear on your vinyl by an incredible 50%. Let the rug take the beating, not the floor.
- Annual Pro-Seal: If you live in an area with extreme humidity during the monsoon season—consider hiring a professional to apply a specialized water-based finish once a year. It prevents moisture from causing planks to warp.
- Ban the Steam Mop: This is crucial. Never, ever use a steam mop on luxury vinyl plank. The intense, pressurized heat forces steam down into the seams of the planks. This melts the internal adhesives, causing the planks to curl at the edges and permanently warp.
Finally, lean into the eco-angle. Always choose water-based finishes over oil-based chemicals. Water-based options drastically reduce Volatile Organic Compounds (VOCs). This means you get a gorgeous, shiny floor without filling your living room with harsh, toxic chemical smells.
Common Mistakes and How to Fix Them
Even with the best intentions, accidents happen. Homeowners frequently make mistakes when trying to clean their floors quickly. Let us look at the top errors people make and, more importantly, how you can fix them.
Over-Wetting the Floor
Many people think that more water makes a floor cleaner. They slop buckets of soapy water onto their LVP. While the top of the plank is waterproof, the seams where the planks click together are not. If water seeps down into those seams, it reaches the subfloor. This causes the planks to swell, buckle, and pop out of place. The Fix: Always ring your mop out until it is practically dry. If you accidentally spill a bucket, drop dry towels on the floor immediately and use a fan to dry the seams.
Using Harsh Cleaners
We mentioned this briefly, but it bears repeating. Grabbing a bottle of bleach, heavy ammonia, or abrasive scrubbing powders will chemically burn the top of your floor. It strips the urethane, leaving a permanent, milky-white dullness. The Fix: Throw away the harsh chemicals. Stick to pH-neutral floor cleaners or simple dish soap.
Ignoring the Yellow Wax Buildup
Perhaps you didn’t know the rules, and you have been waxing your LVP for the last year. Now, your floor looks like it has a hazy, yellow filter, and dirt constantly sticks to it. The Fix: You need to strip the wax. Do not scrape it! Purchase a commercial wax stripper or neutralizer labeled “safe for vinyl.” Apply the neutralizer, let it break down the old wax, and gently wipe the yellow sludge away with a soft mop. Your factory finish is still hiding safely underneath!
Panicking Over Scratches
You moved a heavy sofa and left a giant, white scratch across the floor. Your first instinct might be to fill it with wax. Do not do it! The Fix: Use a dedicated vinyl polish paste. Rub the polish directly into the scratch. The paste fills the gouge and reflects light, making the scratch practically invisible without ruining the rest of the floor.
Imagine the difference: Before, you have a hazy, yellow, scratched floor. After using the correct neutralizer and a soft microfiber polish, your floor looks like a glassy, flawless mirror reflecting the sunlight from your windows.
FAQs
Still have a few lingering questions? You are not alone. Here are the most common questions homeowners ask about maintaining their beautiful floors.
Can you wax vinyl flooring? No. For the vast majority of modern luxury vinyl planks and sheet vinyl, you should never use traditional wax. It will not adhere properly to the factory finish, resulting in a sticky, dull, yellow buildup. Always use a water-based acrylic sealer instead.
How often should I polish my vinyl floor? If your floor is starting to look dull, you should apply a vinyl-safe acrylic polish once a month. This keeps the protective layer strong and the shine brilliant.
Are acrylic sealers safe for LVP? Yes! Unlike heavy paste waxes, liquid acrylic sealers are perfectly safe for luxury vinyl plank. They bond safely to the urethane wear layer and fill in microscopic scratches without causing any damage.
Can I use vinegar to clean my floors? Yes, apple cider vinegar mixed with hot water is an excellent, natural way to cut through dirt and grime without leaving a sticky residue behind.
What is the cost of professional vinyl floor maintenance? If your floors are heavily scratched or covered in old wax, hiring a professional to strip and reseal them is a great investment. In 2026, you can generally expect a professional service to cost around $0.50 to $1.00 per square foot, depending on your region.