
Laminate flooring is a popular choice because it looks good, feels solid, and is usually easier to install than many other floor types. It gives your room a clean, finished look without the high cost of some natural materials.
But one thing matters a lot before you begin: where to start when laying laminate flooring. If you begin in the wrong place, the rows can drift, the cuts can look uneven, and the whole floor may feel off. If you start the right way, the job becomes much smoother.
Why the Starting Point Matters
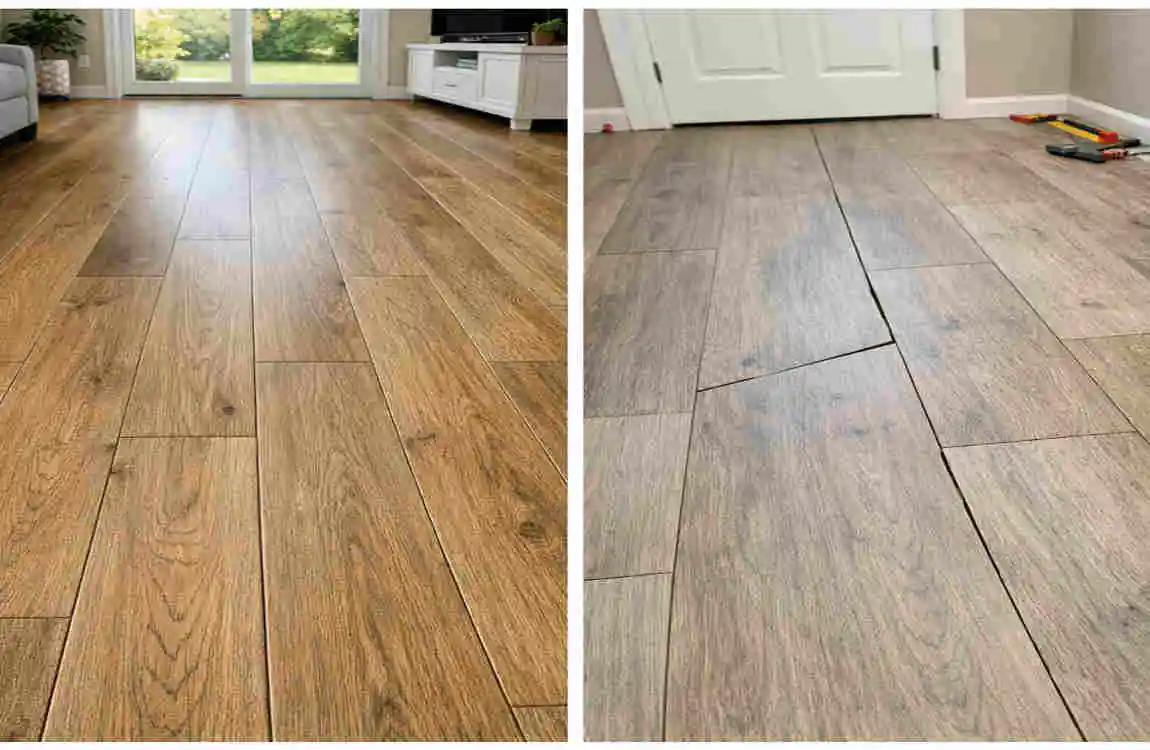
Creates a Professional Finish
The starting point affects the final look of the floor. If the first row is straight, the rest of the room is much easier to build correctly.
A clean first row helps the whole floor look neat and balanced.
Reduces Waste
When you plan, you waste fewer planks. That means fewer bad cuts and less material thrown away.
Keeps Rows Straight
Laminate floors must stay aligned; if the first row is off, every row after it can follow suit.
Makes Installation Easier
A smart start reduces stress. You spend less time fixing errors and more time finishing the room.
Where to Start When Laying Laminate Flooring
Start Along the Longest Wall
In most rooms, the best place to begin is along the longest, straightest wall. This helps the floor look more open and stable.
If one wall is crooked or uneven, pick the straightest one instead. The goal is to give yourself a clean line to follow.
Begin in the Left Corner
Many installers start in the left corner of the room and work from left to right. This is common because it gives a consistent pattern and makes it easier to lock planks together.
Consider the Main Light Source
Natural light can change how the floor looks. When planks run in the same direction as the light, seams often look less visible.
If possible, think about where the windows are and how sunlight enters the room.
Check Room Shape Before Starting
Not every room is a perfect rectangle. If the space has angles, alcoves, or doorways, you should plan carefully before placing the first plank.
A small layout sketch can help you see where the cuts will fall.
Prepare the Room Before Installation
Remove Existing Flooring
Take out carpet, loose tiles, or damaged flooring before you begin. The subfloor must be ready for a new surface.
Clean the Subfloor
Sweep and vacuum the floor well. Dirt and debris can cause bumps under the laminate.
Level Uneven Areas
Laminate needs a flat base. If the subfloor has dips or raised spots, fix them before installation.
Install Underlayment
Underlayment adds comfort, reduces noise, and can help protect against moisture. Many laminate floors need it.
Let Laminate Acclimate
Keep the planks in the room for 48 to 72 hours before installation. This helps the material adjust to the room temperature and humidity.
Tools and Materials You’ll Need
Before starting, gather everything you need. This makes the job easier and prevents delays.
- Laminate flooring planks
- Underlayment
- Tape measure
- Spacers
- Rubber mallet
- Pull bar
- Tapping block
- Utility knife
- Circular or mitre saw
- Pencil
- Safety glasses
Having the right tools ready saves time and helps you work more accurately.
Step-by-Step Guide to Laying Laminate Flooring
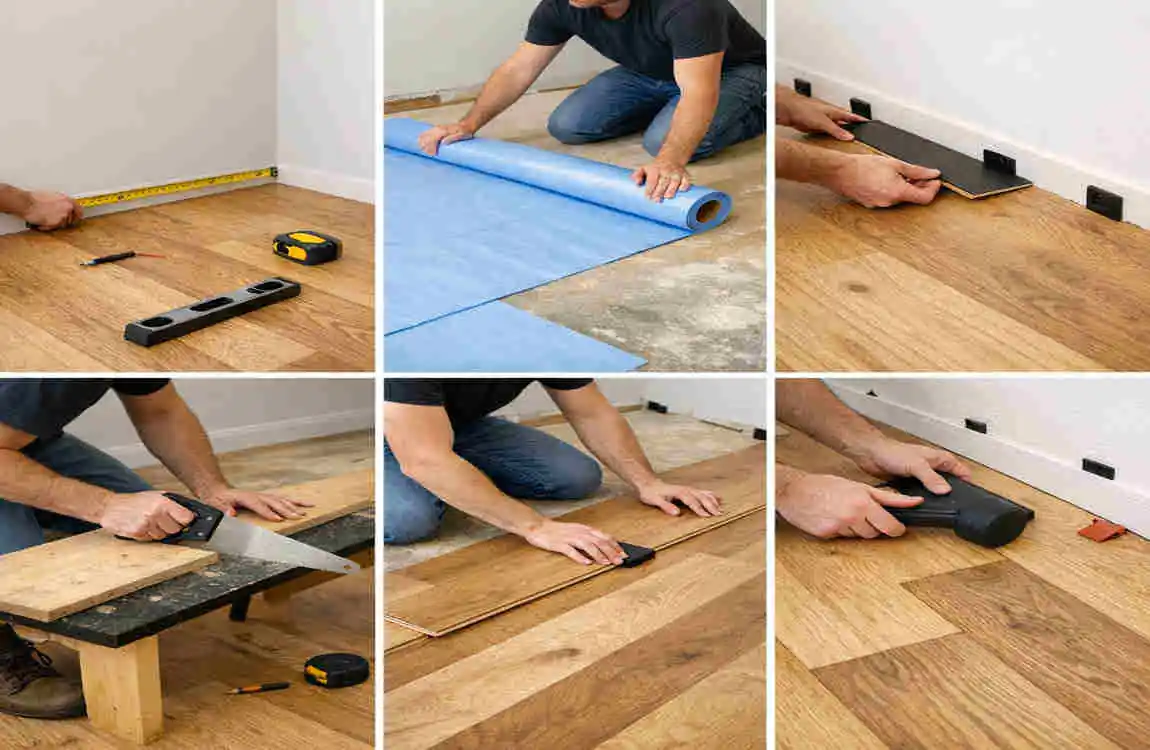
Measure the Room
Measure the length and width of the room carefully. This helps you know how many planks you need.
Plan the Layout
Think about where the first row will go and where the last cuts will land. Try to avoid ending with a very thin strip at the far wall.
Mark Your Starting Line
Use a straight chalk line or pencil mark to guide the first row. A straight first line is one of the most important parts of the job.
Place Expansion Spacers
Leave a small gap around the edges of the room. This lets the floor expand and contract naturally.
Install the First Row
Start with the first plank in your chosen corner. Make sure it sits straight and snug against the spacers.
Stagger the Joints
Do not line up the end joints in every row. Stagger them for a stronger, more natural look.
Best Direction to Lay Laminate Flooring

Parallel to the Longest Wall
This is the most common choice. It makes the room feel longer and more balanced.
Follow Natural Light
If your room gets strong sunlight, lay the planks in a direction that works with the light. This can make the seams less noticeable.
Open Floor Plan Considerations
In open spaces, keep the flooring direction consistent from one area to the next. This helps the whole home feel connected.
Hallway Installation Tips
Hallways are narrow, so direction matters even more. Usually, the planks should run lengthwise to make the hallway look less tight.
Common Mistakes to Avoid
Starting Without a Layout Plan
Do not begin right away without checking the room. A little planning can save a lot of trouble later.
Forgetting Expansion Gaps
Laminate needs room to move. If you skip the gap, the floor may buckle.
Installing on an Uneven Subfloor
An uneven base can lead to noisy or unstable a.
Using Damaged Planks
Inspect each plank before use. Chipped or bent pieces can ruin the final look.
Not Mixing Planks from Different Boxes
Mixing planks helps balance colour variation. If you use one box at a time, the floor may look patchy.
Tips for a Professional Finish
Dry Fit the First Few Rows
Lay out the first rows without locking them in if needed. This helps you see how the floor will look.
Use Quality Installation Tools
Good tools make the work easier and more accurate. A proper tapping block and pull bar are especially helpful.
Check Alignment Frequently
Do not assume the rows are still straight. Keep checking as you go.
Keep Consistent Expansion Gaps
Use spacers around the whole room so the gaps stay even.
Clean as You Work
Sweep away dust and small scraps. A clean work area helps you avoid mistakes.
Laminate Flooring Installation at a Glance
Step What to Do Why It’s Important
Measure the room Accurate planning
Prepare the subfloor Prevents future issues
Install underlayment Adds comfort and moisture protection
Start along the longest wall Keeps rows straight
Use spacers Allows floor expansion
Stagger plank joints Improves strength and appearance
Finish with trim Creates a polished look
Maintenance Tips After Installation

Sweep Regularly
Dust and grit can scratch the surface, so sweep often.
Clean with a Damp Microfiber Mop
Use only a slightly damp mop. Too much water can damage laminate.
Avoid Excess Water
Do not soak the floor. Laminate and standing water do not mix well.
Protect Furniture Legs
Add pads under chairs, tables, and heavy furniture.
Use Entry Mats
Mats at doors help stop dirt and moisture from being tracked inside.
When to Hire a Professional
Large or Complex Rooms
If the room has many angles or open spaces, a pro may save you time and stress.
Uneven Subfloors
A professional can level the surface correctly before installation.
Stairs and Custom Cuts
Stairs and unusual cuts need extra skill and patience.
Limited DIY Experience
If this is your first flooring project, hiring help may give you a better result.
Frequently Asked Questions
Where should you start when laying laminate flooring?
The best place to start is usually along the longest, straightest wall, beginning in the left corner and working across the room.
Which direction should laminate flooring be laid?
Most installers recommend laying laminate parallel to the longest wall or in the direction of the room’s main natural light.
Should laminate flooring be staggered?
Yes. Staggering end joints by at least 8–12 inches improves stability and creates a more natural appearance.
Do I need an expansion gap around laminate flooring?
Yes. Leave a 1/4-inch to 3/8-inch expansion gap around the room so the floor can expand and contract.
Can laminate flooring be installed over existing flooring?
In many cases, yes, if the surface is clean, dry, and level.
How long should laminate flooring acclimate before installation?
Most manufacturers recommend 48–72 hours before installation.
| Step | What to Do | Why It Matters |
|---|---|---|
| Prepare the Subfloor | Clean, dry, and level the surface before installation. | Ensures a smooth, stable floor and prevents damage. |
| Acclimate the Flooring | Leave laminate planks in the room for 48–72 hours. | Helps the flooring adjust to room temperature and humidity. |
| Choose the Starting Wall | Start along the longest, straightest wall, usually opposite the main entrance. | Creates a balanced, professional-looking layout. |
| Install Underlayment | Roll out underlayment if it isn’t pre-attached to the planks. | Reduces noise and provides moisture protection. |
| Use Spacers | Place 1/4-inch spacers between the wall and first row. | Allows room for natural expansion and contraction. |
| Lay the First Row | Install the first row with the tongue side facing the wall. | Ensures proper alignment for the remaining rows. |
