
Are you absolutely tired of looking at that outdated, stained carpet in your living room? Do you catch yourself staring at scuffed, faded floors, only to dread the incredibly high installation costs that come with hiring a professional contractor? If you are nodding your head right now, you are certainly not alone. Upgrading your home should be an exciting journey, not a massive drain on your wallet.
Enter the perfect solution for your weekend project. Dream Home laminate is widely known for being wonderfully waterproof, highly scratch-resistant, and entirely DIY-friendly thanks to its innovative click-lock technology. It gives you the luxurious, rich look of real hardwood without the massive price tag or the headache of messy glues and heavy nail guns.
The benefits of taking on this project yourself are truly massive. By learning the ropes, you will enjoy incredible cost savings—often keeping 50% to 70% of your budget compared to a professional installation. Add in the fact that this flooring boasts a robust 20-to-30-year lifespan and requires incredibly easy maintenance. You have a clear winner for your home makeover.
| Step | Action | Key Tips |
|---|---|---|
| Prepare Room | Remove baseboards, clean/ level subfloor, acclimate planks 48-72 hrs | Check flatness (<3/16″ over 10ft); fix dips with compound |
| Gather Tools | Tape measure, spacers (10-12mm), saw, tapping block, pull bar, underlayment | Add safety gear: gloves, mask, knee pads |
| Install Underlayment | Roll out, tape seams (skip if pre-attached) | Creates moisture barrier and cushion |
| Lay First Row | Tongue to wall, angle/click next planks, use spacers for expansion gap | Start in corner opposite door; cut end piece to fit |
| Add Rows 2+ | Stagger seams 12″+, angle tongue into groove, tap gently | Check level every row; use offcuts for pattern |
Tools and Materials Needed
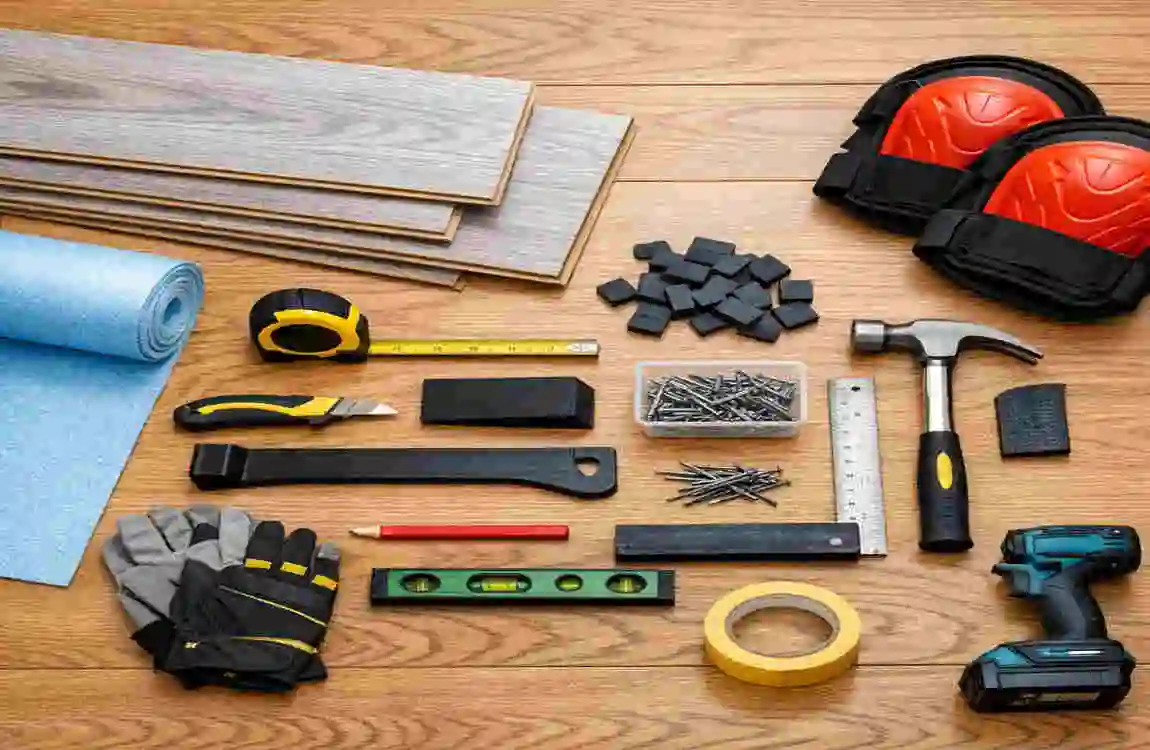
Before you tear up your old floors, gather your gear. Having the right tools on hand will make your how-to install Dream Home laminate flooring project feel like a breeze rather than a frustrating chore.
Here is a simple, scannable table of the essentials you will need to get the job done right.
Category Items Needed: Why You Need Them
Essential Tools : Circular saw or jigsaw, tape measure, spacers (10-12mm), pull bar, tapping block, utility knife, heavy-duty level These are for making precise cuts, maintaining necessary expansion gaps, and ensuring a perfectly flat subfloor.
Core Materials: Dream Home laminate planks (always buy 10% extra), underlayment (if not already attached to the planks), duct tape, quarter-round moulding. These materials allow for a floating install, provide a vital moisture barrier, and give you clean, finished edges.
Safety Gear: Thick work gloves, comfortable knee pads, a protective dust mask, and clear safety glasses . These items will protect your hands, knees, lungs, and eyes during dusty cutting and sanding.
Room Preparation Basics
If there is one massive secret to a successful flooring project, it is preparation. You cannot simply bring your boxes of flooring inside and start snapping them together immediately.
The Importance of Acclimation
First and foremost, you must emphasise acclimation. Wood and laminate products naturally expand and contract with changes in temperature and humidity. You need to let your unopened boxes of planks sit in the middle of the room for 48 to 72 hours at normal room temperature. Skipping this step is a recipe for disaster, as your floor could buckle or pull apart later.
Clearing the Canvas
Once your flooring is used to the room’s climate, it is time to prep your space. You will need to carefully remove your existing baseboards using a pry bar, making sure to score the top edge with a utility knife so you do not peel your drywall paint.
Next, clean your subfloor thoroughly. You want to check for flatness, ensuring there is no more than a 3/16-inch dip or peak over a 10-foot span.
Follow this quick checklist for room prep:
- Vacuum all debris: Even a tiny pebble left behind can cause your new laminate to click or pop when you walk on it.
- Fill cracks: Use a high-quality floor patch compound to smooth out any holes or deep gouges in the subfloor.
- Verify moisture levels: Ensure your subfloor moisture is under 12% to prevent mould and warping down the road.
Subfloor Inspection and Prep
Let us dive a bit deeper into your subfloor, because this is the actual foundation of your brand-new room. A beautiful floor laid over a terrible subfloor will ultimately fail.
Checking for Levelness
Grab a long straightedge—a 6-foot or 10-foot level works perfectly. Slide it across the floor in multiple directions. You are looking for light shining underneath the level, which indicates a low spot, or areas where the level rocks back and forth, which indicates a high spot.
Fixing the Imperfections
You must fix these issues before you proceed. If you find high spots on a wooden subfloor, you will need to sand them down. If you are dealing with a concrete subfloor, you may need a heavy-duty grinder. For low spots, pour a self-levelling compound into the dips. Use a trowel to feather the edges so they blend smoothly with the rest of the floor.
Identifying Your Subfloor Type
Your prep also depends on your subfloor type. If you are installing over concrete, you absolutely must put down a vapor barrier first, as concrete constantly wicks moisture from the earth. If you are installing over a plywood subfloor, make sure all the seams are smooth and that there are no squeaky, loose boards. If a board squeaks now, screw it down tight, because it will still squeak under your new laminate!
(Image Alt Text: Step 1 how to install Dream Home laminate flooring subfloor prep showing a level checking for dips)
Proper subfloor prep ensures your Dream Home laminate flooring install lasts for decades without separating or bouncing.
Calculating Materials and Layout Planning
Math might not be your favorite subject, but it is vital here. You need to know exactly how much material to buy and how you will lay it out across the room.
How to Measure
Grab your tape measure and find the length and width of your room. Multiply those two numbers together to get your total square footage. Because you will inevitably make mistakes, cut pieces the wrong way, and need offcuts for the edges, you must add 10% to your total for waste.
Planning the Perfect Layout
Visual flow is everything. As a general rule, lay your planks perpendicular to the main light source in the room, such as a large window. This allows sunlight to run down the length of the planks, beautifully hiding the seams.
You also need to plan to stagger your seams. You never want the short ends of your planks to line up perfectly with the row next to it. They should be staggered by at least 12 inches to create a strong, interlocking web.
Before you commit, dry-fit your first row. Lay the planks end-to-end across the room without clicking them in. If your final piece is going to be less than 2 inches long, you need to cut a few inches off the very first plank you start with to balance the room.
Sample Calculation Table:
Room DimensionsBase Square FootageAdd 10% Waste FactorTotal Planks to Purchase
10 ft x 20 ft 200 sq ft + 20 sq ft 220 sq ft total
Doorway and Obstacle Prep
Rooms are rarely perfectly square empty boxes. You will inevitably have to deal with doorways, closets, and heating vents. Handling these gracefully separates a DIY amateur from a true professional.
Undercutting the Door Jambs
You should never try to cut your laminate to fit around the intricate curves of a door frame. It looks messy and leaves ugly gaps. Instead, you want the laminate to slide neatly underneath the wooden door jamb.
To do this, take a scrap piece of your new laminate and place it flat on the subfloor right next to the door frame. Rest an oscillating multi-tool or a manual jamb saw flat on top of the scrap plank, and cut straight right through the bottom of the door frame. You can then pop out the cut piece of wood, leaving a perfect gap for your new floor to slide into.
Handling Vents and Pipes
If you have floor heating vents or radiator pipes, you need to make precise cuts. The best trick is to flip the laminate plank upside-down, lay it exactly where it needs to go, trace the outline of the vent with a pencil, and then use your jigsaw to cut out the shape.
Installing Underlayment
Unless your specific boxes of Dream Home laminate clearly state that they have a pre-attached underlayment pad on the back, you will need to roll out a separate layer first.
The Purpose of Underlayment
Do not skip this step to save money! Underlayment provides vital cushioning, making the floor more comfortable to walk on. It also acts as massive soundproofing, preventing your floor from sounding hollow and clicky when you walk on it in hard shoes. Finally, it acts as a moisture barrier.
Rolling It Out
Start at the longest wall and roll out your underlayment in one long row. When you roll out the second row next to it, butt the edges right up against each other. Do not overlap the underlayment edges! Overlapping creates a thick bump that will make your laminate sit unevenly.
Once the edges are touching, use a specialised underlayment seam tape or heavy-duty duct tape to seal the two rows together, creating a single, continuous protective sheet over your subfloor.
Laying the First Row
This is it—the exciting moment where your new floor finally begins to take shape. Your first row dictates how straight the rest of the room will be, so take your time and get it right.
Starting in the Corner
Pick the longest, straightest wall in your room to start on. You will want to begin in the left corner and work your way to the right. Place your first plank down with the tongue side facing the wall, and the groove side facing out into the room.
Remember that laminate flooring needs to breathe. Place your 10-12mm plastic expansion spacers between the plank and the wall. You need these spacers at both the ends and the sides of every plank that touches a wall.
The Angle-and-Lock Method
Now, take your second plank. You will use the famous angle-and-lock method. Hold the second plank at a 20-to-30-degree angle. Insert the short end tongue of the new plank into the short end groove of the plank currently on the floor. Once you feel it seat into the groove, gently drop the plank down flat to the floor. You should hear and feel a satisfying “click.”
Finishing the First Row
Continue this all the way down the wall. At the end, you will likely need to cut a plank to fit. Flip the plank over, push it tight to the wall spacer, mark where it overlaps the previous plank, and cut it.
Master this foundational row for flawless results as you learn how to install Dream Home laminate flooring.
Installing Subsequent Rows
With your first row perfectly straight and locked in place, you are ready to build out into the room. This is where the project really picks up speed and becomes quite fun!
Creating the Staggered Pattern
To start your second row, do not use a full-length plank. If the leftover piece you cut from the end of the first row is longer than 12 inches, use that piece to start the second row! This naturally creates the staggered, stair-step pattern that makes laminate flooring incredibly structurally sound.
Locking in the Long Edges
Installing the second row requires locking the long edge first. Take your plank, tilt it at that 20-to-30-degree angle, and insert the long tongue into the long groove of the first row. Push forward gently as you lower the plank.
For the next pieces in the row, you will need to lock the short end to the neighboring plank first, keeping the board slightly angled upward, and then slide it forward to lock into the long edge of the previous row.
Using Your Tapping Block
Sometimes, the joints need a little friendly persuasion. Once a plank is dropped flat, place your heavy-duty tapping block against the outer groove. Give the block a few gentle taps with your hammer to close any microscopic gaps in the seam. Never hit the laminate directly with a hammer, as you will instantly shatter the locking mechanism!
Check your work with a level every single row to make sure the floor is laying completely flat.
Ripping Planks Lengthwise
When you come across corners or permanent fixtures, you might need to rip a plank lengthwise. Use your tape measure to find the exact width you need, draw a straight line down the entire plank, and carefully cut it with your jigsaw or circular saw.
Handling Final Row and Edges
You have made it across the vast expanse of the room! Now, you are faced with the final wall. Very rarely will a room fit exactly the number of full planks. You will almost certainly need to cut the final row lengthwise to make it fit.
Measuring for Rip Cuts
Do not assume the wall is perfectly straight. You need to measure the distance from your second-to-last row to the wall in multiple places. Subtract the width of your 10-12mm expansion spacer from that measurement.
Use a scrap piece of wood as a straightedge guide, draw your line along the length of the final planks, and rip them to the correct width with your saw.
Using the Pull Bar
You will not have enough physical space between the wall and the final plank to use your tapping block. This is exactly why you bought a pull bar!
Angle the final ripped plank into the groove and drop it flat. Hook the short end of your metal pull bar over the outer edge of the plank (between the plank and the wall), and gently tap the tall end of the pull bar with your hammer. This will pull the final plank tightly into the locking mechanism of the previous row.
Always ensure your expansion spacers stay firmly in place during this step. Do not worry about the ugly gap—you will easily hide it with moulding later!
Transitions and Multi-Room Installs
If you are only doing one room, you can skip this section. But if your ambitious weekend project flows from the living room down the hallway and into the bedrooms, you need to understand transitions.
Managing Large Expansions
Even though laminate is incredibly stable, it still behaves like a single, interconnected sheet of wood. If you lay an unbroken sheet of laminate across a space larger than 30 feet in any direction, the sheer weight and expansion pressure can cause the floor to buckle in the centre.
Using T-Metals and Reducers
To solve this, you need to create intentional breaks in the floor, usually right inside doorways. You will leave a 1-inch gap between the flooring of one room and the flooring of the hallway.
You will then install a transition strip. If the floors are the same height, you will use a “T-moulding” that bridges the gap. If you are transitioning from your new laminate to a lower vinyl floor or from a lower vinyl floor to a thicker tile, you will use a “reducer” strip to create a smooth, trip-free slope.
Whenever possible, try to continue the visual pattern unbroken through the transition so the house feels completely unified.
Finishing Touches and Cleanup
You have laid the last plank! Take a moment to stretch your back and admire your handiwork. The heavy lifting is done, but the finishing touches are what make it look like a professional was in your home.
Installing Quarter-Round Moulding
Go around the perimeter of the room and pull out every single plastic expansion spacer. You should be left with a continuous gap around the edges.
Grab your quarter-round moulding (or base shoe moulding). Use a brad nailer to attach the moulding directly to the baseboards, pushing it down so it covers the expansion gap. Crucial tip: Never nail the moulding directly into the floor! The floor must be able to slide under the moulding as the house’s temperature changes.
Sealing Wet Areas
If you installed this in a kitchen or near an exterior door, use 100% silicone caulk to seal the edges where the floor meets areas prone to water spills.
Finally, clean up your brand-new space. Sweep up the heavy sawdust, and clean the surface with a lightly damp mop. Do not use heavy soaps or wet mops during the first week.
Common Mistakes to Avoid
Even with the best intentions, DIY projects can sometimes go sideways. Knowing the most common pitfalls, you can navigate them safely.
Here are the biggest mistakes you must avoid for a flawless installation:
- Skipping the Acclimation Period: We mentioned this earlier, but it is the number one reason floors fail. If you bring cold planks into a hot house and install them immediately, they will warm up, expand, and push against the walls, causing massive warping in the centre of the room.
- Forgetting the Expansion Gap: That 10-12mm gap is not a suggestion; it is a hard rule. If your floor touches the drywall, it has nowhere to expand in the summer heat. This leads to intense buckling, where the planks pop up like a tent.
- Poor Staggering Habits: If you allow the short seams of your planks to line up perfectly across multiple rows (creating what looks like an ‘H’), you severely weaken the floor’s structural integrity. Those joints will eventually separate under foot traffic.
- Installing Over a Wet Subfloor: If your concrete is retaining moisture and you forget to install a vapour barrier, the bottom of your laminate will absorb that moisture. This leads to bubbling, peeling, and eventually, hidden mould growth.
Maintenance After Install

Congratulations on a job well done! To ensure your new floor looks absolutely stunning for the next two decades, you need to adopt a very simple maintenance routine.
The beauty of this product is that it does not require intense labour. You simply need to sweep the floor daily with a soft-bristle broom or a vacuum cleaner specifically designed for hard floors (make sure the harsh rotating beater bar is turned off to avoid scratches!).
When things get sticky, use a specialised laminate floor cleaner and a microfiber mop. Spray the cleaner sparingly on the mop head, not directly on the floor.
Never use steam cleaners. The intense heat and forced moisture from a steam mop can melt the protective wear layer and force water down into the click-lock joints, causing the core to swell. With gentle dry cleaning, your floor’s lifespan will easily reach 15 to 25 years.
Cost Breakdown Table
Let us look at the real reason you decided to tackle this project yourself—the incredible savings! Here is a realistic breakdown of what you can expect to spend to outfit an average 200-square-foot living room.
Item Category Cost Estimate (200 sq ft room)
Dream Home Laminate Planks $400 – $800
Underlayment and Hand Tools $100 – $200
Total DIY Project Cost $500 – $1000
If you were to hire a professional flooring contractor to do the same job, you would be looking at an absolute minimum of $1,500+, and often much higher, depending on your location. By doing the work yourself, you keep a massive chunk of money in your pocket to buy new furniture for your beautiful room!
FAQ
You probably still have a few lingering questions bouncing around in your head before you grab your toolbelt. We have compiled the most frequently asked questions from homeowners just like you.
How long does it take to install Dream Home laminate flooring? If you are working with an average-sized room of about 200 square feet, a beginner can easily complete the entire project over a standard two-day weekend. Day one is dedicated to removing old flooring, prepping the subfloor, and laying the underlayment. Day two is all about cutting and clicking the planks together. Once you get the rhythm of the angle-and-lock system, the rows go down incredibly fast!
Do I need to use glue for this installation? No, absolutely not! This is the beauty of the system. It is specifically engineered as a “floating floor.” The click-lock mechanisms physically hold the entire floor together, eliminating the need for messy adhesives, nails, or staples. This makes it incredibly easy to replace a single damaged board in the future if needed.
Can I install this flooring directly over my existing tile? Yes, you certainly can, provided that the existing tile is firmly attached to the floor, not cracking, and completely level. You will want to use a slightly thicker underlayment to bridge any deep grout lines, so they do not telegraph right through the bottom of the laminate over time.
How do I install Dream Home laminate flooring over concrete? The most important rule for concrete is moisture control. Concrete holds water like a sponge. Before you lay your standard underlayment, you must roll out a heavy-duty 6-mil polyethene vapour barrier. Tape the seams of the plastic securely so moisture from the concrete can’t rise and ruin your beautiful new planks.
What happens if I mess up a cut? Do not stress! This is exactly why we told you to buy 10% extra material at the very beginning of the project. If you mismeasure or chip a plank with your saw, simply toss it into your scrap pile and grab a fresh one. You can often use those messed-up pieces later for small edge cuts or closet interiors.
Can I put heavy furniture on a floating floor? Yes. While the floor is designed to shift slightly with temperature changes, standard household furniture such as heavy sofas, dining tables, and entertainment centres will not prevent the floor from expanding. However, extremely heavy stationary items, such as massive kitchen islands or heavy stone fireplaces, should be installed before the floor, and you should leave an expansion gap around them.
Is Dream Home laminate pet-friendly? Absolutely. The top wear layer of this flooring is coated in a durable melamine resin that is highly resistant to dog and cat claws. It is much more scratch-resistant than traditional natural hardwood. Plus, since many lines are water-resistant, wiping up a quick pet accident is completely stress-free.