
Imagine this: You’ve finally finished your beautiful kitchen remodel. The granite countertops are gleaming, the new cabinets smell like fresh wood, and your high-end faucet looks like a piece of modern art. But then, you open the cabinet doors below, and you see a tangled mess of old, corroded pipes or, even worse, a puddle of water soaking into your brand-new wood. It’s a total nightmare. A leaky sink can ruin your dream kitchen faster than you can say “plumbing emergency.”
Learning how to install pipes under the kitchen sink is an absolute game-changer for any DIY homeowner. You don’t need to be a professional plumber with years of experience to get this right. In fact, most under-sink plumbing issues are straightforward enough that you can tackle them on a Saturday morning. By doing it yourself, you aren’t just fixing a leak; you’re taking control of your home’s maintenance.
Why DIY Kitchen Sink Pipe Installation Matters for Your Dream Home
Your kitchen is the heart of your home. It’s where you prep meals, wash up after a family dinner, and maybe even host guests. If the plumbing isn’t up to par, the whole room feels “off.” Common issues like clogged drains, persistent leaks, or that funky “sewer smell” often come down to the way the pipes are configured. If you’ve upgraded to a deeper sink or a modern farmhouse style, your old pipe layout might not even fit anymore.
Installing pipes under the kitchen sink yourself allows you to customize the setup. You can choose high-quality PVC that won’t corrode, or even opt for polished chrome if you have an open-vanity look. Let’s talk about the cost-benefit ratio. A professional installation might cost $150 to $400, depending on your location. In contrast, a DIY kit with a P-trap, tailpiece, and washers usually costs between $50 and $100. That’s a lot of extra cash you could spend on a new air fryer or fancy backsplash tiles!
Furthermore, this project is a fantastic “gateway” skill. Once you understand how slip joints and P-traps work, you’ll feel much more comfortable tackling other dream home projects, like installing a new bathroom vanity or even a wet bar in the basement. It’s all about building that DIY momentum.
Tools and Materials Needed for Installing Pipes Under the Kitchen Sink
Before you dive in and start unscrewing things, you need to have your “battle station” ready. There’s nothing worse than being halfway through a plumbing job and realizing you don’t have the right size washer.
Essential Tools List
To make this job smooth and stress-free, gather these items first:
- Pipe Wrench or Channel-Lock Pliers: These are your best friends for loosening stubborn, old metal nuts.
- Hacksaw or PVC Cutter: You’ll likely need to trim your new pipes to fit your specific sink depth.
- A Large Bucket: Trust me, there is always water left in the trap. You’ll want this to catch the “old” water.
- Old Rags or Towels: For cleaning up drips and wiping down the pipes.
- Plumber’s Putty or Teflon Tape: These help create a watertight seal on threaded connections.
- Measuring Tape: Accuracy is everything here.
- Screwdriver Set: You might need these if you’re also dealing with a garbage disposal bracket.
Materials Breakdown
Here is a handy table to help you shop for the right parts. Most of these can be found in a “sink trap kit” at your local hardware store.
ItemType/SizeWhy NeededApprox. Cost
P-trap PVC or Metal, 1.5″ The “U” shape that holds water to block sewer gases. $10 – $15
Tailpiece 12-16″ Extension Connects the sink drain directly to the trap. $5 – $8
Slip Joint Nuts, Plastic or Brass. The nuts that screw the pipe sections together. $5 (Pack)
Rubber Washers Beveled/Tapered. These sit inside the nuts to create the actual seal. $3 (Pack)
PVC Cement Liquid Solvent Only needed for permanent “weld” joins. $8
Safety Precautions Before You Start: How to install Pipes Under a Kitchen Sink
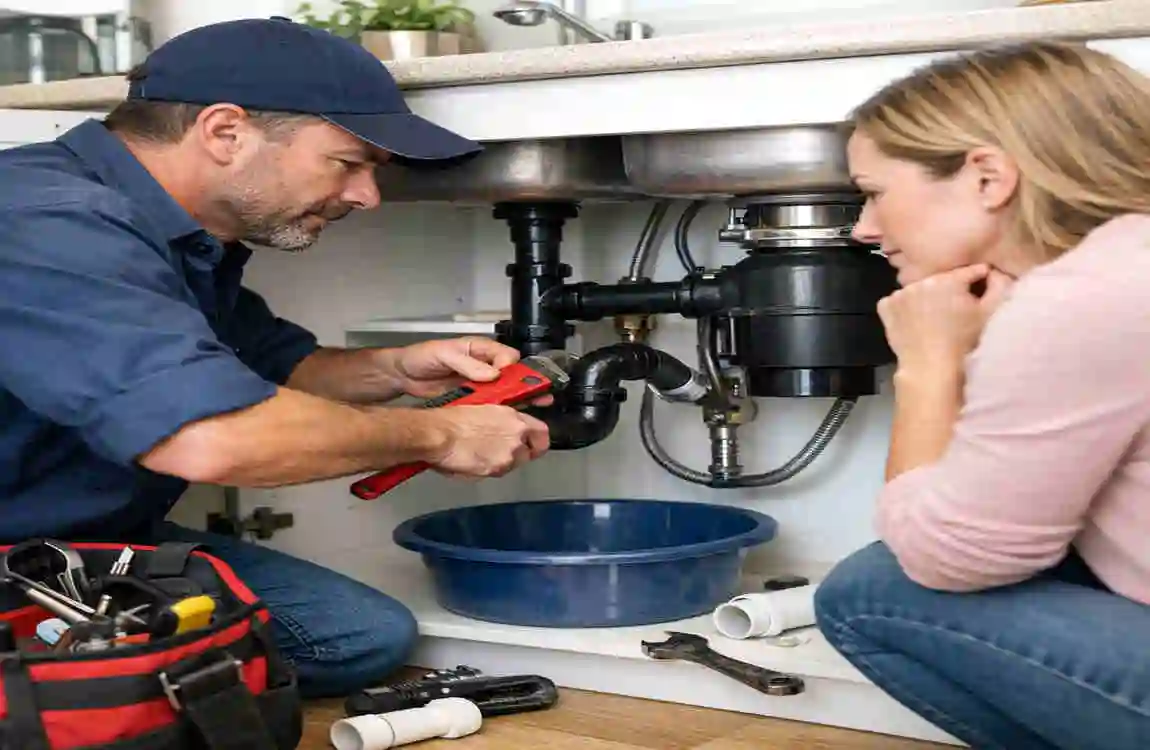
Safety might seem tedious, but in plumbing, it’s the difference between a quick fix and a flooded kitchen. First things first: shut off the water supply. Look for the silver valves under the sink and turn them clockwise until they stop. If you have an electric water heater, it’s a good idea to turn that off too, just in case you end up draining the lines completely.
Next, clear out everything from under the sink. You need room to move. Lay down a drop cloth or a thick layer of old towels. This protects your cabinet floor from water damage and also makes it easier to find any small screws or washers you might drop.
When should you call a pro? If you see gas lines (for a gas stove) running too close to your workspace, or if your home has old lead or galvanized steel pipes that are literally crumbling, it might be time to call in a professional also, if you need to move the “stub-out” (the pipe coming out of the wall) to a completely different location, that involves cutting into the studs, which is a bigger job than a standard pipe replacement.
Preparing Your Kitchen Sink Area for Pipe Installation
Preparation is the secret sauce to a leak-free sink. Once your tools are ready, follow these prep steps:
- Disconnect the Old Pipes: Place your bucket under the P-trap (the U-shaped part). Use your pliers to loosen the nuts. Be prepared—the water inside that trap might be a little smelly!
- Clean the Area: Once the pipes are gone, take a damp rag and wipe down the “stub-out” coming from the wall and the bottom of the sink strainer. Remove any old, crusty plumber’s putty or mineral deposits. A clean surface ensures a better seal for the new parts.
- Measure Twice: Don’t just eyeball it. Measure the distance from the bottom of the sink to the wall drain. If your new sink is deeper than the old one, your old pipes won’t line up with it.
Step-by-Step Guide: How to install Pipes Under the Kitchen Sink
Ready to get your hands dirty? Follow these steps closely, and you’ll have a professional-looking setup in no time.
Remove the Old P-Trap and Pipes
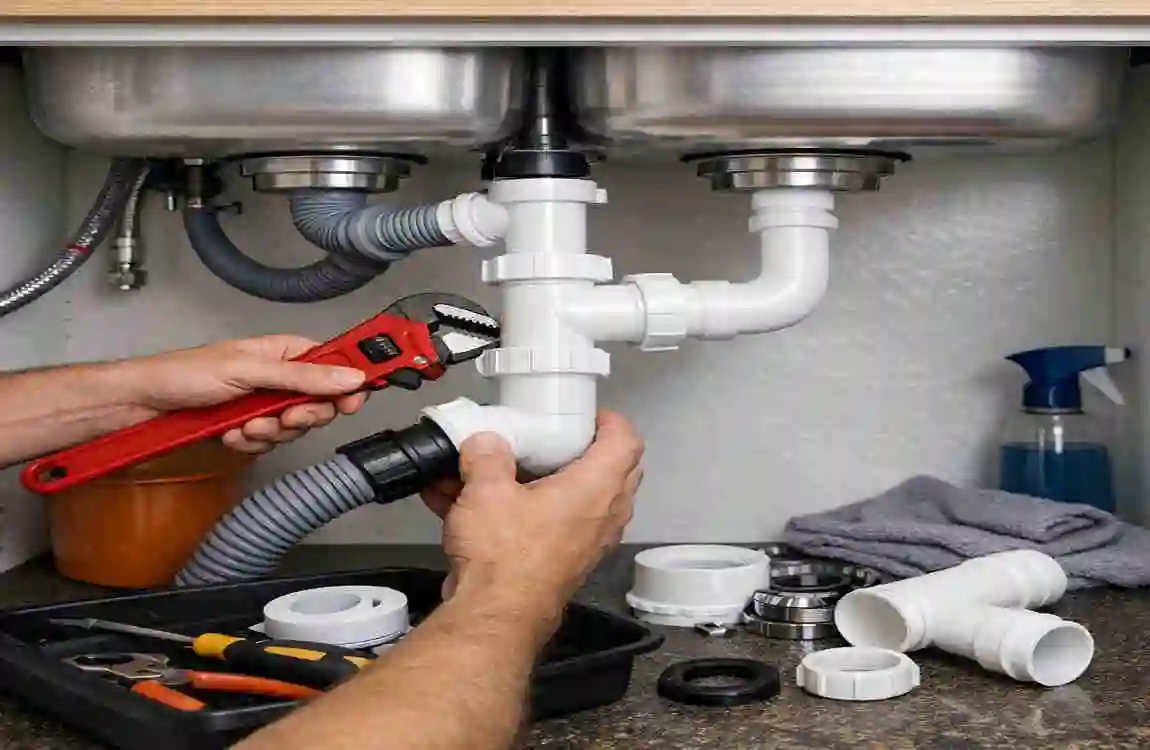
Start by identifying the P-trap. This is the curved section of pipe that looks like the letter “P” (or a “U” depending on how you look at it). Its job is to hold a small amount of water, which acts as a barrier to keep smelly sewer gases from coming up through your sink.
Place your bucket directly under the trap’s lowest point. Use your channel-lock pliers to unscrew the slip nuts at both ends of the trap. If the pipes are PVC, you might even be able to unscrew them with your bare hands. Once the nuts are loose, gently wiggle the trap down. Empty the “trap water” into the bucket. Now, remove the tailpiece (the straight pipe coming down from the sink) and the horizontal arm that goes into the wall.
Measure and Cut New Pipes to Size
Now that the old stuff is out, use it as a template. Lay your new PVC pipes next to the old ones. If your new sink is deeper, you might need a shorter tailpiece. If the sink is farther from the wall, you might need a longer waste arm.
When cutting PVC, use a hacksaw. Try to cut as straight as possible. After cutting, you’ll notice some “burrs” or rough plastic edges. Use sandpaper or a utility knife to smooth them out. If you leave those burrs, they can catch hair and debris, leading to clogs later on. Always add about 1/4 inch to your measurements to ensure the pipe sits deeply enough inside the fittings.
Assemble the P-Trap and Tailpiece
Before you tighten anything, do a “dry fit.” This means putting the pipes together without glue or tape to ensure everything lines up.
Slide a slip nut onto the tailpiece, followed by a beveled washer. The thick part of the washer should face the nut, and the thin, tapered end should face the joint. Connect the tailpiece to the bottom of the sink strainer. Next, slide the P-trap onto the bottom of the tailpiece.
If your threads are plastic, you usually don’t need plumber’s tape, but if you’re using metal pipes, wrap a bit of tape around the threads in a clockwise direction. This helps the nuts glide on smoothly and creates a tighter seal.
Connect Pipes to Wall Drain and Sink
This is where it all comes together. Align the trap arm (the horizontal pipe) so it goes into the wall “stub-out.” You might need to rotate the P-trap slightly to get a perfect alignment. This is the beauty of the P-trap design—it can swivel!
Once everything is aligned, start tightening the nuts. Hand-tighten them first. You want to feel the threads engage correctly so you don’t cross-thread. Once they are as tight as you can get them with your fingers, give them another 1/4 turn with your pliers. Do not over-tighten! Over-tightening can crack the plastic nuts or crush the rubber washers, which actually causes leaks.
Double Sink Tip: If you have a double sink, you’ll have two tailpieces meeting at a “T-junction” or a “Y-connector” before they enter a single P-trap. The process is the same: make sure your “tee” is slightly angled downward toward the trap to help the water flow.
Secure and Test for Leaks
Now for the moment of truth. Remove the bucket and dry the area thoroughly with a towel. You want the pipes and the cabinet floor to be bone-dry so you can spot any tiny drips.
Turn on the faucet at first. Watch the joints. If it looks good, turn the water on full blast. For the ultimate test, fill the sink to the brim and then pull the plug. This creates a high-pressure flow that revealsreveals even the slightest weaknesses in your seals.
If you see a drip, don’t panic. Usually, it just means a nut needs another tiny turn, or a washer got slightly pinched. Tighten it slightly and test again. Some people like to use a bit of silicone sealant around the very top of the tailpiece where it meets the sink, but if your washers are new, this usually isn’t necessary.
Final Touches and Cleanup
If you have a garbage disposal, make sure the discharge tube is securely connected to the side of your new piping. Most disposals have a specific port for this. Use a hose clamp to keep it tight.
Finally, organize your pipes. If they feel a bit “wobbly,” you can use a pipe strap to secure the horizontal arm to the back of the cabinet. This prevents the pipes from vibrating when the water is running or when the disposal is on. Wipe everything down one last time, put your cleaning supplies back in the cabinet, and give yourself a pat on the back!
Troubleshooting Common Issues During Kitchen Sink Pipe Installation
Even the best DIYers run into a few hiccups. Here is how to handle the most common “oh no” moments.
Leaks at the Joints
If you see water weeping from a nut, it’s usually because the washer is crooked. Unscrew the nut, check that the washer is sitting flat and facing the right direction (tapered end into the joint), and re-tighten. If it still leaks, you might have a tiny crack in the pipe or the nut itself.
Clogs Right After Installation
If your sink is draining slowly after you just installed new pipes, check the slope. Pipes need a “pitch” to let gravity do its work. Ideally, your horizontal pipes should drop about 1/4 inch per foot. If the pipe is perfectly level or (heaven forbid) sloping upward toward the wall, the water will sit there and collect gunk.
Noisy or Vibrating Pipes
Does your sink sound like a freight train when the water runs? This is often called “water hammer,” but in under-sink plumbing, it’s usually just loose pipes hitting the cabinet. Adding foam insulation or securing the pipes with plastic clips can dampen the sound and make your kitchen feel much more high-end.
Quick-Fix Troubleshooting Table
ProblemLikely CauseQuick Solution
Dripping Nut Loose or misaligned washer. Re-seat the washer and hand-tighten.
Slow Drainage: Incorrect pipe slope. Ensure a 1/4″ drop per foot toward the wall.
Foul Odor P-trap is dry or missing. Run water into the trap to check for a proper “U” shape.
Whistling Sound High water pressure/narrow pipe Check if valves are fully open; check for debris.
Maintenance Tips to Keep Your New Under-Sink Pipes Leak-Free
Now that you’ve mastered how to install pipes under the kitchen sink, you want that work to last for years. Maintenance is simple but vital.
- Monthly Visual Check: Once a month, take a quick peek under the sink with a flashlight. Look for “salt” deposits or dampness on the joints. Catching a tiny drip early prevents mold and cabinet rot.
- Annual Trap Cleaning: Every year or so, place your bucket back under the P-trap, unscrew it, and dump out the accumulated sludge. It’s gross, but it prevents major clogs.
- Avoid Harsh Chemicals: Try to stay away from those “liquid plumber” chemicals. They are highly caustic and can actually erode your pipes and seals over time. Instead, use an enzyme-based cleaner or a simple mixture of baking soda and vinegar to keep things fresh.
- Upgrade to PVC: If you still have old metal pipes elsewhere in the luxury house, consider replacing them with PVC. It’s smoother, which means fewer clogs, and it will never rust.
When to Hire a Professional Plumber for Under Kitchen Sink Pipes
I know we’re all about DIY, but a true professional knows when to ask for help. You should call a licensed plumber if:
- The Wall Drain is Clogged: If the clog is deep inside the wall (past the pipes you installed), you’ll need a professional snake or hydro-jet.
- You Smell Gas: If you have a gas line for your range nearby and you smell “rotten eggs,” get out of the house and call a pro.
- Code Compliance: If you are selling your home soon and your DIY work looks “creative” rather than professional, a home inspector might flag it. A plumber can ensure everything is up to local building codes.
FAQs: How to install Pipes Under the Kitchen Sink
How long does it take to install pipes under a kitchen sink? For a beginner, it usually takes about 30 to 60 minutes. If you have to cut several pipes or deal with a complex double-sink setup, it might take closer to 90 minutes.
Can I use PVC pipes for my kitchen sink? Absolutely! PVC is the industry standard for residential drainage. It’s durable, cheap, and very easy to work with. Just make sure you get the 1.5-inch size, as that’s standard for kitchens (bathrooms often use 1.25-inch).
Do I need a permit to change my sink pipes? In most jurisdictions, you do not need a license for simple “repair and replacement” of existing fixtures. However, if you are moving the main stack or adding a new drain line where none existed, you might.
What is the “beveled” part of the washer? The beveled part is the slanted or “pointy” side. It is designed to slide into the pipe opening, creating a wedge-like seal when the nut is tightened.
How do I install pipes if I have a garbage disposal? The disposal usually has a “discharge arm” that connects directly to your waste pipe. You’ll need a special “disposal kit” or a T-pipe that has a side inlet for the disposal’s hose.