
Have you ever walked into a room and been completely captivated by an unexpected design element? That’s exactly what’s happening in homes across the globe as innovative materials transform ordinary spaces into extraordinary showcases. The world of interior design is experiencing a revolution, and at its heart lies a surprising hero: vinyl flooring.
What Is Vinyl Flooring?
Let’s start with the basics. Vinyl flooring isn’t just one product – it’s a family of versatile materials that have revolutionized home design. Understanding what makes vinyl special will help you appreciate why it’s making the leap from floors to walls.
Types of Vinyl Flooring
The vinyl flooring universe includes three main players, each with unique characteristics:
Luxury Vinyl Tile (LVT) represents the Premium end of the spectrum. These tiles mimic natural materials such as stone and ceramic with stunning accuracy. They’re thick, durable, and come in individual pieces that you can arrange in countless patterns.
Vinyl Planks bring the warmth of wood into your home without the maintenance headaches. These long strips recreate everything from rustic barn wood to sleek modern hardwood. They’re perfect for creating that cozy, natural look everyone loves.
Sheet Vinyl comes in large rolls, offering seamless coverage. While it might sound less glamorous than its tile and plank cousins, modern sheet vinyl features incredibly realistic designs and textures that can transform any surface.
Key Characteristics That Matter
What makes vinyl such a game-changer? First, there’s the durability factor. This material laughs in the face of daily wear and tear. Spills, splashes, and scratches that would damage other materials barely phase quality vinyl.
The waterproof nature of vinyl makes it a superhero in moisture-prone areas. Unlike wood or wallpaper, which can warp or peel when exposed to humidity, vinyl maintains its integrity even in the steamiest bathroom or the busiest kitchen.
Then there’s the maintenance aspect. If you’ve ever spent hours scrubbing grout lines or refinishing wood, you’ll appreciate vinyl’s easy-care nature. A simple wipe-down keeps it looking fresh and new for years.
The Evolution Beyond Floors
Traditionally, vinyl lived exclusively on floors. But creative minds began asking, “Why stop there?” The same properties that make vinyl excellent for floors – durability, water resistance, and design variety – make it equally appealing for vertical surfaces.
This shift didn’t happen overnight. It started with adventurous DIYers experimenting in their own homes. Professional designers took notice, and soon, vinyl on walls became a legitimate design strategy. Today, it’s not just accepted – it’s celebrated as an innovative approach to interior design.
Can You Put Vinyl Flooring on the Wall? The Answer and Explanation
Here’s the moment you’ve been waiting for: Yes, you absolutely can put vinyl flooring on the wall! But, as with any design decision, success lies in understanding the how and why behind this creative choice.
Why Vinyl Works on Walls
The magic of vinyl’s wall-worthiness comes down to its inherent flexibility and adhesion properties. Modern vinyl flooring is engineered to bond securely to various surfaces, including walls. The lightweight nature of most vinyl products means they won’t put excessive stress on vertical surfaces.
Think about it this way: if vinyl can withstand the constant pressure of foot traffic, the relatively stress-free life on a wall is practically a vacation. The same adhesives that keep vinyl firmly attached to subfloors work just as well on properly prepared wall surfaces.
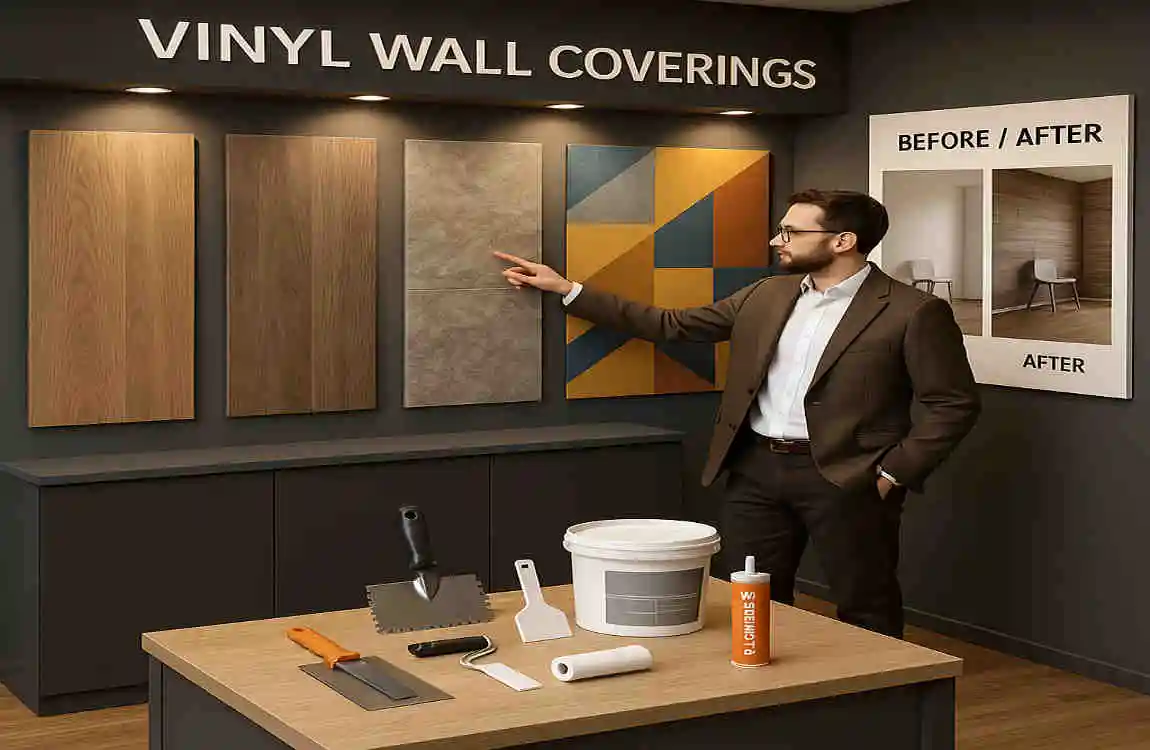
Best Types for Wall Applications
Not all vinyl is created equal when it comes to wall installation. Luxury vinyl tiles shine as accent features, creating stunning geometric patterns or faux stone effects. Their individual nature allows for creative arrangements that would be impossible with other materials.
Vinyl planks excel at creating warm, wood-inspired feature walls. They’re particularly effective in bedrooms, living rooms, or any space where you want to add natural texture without the maintenance of real wood.
Sheet vinyl offers unique advantages for large wall areas. Its seamless nature makes it ideal for wet areas like shower surrounds or kitchen backsplashes, where you want zero gaps for water to penetrate.
How It Compares to Traditional Wall Materials
Let’s put vinyl in perspective against other popular wall treatments:
Material Cost, Installation Difficulty, Durability, Water Resistance, Design Options
Vinyl Flooring $ Easy-Moderate Excellent Excellent Extensive
Ceramic Tile $$$ Difficult Excellent Excellent Good
Wallpaper $$ Moderate Fair Poor Extensive
Wood Panels $$$$ Moderate-Difficult Good Poor Limited
Paint $ Easy Fair Fair Unlimited
Expert Validation
Interior designers and contractors increasingly recommend vinyl for wall applications. Sarah Chen, a renowned interior designer from San Francisco, shares: “I’ve used vinyl flooring on walls in dozens of projects. Clients love the durability and design options. It’s particularly brilliant in rental properties where you need style that can handle anything.”
Professional installers report that wall applications often prove easier than floor installations since you’re not dealing with the complexities of level surfaces and expansion gaps. The vertical orientation actually helps vinyl lay flatter in many cases.
Benefits of Using Vinyl Flooring on Walls
The advantages of choosing vinyl for your walls extend far beyond simple aesthetics. Let’s explore why homeowners and designers are falling in love with this innovative approach.
Unmatched Durability and Moisture Resistance
Picture your kitchen backsplash after years of cooking splatters, or your bathroom walls constantly exposed to steam and splashes. Traditional materials might show wear, staining, or water damage. Vinyl laughs at these challenges.
The waterproof nature of quality vinyl means moisture can’t penetrate. This makes it ideal for:
- Bathroom walls, especially around tubs and showers
- Kitchen backsplashes where grease and food splatter
- Laundry rooms with high humidity
- Basement walls are prone to dampness
Even in dry areas, vinyl’s durability shines. Kids can’t damage it with toys, pets can’t scratch it, and daily life won’t leave its mark. This resilience translates to walls that look fantastic year after year.
Maintenance That Fits Your Lifestyle
Here’s a truth every homeowner knows: life is busy enough without high-maintenance walls. Vinyl delivers the ultimate in easy care. A damp cloth handles most cleaning needs. Stubborn marks? A gentle all-purpose cleaner does the trick.
Compare this to:
- Painted walls that need touch-ups and repainting
- Wallpaper that tears and peels
- Natural wood that requires regular treatment
- Tile with grout that collects dirt and needs scrubbing
With vinyl, you spend less time maintaining and more time enjoying your beautiful space.
Design Versatility That Inspires
Walk into any home improvement store’s vinyl section, and you’ll understand why designers love this material. The variety is simply staggering. Want the look of weathered barn wood? There’s vinyl for that. Dreaming of marble elegance? Vinyl delivers without the price tag.
Modern printing technology means today’s vinyl features:
- Realistic textures you can feel
- High-definition patterns that fool the eye
- Color options from subtle neutrals to bold statements
- Mix-and-match possibilities for custom designs
Cost-Effectiveness Without Compromise
Let’s talk money – because great design shouldn’t require a second mortgage. Vinyl flooring on walls delivers a Premium look at an accessible price. The material itself costs significantly less than natural stone, wood, or high-end tiles.
But the savings extend beyond purchase price:
- Lower installation costs (especially for DIY projects)
- Minimal maintenance expenses over time
- Longevity which means no frequent replacements
- Energy efficiency from added insulation properties
Popular Vinyl Flooring Wall Design Ideas for 2025
As we embrace 2025’s design trends, vinyl on walls is taking center stage in creative and unexpected ways. Let’s explore the hottest applications that are transforming homes right now.
Statement Accent Walls
Forget basic painted accent walls – vinyl brings texture, pattern, and personality that paint can’t match. Imagine walking into a bedroom where one wall features rich, dark wood-look planks arranged in a striking herringbone pattern. Or picture a living room where geometric vinyl tiles create an art-deco-inspired focal point.
The beauty of vinyl accent walls lies in their ability to:
- Define spaces in open floor plans
- Add warmth to minimalist interiors
- Create visual interest without overwhelming
- Complement existing décor seamlessly
Revolutionary Kitchen Backsplashes
The kitchen backsplash has evolved from purely functional to a major design statement. Vinyl is revolutionizing this space by offering looks previously reserved for expensive materials. Marble-look vinyl sheets provide seamless elegance without grout lines to clean. Wood-look planks add rustic charm that won’t warp from steam.
Creative homeowners are pushing boundaries with:
- Full-height backsplashes extending to the ceiling
- Mixed patterns creating custom mosaics
- Metallic-finish vinyl for industrial chic
- Textured options that add dimensional interest
Bathroom Transformations
Bathrooms present unique challenges – moisture, temperature changes, and the need for easy cleaning. Vinyl conquers all these concerns while delivering stunning style. Shower surrounds made with large-format vinyl sheets eliminate grout entirely, creating sleek, modern spaces that stay mold-free.
Popular bathroom applications include:
- Wainscoting effects using vinyl planks
- Full wall coverage in powder rooms for drama
- Accent walls behind freestanding tubs
- Water-resistant alternatives to traditional Tile
Living Space Innovation
Living rooms and bedrooms offer the perfect canvas for vinyl creativity. Here, the focus shifts from purely practical to aesthetically adventurous. Feature walls behind entertainment centers use dark vinyl planks to make screens pop. Bedrooms embrace softer looks with whitewashed wood-effect vinyl creating coastal calm.
Commercial Inspiration for Home Use
Commercial spaces have long recognized vinyl’s potential, and homeowners are taking note. Retail stores use vinyl walls to quickly and affordably create branded environments. Restaurants appreciate the ease of maintenance and the style options. These commercial applications inspire residential uses:
- Home offices with professional-looking vinyl accent walls
- Basement rec rooms with durable, stylish surfaces
- Garage walls that clean easily and look great
- Mudrooms that handle heavy use beautifully
Mixed Material Magic
The most exciting trend for 2025? Combining vinyl with other materials for layered, sophisticated looks. Designers are pairing:
- Vinyl planks with exposed brick for urban loft vibes
- Smooth vinyl with textured paint for contrast
- Wood-look vinyl with real wood trim for authenticity
- Stone-look vinyl with metal accents for a modern edge
How to Choose the Right Vinyl Flooring for Wall Installation
Selecting the perfect vinyl for your wall project requires understanding key features and matching them to your specific needs. Let’s break down the selection process to ensure your success.
Essential Features for Wall Applications
When shopping for vinyl for walls, certain characteristics matter more than others. Thickness plays a crucial role – while ultra-thick vinyl works great on floors, walls benefit from thinner, more flexible options that conform better to vertical surfaces.
Look for vinyl with:
- Flexible backing that bends without cracking
- Lightweight construction for easier installation
- Strong adhesive compatibility for vertical hold
- Dimensional stability to prevent warping
The finish matters too. Matte finishes hide minor wall imperfections better than high-gloss options. Textured surfaces add visual interest but can collect dust in vertical applications, so consider your cleaning preferences.
Waterproof and Safety Considerations
Not all vinyl is created equal when it comes to moisture resistance. For bathroom or kitchen walls, invest in 100% waterproof options. Check product specifications carefully – water-resistant isn’t the same as waterproof.
Fire safety deserves attention, especially for larger installations. Look for vinyl with:
- Class A fire ratings for commercial-grade safety
- Low VOC emissions for healthy indoor air
- Certifications from recognized testing organizations
Color and Pattern Trends for 2025
This year’s trending colors reflect a desire for both comfort and sophistication. Warm neutrals dominate, with greige (grey-beige) tones leading the pack. These versatile shades work with any décor style and won’t date quickly.
Pattern trends include:
- Wide plank wood looks natural in its unstained finishes
- Large format tiles minimize visible seams
- Subtle textures over bold patterns
- Mixed-width installations for custom looks
Bold choices haven’t disappeared, though. Deep charcoals, rich navy blues, and even black vinyl create dramatic statements when used strategically.
Creating Cohesive Design
When your floors and walls share visual elements, spaces feel larger and more sophisticated. This doesn’t mean matching exactly – in fact, that can feel overwhelming. Instead, consider:
- Using the same vinyl line in different colors
- Choosing complementary wood tones
- Mixing patterns from the same color family
- Creating contrast with light floors and dark walls (or vice versa)
Quality Indicators to Recognize
Not all vinyl performs equally on walls. Quality indicators help you invest wisely:
Wear layer thickness – Look for at least 12 mil for residential use, 20 mil or more for high-traffic areas.
Core construction – Rigid core options provide better stability than flexible varieties for large wall areas.
Warranty coverage – Reputable manufacturers offer specific warranties for wall applications.
Brand reputation – Established brands invest in research and testing that ensures better performance.
Step-by-Step Guide to Installing Vinyl Flooring on Walls
Ready to transform your walls? This detailed installation guide will walk you through the process, ensuring professional results whether you’re a DIY enthusiast or preparing to work with a contractor.
Preparation: The Foundation of Success
Perfect preparation prevents poor performance – this old saying couldn’t be more true for vinyl wall installation. Start by assessing your wall condition. Remove any loose paint, wallpaper, or debris. Fill holes and cracks with spackling compound, then sand smooth once dry.
The wall surface must be:
- Clean and dust-free
- Smooth and level (within 1/8 inch over 6 feet)
- Dry with no moisture issues
- Primed if previously painted with glossy paint
For textured walls, you’ll need to skim coat with joint compound to create a smooth surface. This extra step ensures your vinyl lies flat without showing underlying texture.
Tools and Materials Checklist
Gather everything before starting to avoid frustrating interruptions:
Essential Tools:
- Measuring tape and pencil
- Level (at least 4 feet long)
- Utility knife with fresh blades
- Straight edge or T-square
- Roller (J-roller or hand roller)
- Notched trowel for adhesive
Materials Needed:
- Your chosen vinyl flooring
- Appropriate adhesive (pressure-sensitive or permanent)
- Primer (if recommended by adhesive manufacturer)
- Transition strips for edges
- Cleaning supplies
Measuring and Planning Your Layout
Measure twice, cut once – this principle saves materials and frustration. Start by measuring your wall height and width at multiple points (walls are rarely perfectly square). Calculate the square footage and add 10% for waste and mistakes.
Plan your layout on paper first:
- Decide on pattern direction (vertical, horizontal, or diagonal)
- Determine starting point (usually the center for a balanced look)
- Plan for outlets, switches, and fixtures
- Consider how pieces will meet at corners
For patterned vinyl, think about pattern matching and where seams will fall. Avoid seams in high-visibility areas when possible.
Choosing and Applying Adhesive
Adhesive selection makes or breaks your installation. For walls, you need adhesives specifically designed for vertical applications. Pressure-sensitive adhesives allow repositioning during installation, while permanent adhesives provide maximum hold.
Application technique matters:
- Apply adhesive with the recommended notched trowel
- Work in sections you can cover within the adhesive’s working time
- Follow the manufacturer’s coverage rates exactly
- Allow proper tack time before installing vinyl
Temperature affects adhesive performance. Maintain room temperature between 65-85°F during installation and for 48 hours after.
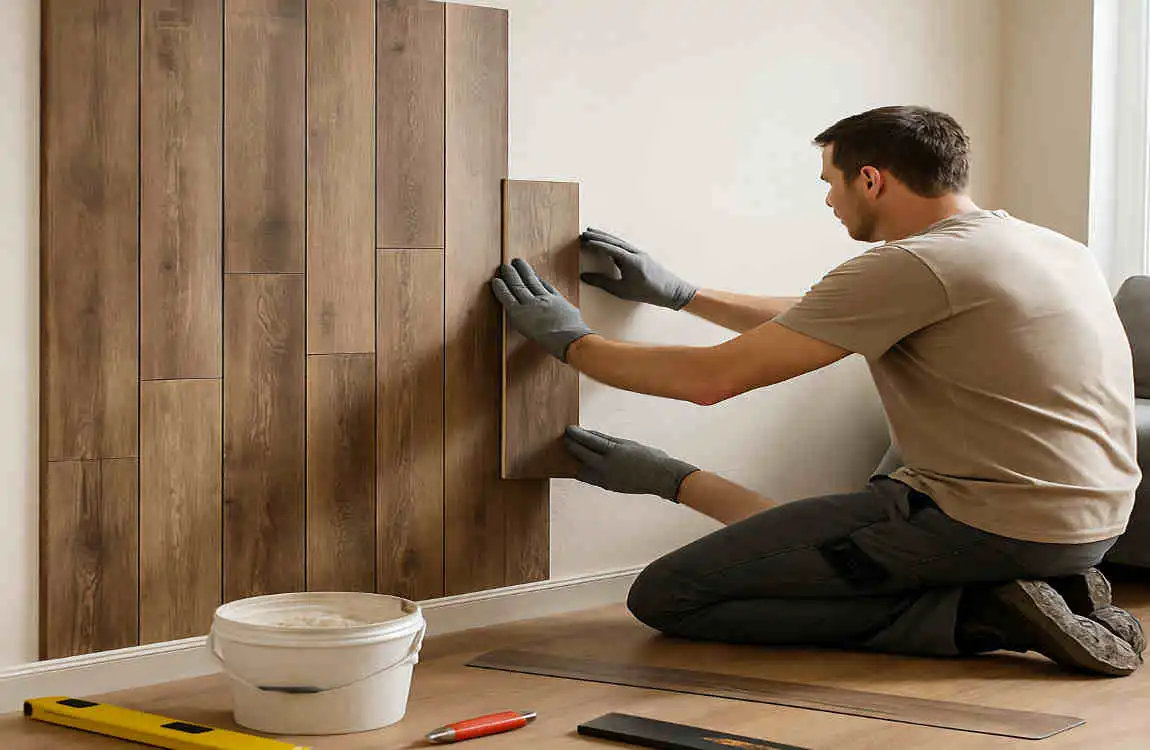
Installing Your Vinyl
Now for the exciting part! Begin installation at your predetermined starting point. For planks or tiles:
- Position your first piece carefully using your level to ensure it’s perfectly straight
- Press firmly from the center outward to eliminate bubbles
- Roll each piece with your J-roller for maximum adhesion
- Continue systematically, checking alignment frequently
- Cut pieces to fit around obstacles using careful measurements
For sheet vinyl, the process differs slightly:
- Position the entire sheet before committing
- Work from one side to the other, smoothing as you go
- Use a roller to ensure complete contact
- Trim excess with a sharp utility knife
Finishing Touches
The difference between amateur and professional results lies in the details. Finishing edges properly prevents peeling and creates polished transitions. Use appropriate trim pieces where vinyl meets other surfaces. Caulk gaps with color-matched sealant for a seamless appearance.
Don’t forget:
- Install outlet covers and switch plates carefully
- Clean excess adhesive immediately
- Allow proper cure time before heavy use
- Document your installation for warranty purposes
Common Mistakes to Avoid
Learn from others’ experiences to ensure success:
Rushing the prep work – Shortcuts here haunt you later. That small bump you ignored? It’ll show through your vinyl.
Using the wrong adhesive – Floor adhesive isn’t formulated for vertical hold. Invest in the right product.
Ignoring expansion gaps – Vinyl expands and contracts. Leave small gaps at edges, hidden by trim.
Forcing misaligned pieces – If something doesn’t fit right, stop and reassess. Forcing leads to buckling.
Maintenance and Care for Vinyl Flooring Walls
Your beautiful new vinyl walls deserve proper care to maintain their appearance for years to come. The good news? Maintenance is refreshingly simple compared to other wall treatments.
Daily and Weekly Cleaning Routines
The beauty of vinyl walls lies in their low-maintenance nature. For daily care, a simple dusting with a microfiber cloth keeps surfaces looking fresh. This prevents dust buildup that can dull the finish over time.
Weekly cleaning involves:
- Wiping with a damp microfiber cloth
- Using a mild, pH-neutral cleaner for stubborn spots
- Drying with a soft cloth to prevent water spots
- Checking edges and seams for any lifting
Avoid harsh chemicals, abrasive cleaners, or scrub brushes that could damage the wear layer. When in doubt, test cleaning products in an inconspicuous area first.
Handling Minor Damage
Life happens – furniture bumps walls, kids play rough, accidents occur. Small scratches often disappear with vinyl floor polish applied sparingly. Deeper scratches might require touch-up kits available from manufacturers.
For minor lifting at edges:
- Clean the area thoroughly
- Apply an appropriate adhesive under the lifted section
- Press firmly and roll smooth
- Weight down until the adhesive cures
Small punctures or tears can be patched using leftover vinyl and seam sealer. The key is addressing issues quickly before they worsen.
Preventive Measures
Prevention beats repair every time. Protect your vinyl walls by:
- Using furniture pads when moving items
- Avoiding adhesive hooks or tape directly on vinyl
- Keeping heating sources at appropriate distances away
- Maintaining consistent indoor humidity levels
In high-traffic areas, consider applying clear protective film to lower sections where bumps and scrapes are most likely to occur.
When Professional Help Makes Sense
While vinyl is DIY-friendly, certain situations benefit from professional expertise:
- Large areas of damage requiring section replacement
- Persistent adhesion problems indicate underlying issues
- Water damage from leaks requires investigation
- Installation warranty claims needing documentation
Professional repair often costs less than you’d expect and ensures problems are solved correctly the first time.
Cost Considerations: Budgeting for Vinyl Flooring Walls
Let’s talk real numbers – because understanding costs helps you make informed decisions and avoid budget surprises.
Material Cost Breakdown
Vinyl flooring prices vary significantly based on quality and style:
Budget Options ($1-3 per square foot):
- Basic designs and patterns
- Thinner wear layers
- Good for low-traffic areas
- Perfect for testing the concept
Mid-Range Selections ($3-5 per square foot):
- Realistic wood and stone looks
- Thicker, more durable construction
- Suitable for most residential applications
- Best value for most homeowners
Premium Products ($5-8+ per square foot):
- Ultra-realistic textures and patterns
- Commercial-grade durability
- Extended warranties
- Ideal for showcase installations
Additional Costs to Consider
Beyond the vinyl itself, budget for:
- Adhesive: $30-50 per gallon (covers 100-200 sq ft)
- Tools (if DIY): $50-150 for basic set
- Prep materials: $20-100, depending on wall condition
- Trim and transitions: $2-5 per linear foot
- Disposal of old materials: $50-200
DIY vs. Professional Installation
The DIY route offers significant savings but requires time and effort:
DIY Costs:
- Materials only
- Tool purchase or rental
- Your time (calculate 2-4 hours per 100 sq ft)
- Potential mistake corrections
Professional Installation:
- $2-4 per square foot labor
- Faster completion
- Warranty on artistry
- Expert handling of challenges
For a 10×10 wall (100 sq ft), expect:
- DIY total: $150-500
- Professional total: $350-900
Long-Term Value Analysis
Consider vinyl walls as an investment, not just an expense. Compare 10-year costs:
Wall Treatment Initial Cost Maintenance (10 years)Replacement Needs Total 10-Year Cost
Vinyl $300-800 $50 None $350-850
Paint $100-200 $200 2-3 repaints $500-800
Wallpaper $400-1000 $100 1 replacement $900-2100
Tile $800-2000 $200 Grout repair $1000-2500
The durability and low maintenance of vinyl often make it the most economical choice over time.
Potential Drawbacks and How to Overcome Them
Every design choice has floor limitations. Understanding vinyl’s challenges helps you make informed decisions and implement solutions.
Temperature and Sunlight Considerations
Direct sunlight and extreme heat can affect vinyl over time. In south-facing rooms with large windows, prolonged UV exposure might cause fading or warping. This doesn’t mean avoiding these areas – it means taking precautions.
Solutions include:
- Installing UV-filtering window treatments
- Choosing vinyl with enhanced UV inhibitors
- Using lighter colors that show fading less
- Positioning vinyl walls away from direct sun paths
In areas near heat sources such as fireplaces or radiators, maintain the recommended clearances (usually 12-18 inches) to prevent warping.
Surface Compatibility Challenges
Not every wall surface plays nicely with vinyl. Textured walls require extensive prep work. Concrete block walls need moisture barriers. Old plaster might need stabilization before installation.
Address these challenges by:
- Investing in proper wall preparation
- Using appropriate primers and sealers
- Considering furring strips for very uneven surfaces
- Consulting professionals for complex situations
Aesthetic Concerns and Solutions
Some traditionalists worry vinyl looks “fake” or “cheap.” Modern vinyl technology has largely eliminated these concerns, but perception persists. Address skepticism by:
- Choosing higher-quality options with realistic textures
- Using vinyl strategically, not everywhere
- Combining with natural materials for balance
- Showing samples to doubters – seeing is believing
Resale Value Considerations
While vinyl walls are gaining acceptance, some buyers might have preferences. Maximize appeal by:
- Keeping the installation professional and clean
- Choosing neutral, widely appealing styles
- Documenting quality and warranties
- Highlighting practical benefits like durability
Remember, easy removal is actually a selling point – new owners can change styles without major renovation.
Trend Forecast: Why Vinyl Flooring on Walls Is a 2025 Design Trend
Understanding why this trend is exploding helps you decide if it’s right for your home. Let’s explore the forces driving vinyl’s wall revolution.
Sustainability and Eco-Conscious Design
Today’s homeowners increasingly prioritize environmental responsibility. Modern vinyl manufacturers respond with:
- Recycled content in products
- Phthalate-free formulations
- Low-emission manufacturing processes
- Recyclable end-of-life options
The durability factor means fewer replacements, reducing overall environmental impact. When vinyl walls last 20+ years, while paint lasts 5-7 years, the sustainability math becomes clear.
The Multifunctional Home Movement
Post-2020, homes work harder than ever. Spaces serve multiple purposes – home offices double as guest rooms, and kitchens become classrooms. Vinyl walls support this flexibility by:
- Creating durable surfaces for high-activity areas
- Allowing quick style changes without renovation
- Providing acoustic benefits in multi-use spaces
- Offering easy-clean surfaces for messy activities
Social Media’s Design Influence
Instagram and Pinterest drive design trends faster than ever. Vinyl walls photograph beautifully, creating shareable moments that inspire others. The ability to achieve high-end looks affordably means more people can participate in design trends.
Influencers showcase:
- Dramatic before/after transformations
- DIY installation processes
- Creative pattern mixing
- Budget breakdowns proving accessibility
Future Innovation Predictions
The vinyl industry isn’t standing still. Coming innovations include:
- Smart vinyl with integrated technology
- Self-healing surfaces that repair minor scratches
- Antimicrobial treatments for healthier homes
- Custom printing for truly unique designs
As technology advances, expect vinyl to become even more versatile and appealing for wall applications.