
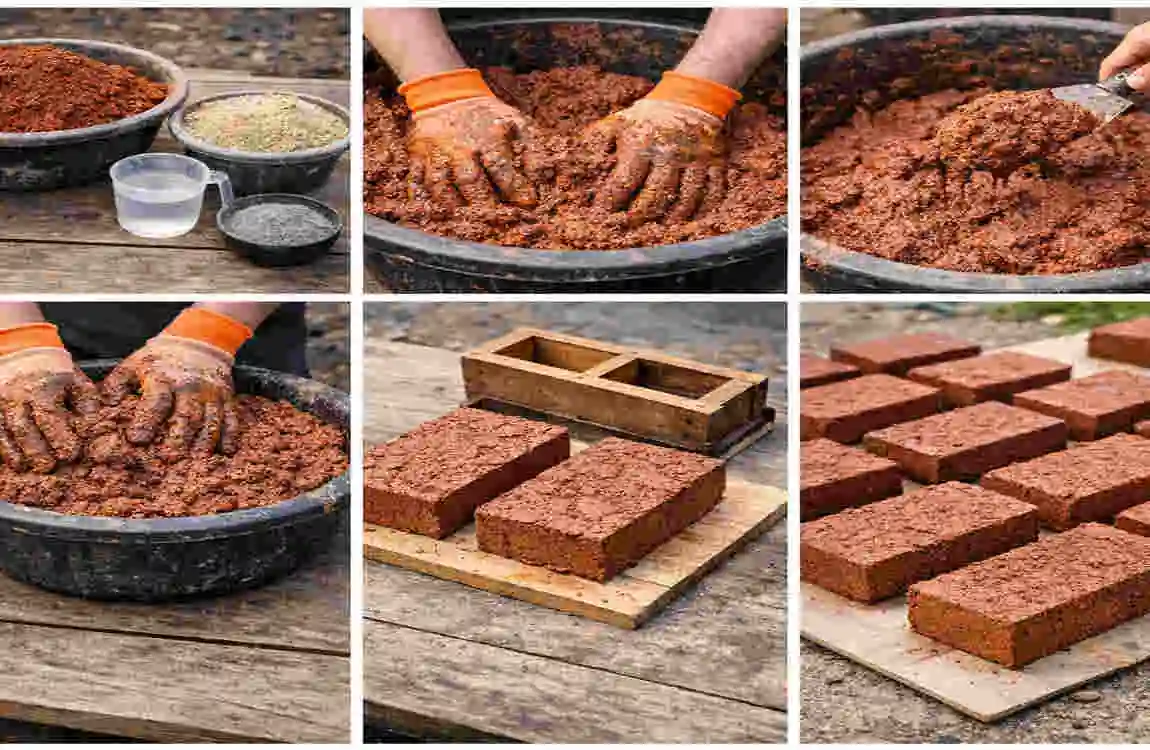
Making your own bricks can feel old-fashioned, but it is still useful today. Many people like homemade red bricks for garden walls, fire pits, walkways, and small outdoor projects. They provide a natural look and can also save money if you already have clay-rich soil nearby.
If you are curious about how to make red bricks at home, the process is simpler than many people think. You need the right clay, some sand, water, molds, and enough time to dry and fire. The work is not hard, but it does need patience. A rushed brick usually cracks, weakens, or turns out uneven.
What Are Red Bricks and How Are They Made?
Understanding Red Bricks
Red bricks are one of the oldest building materials in the world. People use them for walls, paths, small structures, and decorative projects. Their strong shape and classic look make them popular in both old and new homes.
The red color comes from iron oxide in the clay. When the clay is fired at high temperatures, the iron reacts with oxygen, turning the bricks red or reddish-brown. The exact shade depends on the clay and the firing temperature.
Traditional Brick-Making Process
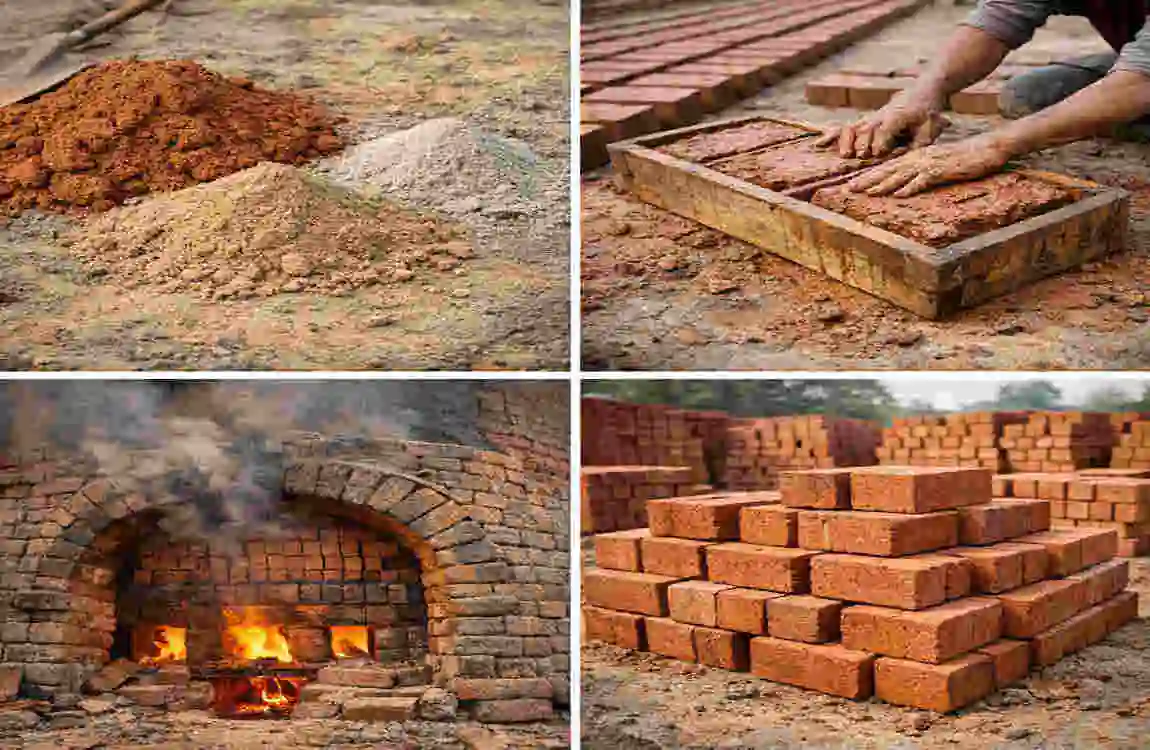
The brick-making process has stayed very similar for many years. It usually includes:
- Collecting clay
- Mixing with sand and water
- Shaping in molds
- Drying in the air
- Firing in a kiln or firing pit
Each step matters. If one part is weak, the final brick home may not hold up well.
Benefits of Making Bricks at Home
Making bricks at home can be a smart choice for smaller projects. Some of the biggest benefits include:
- Lower cost
- Custom sizes
- Natural, handmade look
- Learning a traditional skill
- Using local materials
If you enjoy hands-on work, this can be a rewarding project.
Materials Needed to Make Red Bricks at Home
Essential Materials List
MaterialPurpose
Clay soil Main ingredient for bricks
Sand Improves strength and reduces cracking
Water Helps create workable clay mixture
Straw or organic fiber Adds stability
Wood or fuel Used for firing bricks
The quality of your clay matters a lot. Good clay is usually sticky, smooth, and easy to shape. If the clay has too many stones or too much organic matter, the bricks may not turn out well.
Tools Required
You do not need expensive equipment to get started. Basic tools are usually enough.
- Mixing container
- Shovel or hoe
- Brick molds
- Flat drying surface
- Gloves and protective gear
A simple wooden mold works well for beginners. It helps you keep the brick size uniform, which makes the finished bricks look neater.
How to Make Red Bricks at Home Step-by-Step
Find and Prepare Suitable Clay
Start by finding clay-rich soil. Good brick clay feels smooth and slightly sticky when wet. It should hold its shape when squeezed.
Remove:
- Stones
- Roots
- Leaves
- Other debris
If you are unsure whether the soil is good, make a small test brick first. Dry it and fire it. That test can save you time later.
Mix Clay With Sand and Water
Once the clay is ready, mix it with sand. Sand helps reduce shrinkage and cracking. Too much clay can make bricks brittle. Too much sand can make them weak and crumbly.
Add water slowly. You want a mixture that is moist and workable, not runny. The texture should feel like stiff dough. If it sticks to your hands badly, it is probably too wet.
A balanced mix gives the brick strength and helps it dry evenly.
Prepare Brick Molds
Brick molds come in different shapes and sizes, but the standard rectangular shape is the easiest to start with. You can use wood, metal, or sturdy plastic.
Before filling the mold, lightly wet it or dust it with a little sand so the clay does not stick too much.
This makes it easier to remove the brick cleanly after shaping.
Shape the Bricks
Press the clay mixture firmly into the mold. Fill all corners so the brick keeps a proper shape. Then scrape off extra clay from the top.
Try to make the surface smooth. Smooth bricks dry more evenly and stack better during firing.
Once shaped, carefully lift the mold away. Handle the soft brick gently so it does not lose its shape.
Dry the Bricks Naturally
Drying is one of the most important steps. If the bricks dry too quickly, they can crack. If they stay wet too long, they may warp or grow mold.
Place the bricks on a flat, dry, shaded surface with good airflow. Turn them gently after a few days so all sides dry evenly.
Drying time depends on weather, brick thickness, and moisture level, but most bricks need 1 to 3 weeks before firing.
Fire the Bricks for Strength
Firing changes soft clay into hard brick. This step gives the brick its final strength and color.
Traditionally, people use a kiln or a firing pit. The bricks are stacked carefully so that heat can move evenly around them. Then wood or another fuel source is used to raise the temperature.
During firing, the clay particles fuse. That is what makes the brick durable. If the heat is too low, the brick stays weak. If the heat is too high, the brick can crack or warp.
How Long Does It Take to Make Red Bricks at Home?
Time Required for Each Stage
Process Approximate Time
Clay preparation 1–2 days
Brick shaping A few hours
Drying 1–3 weeks
Firing Several hours to days
The full process takes time, so patience is important. Homemade brick making is not a fast project.
Factors Affecting Brick-Making Time
Several things can change the timeline:
- Weather conditions
- Clay quality
- Brick thickness
- Firing method
Warm, dry weather helps speed up drying. Cold or rainy weather slows everything down.
Common Mistakes When Making Homemade Red Bricks
Using Poor Quality Clay
Bad clay is one of the biggest reasons homemade bricks fail. Soil with too many stones, roots, or organic matter can create weak bricks.
If the soil is not right, do a small test batch before making many bricks.
Incorrect Water Ratio
Too much water makes the mixture soft and hard to shape. Too little water makes it dry and crumbly.
The goal is a balanced mixture that holds together without slumping.
Skipping Proper Drying
Many beginners want to fire bricks home too soon. That usually leads to cracks or broken pieces.
Make sure the bricks are fully dry before firing. This step is worth the wait.
Improper Firing Temperature
If the heat is too low, the bricks stay soft. If it is too high, they can deform or crack.
Consistent heat is better than extreme heat.
Tips to Make Stronger Red Bricks at Home
Improve Clay Mixture Quality
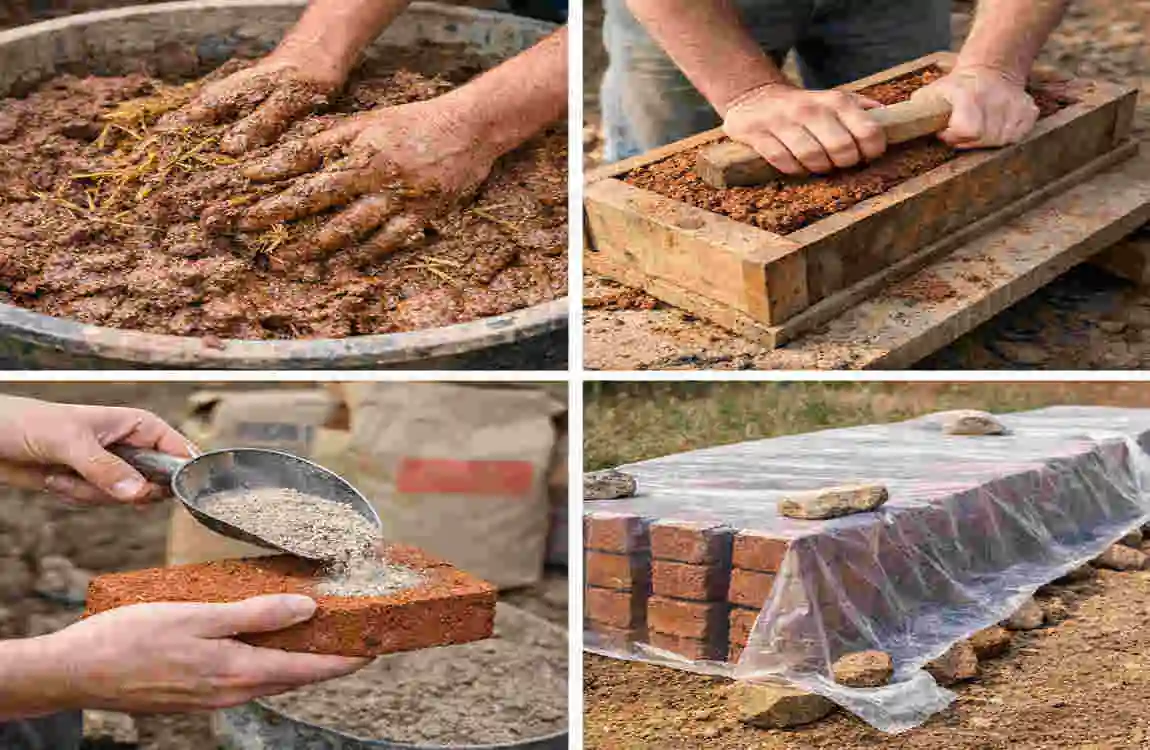
A strong brick starts with a strong mix. Use the right balance of clay and sand, and remove unwanted debris before mixing.
A clean mixture gives better results and fewer cracks.
Allow Enough Drying Time
Keep the bricks out of heavy rain and sudden changes in moisture. Let them dry slowly and evenly.
Slow drying often leads to better strength.
Use Proper Firing Techniques
Try to keep heat steady during firing. Do not overload the kiln or stack the bricks too tightly.
Even heat helps the bricks harden properly.
Test Brick Strength
Before using your bricks in a project, test a few.
Useful checks include:
- Water absorption test
- Drop test
- Visual inspection
A good brick should feel solid, not sandy or soft.
Are Homemade Red Bricks Good for Construction?
Advantages of Homemade Bricks
Homemade bricks can work well for many small projects. They are affordable, natural-looking, and useful when you want a simple handmade finish.
They are especially good for:
- Garden walls
- Fire pits
- Decorative pathways
- Small outdoor structures
Limitations of Homemade Bricks
They do have limits. Homemade bricks may not match factory bricks in strength or consistency. They also take time and skill to make properly.
That is why they are usually better for light-duty or decorative use rather than major structural work.
Best Uses for Homemade Bricks
If you want practical ideas, start small. Good uses include patios, edging, garden borders, and non-load-bearing projects.
This gives you experience before trying a larger build.
Cost of Making Red Bricks at Home
Estimated Expenses
Item Approximate Cost
Clay Low cost or free
Sand Low cost
Tools Depends on availability
Fuel for firing Main expense
If you already have clay on your land, the project can be quite affordable. Fuel is often the highest cost, especially if you need a lot of bricks.
Ways to Reduce Brick-Making Costs
You can keep costs down by:
- Using local materials
- Reusing molds
- Choosing efficient firing methods
Planning helps you save money and avoid waste.
Safety Tips When Making Bricks at Home
Brick making is simple, but it still needs care.
- Wear gloves when handling clay
- Protect yourself from dust
- Be careful around high heat
- Keep children away from firing areas
- Work in a well-ventilated place
Safety matters most during firing. Hot surfaces and fuel can be dangerous if you are not careful.
Eco-Friendly Benefits of Homemade Brick Making
Reducing Transportation Costs
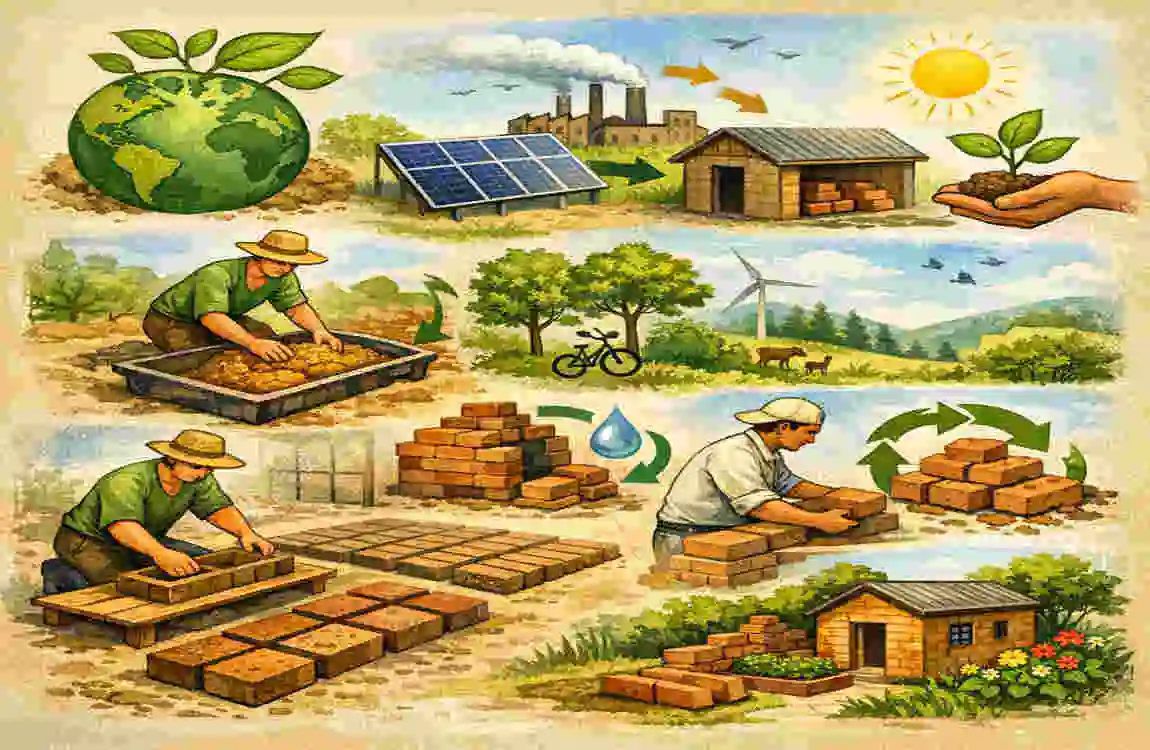
When bricks are made locally, you do not need to transport heavy materials very far. That lowers fuel use and can reduce your overall environmental impact.
Using Natural Materials
Clay-based bricks are made from natural ingredients. That makes them a more traditional and often more eco-friendly choice than some modern materials.
Supporting Traditional Construction Methods
Making bricks by hand helps preserve older building skills. Many people enjoy that connection to traditional craftsmanship.
Frequently Asked Questions
Q: Can I make red bricks at home?
Yes, you can make red bricks at home using clay, sand, water, molds, and a proper drying and firing process.
Q: What type of soil is best for making red bricks?
Clay-rich soil with good plasticity is best because it holds shape and becomes strong after firing.
Q: How long do homemade bricks take to dry?
Homemade bricks usually need 1 to 3 weeks to dry completely before firing.
Q: Can homemade bricks be used for building a house?
They may work for small projects, but professionally tested bricks are better for major structural construction.
Q: Why do red bricks turn red after firing?
The iron minerals in clay react with oxygen during firing, which creates the red color.
| Step | Process | Details |
|---|---|---|
| Collect Clay Soil | Choose the right clay | Use clean, fine clay soil that can hold shape when mixed with water. Remove stones, roots, and debris. |
| Prepare the Clay | Mix and knead clay | Add water slowly and mix until the clay becomes smooth, soft, and easy to mold. |
| Add Strength (Optional) | Improve brick durability | Mix materials like sand or straw fibers to reduce cracking during drying. |
| Shape the Bricks | Use molds | Press the clay into a wooden brick mold and remove excess material for even shapes. |
| Dry the Bricks | Air-dry properly | Place bricks in a dry, shaded area for several days until most moisture is removed. |
