
Welcome to the exciting world of 2026 home renovations! If you are a homeowner right now, taking on do-it-yourself (DIY) projects has never been more popular. We are all looking for ways to upgrade our living spaces, save some hard-earned money, and create environments that truly reflect our personal style. As you start planning your next big room makeover, you might find yourself holding a beautiful plank of faux-oak wood and asking a very common question: “Can I glue down laminate flooring?”
It is a perfectly logical question. After all, we glue down tiles, we glue down carpets, and we certainly glue down traditional hardwood. So, why would laminate be any different? The truth is, there are many myths floating around the internet about this topic. Many people believe that gluing is the standard way to install any floor, while others insist that a single drop of adhesive will completely ruin your brand-new planks.
The reality sits somewhere in the middle. Gluing laminate flooring in your home is not the standard procedure for most modern planks, but it is an entirely viable option for specific types of homes, unique subfloors, and high-traffic areas.
What Is Laminate Flooring?
Before we can decide how to install it, we need to understand exactly what we are working with. What is laminate flooring, anyway?
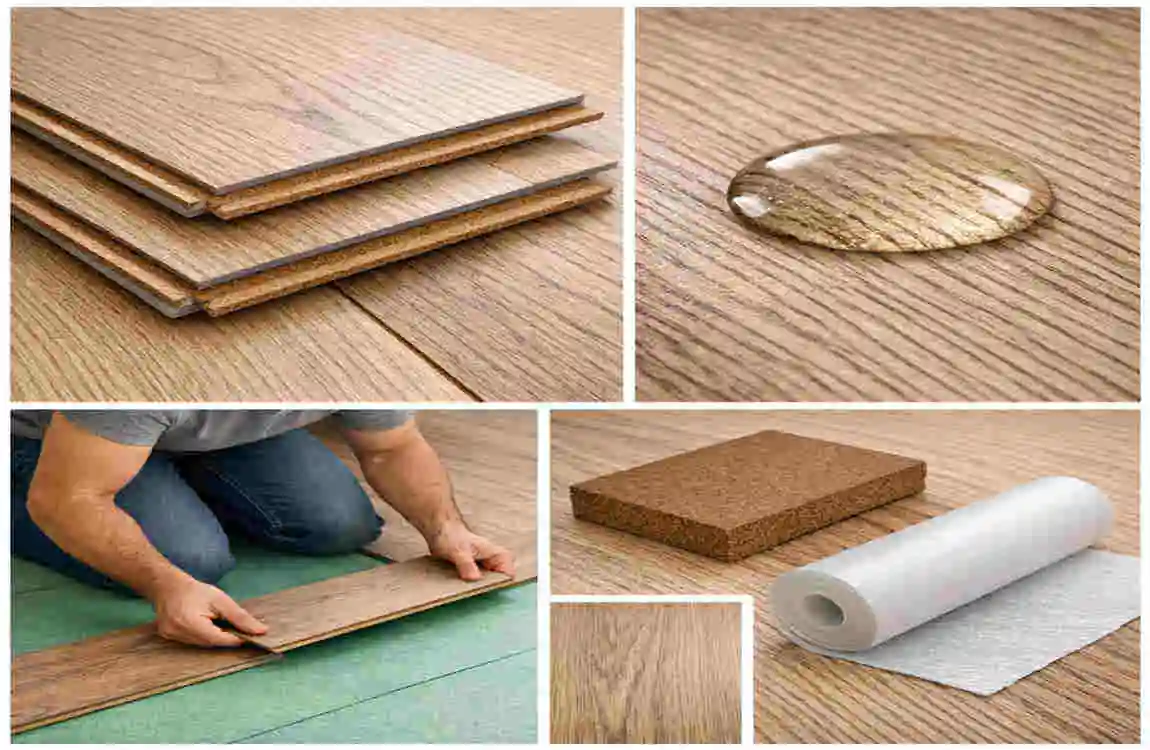
Unlike solid hardwood, which is cut straight from a single tree, laminate is a highly engineered, synthetic product. It is specifically designed to mimic the beautiful look of natural wood or stone perfectly, but at a fraction of the cost. A standard laminate plank is usually made up of four distinct layers pressed together under intense heat.
At the bottom, you have a backing layer that resists moisture. Above that sits the thickest part: the High-Density Fiberboard (HDF) core. This core gives the plank its strength. Next comes the photo layer, a highly detailed, high-resolution image of wood grain or stone. Finally, everything is sealed together beneath a tough, clear wear layer that protects the floor from scratches, dents, and fading.
The Mechanics: Floating vs. Glue-Down
Because of how it is built, laminate flooring is almost always designed to be a “floating” floor. What does floating mean? It means the planks lock together using a click-and-lock tongue-and-groove system at their edges. They rest gently on top of your subfloor without any nails, staples, or chemical adhesives holding them down to the base of your house.
A glue-down installation, on the other hand, means you apply a strong chemical adhesive directly to your concrete or wooden subfloor, and you press the laminate planks directly into that wet glue to create a permanent bond.
Why Your Climate Matters
Where you live plays a massive role in your flooring choices. For example, if you are asking, “Can I glue down laminate flooring in humid homes?” the answer requires careful consideration. In places like, homes experience intense humidity during the monsoon season and dry conditions in the winter. The HDF core in the laminate absorbs moisture from the air, causing the planks to expand and contract naturally. You must choose moisture-resistant laminate types if you plan to use adhesive in these highly variable climates.
Can You Glue Down Laminate Flooring? The Short Answer
Let’s get straight to the point. Can you glue down laminate flooring?
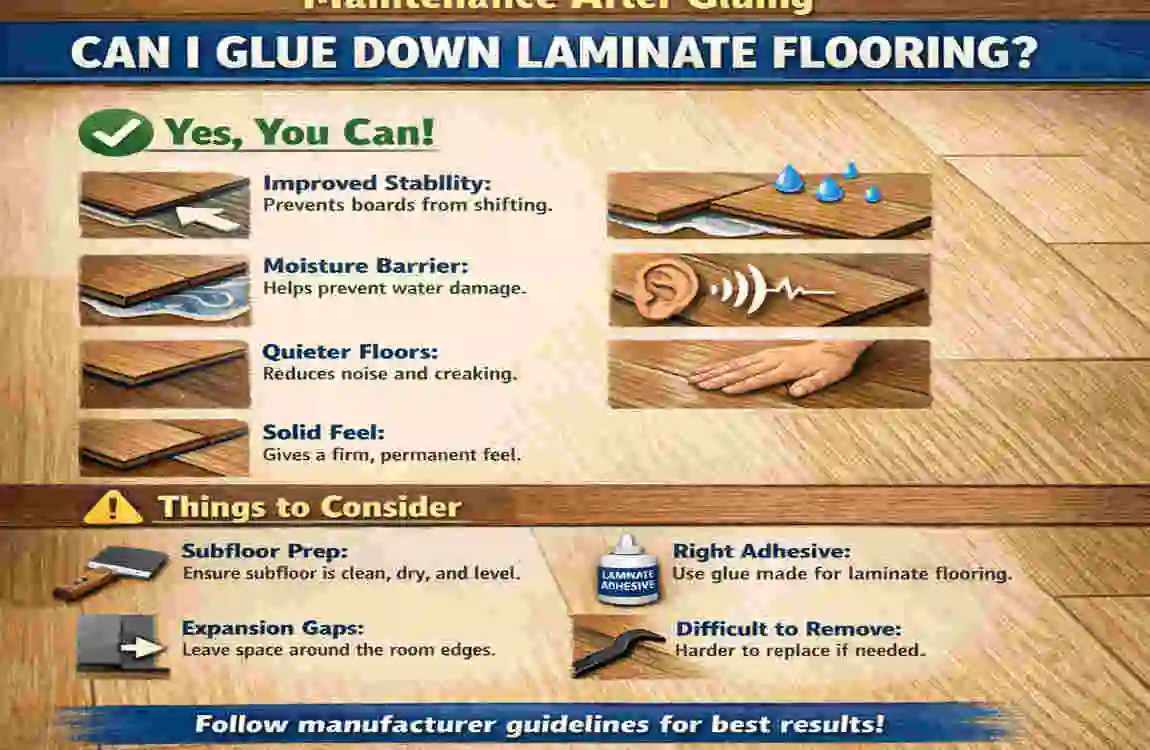
The short answer is: Yes, it is physically possible, but it is generally not recommended for the vast majority of modern click-lock laminate planks.
Most manufacturers specifically engineer their click-lock floors to float. Because the planks need to expand and contract with the changing temperatures and humidity in your home, pinning them down with rigid glue restricts their natural movement. If you glue down a floor meant to float, the planks might push against each other and buckle, or pull apart, creating ugly gaps. Even worse, doing this almost always completely voids your manufacturer’s warranty.
However, there are exceptions to this rule! You can absolutely use glue if you purchase a laminate designed for glue-down installations. Also, consider gluing in high-traffic areas of your home, such as busy family kitchens or entryways, where a floating floor might bounce or shift under heavy footsteps. Always read the manufacturer’s guidelines printed on the box before you open a tub of adhesive.
Quick Reference: Installation Types
Installation Type Best For Glue Needed?Warranty Risk
Floating (Click-Lock) Most standard family homes and bedrooms. No adhesive required. Low risk (Maintains warranty).
Full Glue-Down Commercial spaces or high-moisture rooms. Yes, full spread on subfloor. High risk if misused on the wrong planks.
Glue Joints Only Spill-prone rooms like kitchens. Edges/grooves only—low risk (Often recommended).
Pros and Cons of Gluing Laminate Flooring
Every home improvement decision comes with a delicate balancing act. If you are weighing the pros of gluing down laminate flooring at home, you should also consider the potential drawbacks. Let us break down both sides of the argument.
The Pros of a Glued Floor
Enhanced Stability in Busy Homes. The biggest advantage of a glued floor is how it feels under your feet. Floating floors can feel hollow or bouncy when you walk on them, especially if your subfloor is not perfectly flat. When you use adhesive, the laminate bonds tightly to the concrete or wood below. This gives the floor a dense, solid, and incredibly Premium feel, similar to real hardwood.
Significant Noise Reduction Because the planks are fused to the subfloor, they do not vibrate against each other when you walk. This drastically reduces the annoying clicking or hollow-tapping sounds that floating floors sometimes produce. If you hate the sound of dog nails clicking across the room, gluing can help muffle that noise.
An Extra Moisture Barrier When you spread a high-quality polyurethane adhesive across your subfloor, the glue itself acts as a secondary shield against rising dampness. This is a fantastic benefit for basement installations where ground moisture constantly tries to sneak upward.
The Cons of a Glued Floor
Severe Expansion Issues. This is the biggest drawback. As we mentioned regarding distinct seasons, homes expand and contract. During the rainy monsoons , the air is thick with water. Your laminate wants to expand. If it is glued tightly to the floor, it has nowhere to go. The pressure builds up until the planks physically push upward, creating a tenting or buckling effect that ruins the floor.
A Nightmare to Remove. If you ever want to change your floors in the future, removing a glued-down laminate floor is a grueling, exhausting task. You will likely need heavy power tools to scrape the dried glue and shredded wood off your subfloor. A floating floor, by contrast, can be pulled up by hand in an hour.
Voiding Your Warranty: If you ignore the instructions on the box and glue down a standard floating plank, the company will not issue a refund if the floor fails. You take on all the financial risk yourself.
When Should You Glue Down Laminate Flooring?
Now that we know the risks, when does it actually make sense to break out the adhesive? There are a few highly specific scenarios where gluing is not just an option, but the smarter choice.
Dealing with Uneven Subfloors If your home has a subfloor with slight dips and rolls, a floating floor will bend and bounce every time you step on those low spots. Eventually, that bouncing will snap the delicate click-lock joints. Gluing the floor down fills those minor gaps and holds the planks firmly in place, preventing the joints from breaking.
Renting and Special Circumstances Sometimes, you are dealing with a rental property or a space where you absolutely cannot drill transition strips into the floor. A glued floor stays exactly where you put it without needing bulky metal transition strips screwed into doorways.
Bathrooms and Stairs . If you are installing laminate on a staircase, you absolutely must glue it down. A floating plank on a stair tread is a massive slipping hazard. Similarly, in bathrooms, running a bead of glue along the tongue-and-groove joints (rather than gluing to the subfloor) creates a waterproof seal against splashed water.
Embracing 2026 Eco-Trends. In 2026, we are seeing a massive trend toward sustainable, eco-friendly homes. If you are going to glue, consider the new wave of ultra-low VOC eco-glues. They provide the stability you need without filling your family home with harsh chemical smells. If you are monsoon-proofing a home in a humid climate , selecting a Premium, highly flexible waterproof adhesive is your best defense against shifting weather.
Tools and Materials Needed
If you have decided that a glue-down installation is the right path for your specific home, you need to gather the correct tools before you start. Having everything within arm’s reach will make this messy job significantly easier.
Your Essential Shopping List
- Laminate Flooring Adhesive: You need a high-quality PVA (Polyvinyl Acetate) glue or a water-resistant polyurethane adhesive. Do not use standard wood glue.
- A V-Notched Trowel: a metal spreading tool with teeth. It ensures you spread the exact right thickness of glue on the floor.
- A Sharp Utility Knife: For cutting the moisture barrier and opening boxes.
- A Long Spirit Level: To check your subfloor for hidden dips and bumps.
- Plastic Wall Spacers: Crucial. They keep the planks a 1/4 inch away from your walls to allow for natural heat expansion.
- A Quality Underlayment: If your adhesive does not act as a moisture barrier, you will need a thin foam underlayment.
- A Tapping Block and Rubber Mallet: To gently tap the planks together without damaging their delicate edges.
Typical Budget for Markets Estimates
If you are shopping in local hardware markets, here is a quick look at what you can expect to spend to get started. Materials for gluing laminate flooring are relatively affordable if you shop smart.
Item Estimated Cost (PKR)Purpose
Premium Laminate Glue (Per Tub) Rs. 1,500 – Rs. 3,500 Creates a permanent bond.
V-Notched Trowel Rs. 500 – Rs. 800 Spreads the adhesive evenly.
Spacers and Tapping Block Kit Rs. 1,000 – Rs. 1,500 Ensures a safe, gap-free installation.
Heavy-Duty Rubber Mallet Rs. 800 – Rs. 1,200 Gently locks planks tight.
Step-by-Step Guide: How to Glue Down Laminate Flooring
Are you ready to roll up your sleeves? Installing a glued floor is a labor of love, but the results can be incredibly rewarding. Follow this meticulous, step-by-step guide to ensure your floor looks flawless and lasts for decades.
Prepare the Subfloor (The Most Crucial Step)
Do not skip this step! Your glued floor will only be as smooth and strong as the subfloor underneath it.
First, remove all old flooring, carpets, and baseboards. Grab a heavy broom and sweep the bare concrete or wood subfloor until it is perfectly clean. Any dust, pebbles, or old paint flakes will prevent the glue from sticking properly.
Next, take your long spirit level and crawl across the floor. You are looking for any dips or high spots. If you find a dip deeper than 3/16 of an inch, fill it with a self-leveling concrete compound; if you find a high spot, sand or grind it down.
Finally, do a critical moisture test. Tape a 2-foot-by-2-foot piece of clear plastic to your concrete floor and leave it for 24 hours. If you see condensation under the plastic the next day, your floor is too wet for standard adhesive. You must address the moisture issue or use a specialized waterproof glue.
Acclimate Your Planks
Laminate flooring is sensitive to temperature. When you bring the boxes home from the store, the planks are probably hot from the truck or cold from the warehouse.
Stack the unopened boxes of flooring flat in the exact room where you plan to install them. Leave them there for at least 48 hours. This process, called acclimation, allows the HDF core inside the planks to get used to the exact humidity and temperature of your home. If you glue them down while they are too cold, they will expand later and buckle the floor.
Apply the Glue
Now the messy fun begins. Start at the longest, straightest wall in your room. Open your tub of adhesive and scoop a generous amount onto the subfloor.
Take your V-notched trowel and hold it at a 45-degree angle. Scrape the glue across the floor. The teeth of the trowel will leave perfect, even ridges of adhesive behind. Do not cover the whole room! Only spread enough glue for two or three rows of planks at a time. If you spread too much, the glue will dry out and harden before you have a chance to lay the wood down.
Lay and Press the Planks
Place your plastic spacers against the wall. You must leave a 1/4 inch expansion gap between the wood and the wall to allow the house to breathe.
Lay your first plank into the wet glue and press it firmly against the wall spacers. Take your second plank, angle it slightly to engage the click-lock mechanism, and snap it into the end of the first plank. Press it down into the glue.
As you start your second row, remember to stagger your seams. You do not want the ends of the planks in row two to line up exactly with those in row one. This creates a weak spot. Cut your first plank of row two in half to ensure the joints are staggered, like a brick wall.
Use your tapping block and rubber mallet to gently tap the side of each plank, ensuring the joints are incredibly tight. If you hit the plank directly with the hammer, you will chip the photo layer.
Cure and Finish
Once you have meticulously glued and laid every plank across the room, it is time to step away.
Do not walk on your new floor! The adhesive needs time to cure and form a permanent chemical bond. Read the back of your glue tub, but generally you need to wait a full 24 hours before allowing any foot traffic and 48 hours before moving your heavy furniture back into the room.
Once the glue is rock solid, walk around the edges of the room and pull out all the plastic wall spacers. Finally, nail your decorative baseboards or quarter-round molding to the wall (never nail it to the floor) to hide the 1/4-inch expansion gap. Install your metal or wood transition strips in the doorways, and your beautiful new floor is complete!
Best Glues for Laminate Flooring
Choosing the right adhesive is just as important as choosing the right flooring. If you buy a cheap, low-quality glue, your floor will start peeling up within a year. You need an adhesive that offers a strong bond but also retains a tiny bit of flexibility to handle microscopic shifts in the house.
Here are the top picks for your project:
Liquid Nails Fuze*It. This is a modern marvel in the world of adhesives. It is a highly advanced, hybrid-polyurethane adhesive. What makes it incredible is that it bonds to almost any surface, even if the subfloor is slightly damp. It cures incredibly fast, meaning you can walk on your floor much sooner.
Roberts 1407 This is an industry classic. It is an engineered wood and laminate flooring adhesive designed specifically for tongue-and-groove systems. It is an acrylic-based PVA glue, which means it cleans up easily with warm water if you accidentally spill some on top of your planks.
When shopping, always check the label for VOCs (Volatile Organic Compounds). You want a “Low-VOC” or “Zero-VOC” glue for family homes to ensure your indoor air quality remains safe and healthy to breathe.
Quick Glue Comparison Table
Glue Brand Chemical Type Average Dry Time Est. Price (Rs./Liter)Best Application For
Roberts 1407 Acrylic PVA 24 to 48 hours Rs. 1,500 Standard indoor family homes.
Liquid Nails Hybrid Polyurethane 12 to 24 hours Rs. 2,000 High moisture areas or basements.
Bostik GreenForce Urethane 12 hours Rs. 2,500 Eco-friendly, low-VOC requirements.
Common Mistakes to Avoid
Even the most enthusiastic DIY homeowners can make critical errors. If you want to avoid tearing up your hard work next week, steer clear of these incredibly common installation mistakes.
The Over-Gluing Disaster. More glue does not equal a better floor. If you slather too much adhesive on the subfloor, it will ooze up through the laminate joints when you step on the planks. This creates a sticky, crusty mess on top of your beautiful new wood that is incredibly difficult to clean. Always trust the teeth on your V-notched trowel to leave the exact right amount of glue.
Skipping the Expansion Gaps. We cannot stress this enough. If you push your planks against the drywall too tightly, your floor will fail. When the summer humidity hits, the wood will expand. If it hits the wall, the pressure will force the floor to buckle upward in the middle of the room. Always use your plastic 1/4 inch spacers.
Gluing Over Wet Subfloors. If you have a concrete basement floor that feels cold and slightly damp, do not apply standard glue. The moisture interacting with the chemicals will turn the adhesive into a useless, soapy sludge. Fix the moisture leak first, or invest in a highly specialized moisture-barrier adhesive system.
Glue-Down vs. Floating Laminate: Comparison
Are you still on the fence about laminate flooring glue-down vs. floating? It is a tough choice. Let us put them head-to-head in a deep dive comparison so you can easily see which method suits your specific lifestyle and home layout.
The Deep Dive Comparison
Factor to ConsiderGlue-Down InstallationFloating Installation
Overall Stability Very High. Feels like solid hardwood; zero bouncing or shifting underfoot. Medium. Can feel slightly hollow; might bounce if the subfloor is uneven.
Installation Time Longer. Requires spreading messy glue and waiting 24 hours to cure. Much Faster. You can walk on the floor immediately after clicking it together.
Total Cost +20% Higher. You must purchase expensive buckets of Premium adhesive and trowels. Base Cost. Only requires the planks, a cheap foam underlayment, and a mallet.
Future Removability Extremely Hard. Requires heavy-duty power-scraping tools to remove the permanent chemical bond. Incredibly Easy. Planks can be unclicked and pulled up by hand in minutes.
Best Home Suitability: High-traffic hallways, commercial spaces, and active family kitchens. General living rooms, standard bedrooms, and rental apartments.
By looking closely at this table, you can see that the glue-down laminate flooring vs. floating in-home laminate flooring debate really comes down to your personal priorities. Do you want a fast, cheap, and easily replaceable floor? Go floating. Do you want a permanent, Premium, solid-feeling floor that will handle heavy traffic? Get the glue.
Maintenance After Gluing
Congratulations, your new floor is installed, and the glue is fully cured! How do you keep it looking brand new for the next two decades?
Maintenance for a glued laminate floor is wonderfully simple. Your daily routine should involve a soft-bristle broom or a vacuum cleaner with the “hard floor” setting turned on. You want to sweep up dirt and sand quickly, as those tiny particles act like sandpaper against the clear wear layer of your planks.
The biggest rule of laminate maintenance is this: Never use a soaking wet mop. Even if your floor is tightly glued, standing water can seep into the microscopic seams and swell the HDF core. Instead, use a slightly damp microfiber mop with a specialized laminate floor cleaning spray.
With proper care and a solid glue-down foundation, a high-quality laminate floor will easily provide you with a stunning, durable surface for 15 to 25 years.
Cost Breakdown for Homes
Let us talk numbers. If you are planning a renovation or a similar metropolitan market in 2026, accurate budgeting is key to a stress-free project.
For the materials alone—including high-quality moisture-resistant laminate planks, the Premium polyurethane adhesive, your trowels, and your spacers—you should budget anywhere from Rs. 50 to Rs. 100 per square foot.
If you decide to hire professional labor instead of doing it yourself, expect to add another Rs. 30 to Rs. 60 per square foot for their time and expertise.
Is it worth the investment? Absolutely. Upgrading old, tired carpets to sleek, glued-down laminate floors drastically modernizes a house. Real estate experts estimate that a high-quality hard flooring upgrade can boost your home’s resale value by a solid 5% to 10%, giving you an excellent Return on Investment (ROI) if you ever decide to sell.
FAQs
We know that flooring projects generate many specific questions. Here are the answers to the most common queries we get from homeowners just like you.
Can I glue down laminate flooring over my existing ceramic tile? Yes, but it takes significant preparation. You cannot just smear glue over glossy tiles. You must use a heavy-duty deglosser or a floor grinder to roughen the tile surface so the adhesive has something to grip. Furthermore, you must fill in all the deep grout lines with a leveling compound; otherwise, those lines will eventually show through the laminate planks.
Does gluing down a floating floor automatically void my warranty? In 95% of cases, yes. If the box says “Click-Lock Floating Floor,” the manufacturer expects it to float. If you use glue and the floor later buckles, the company will blame your adhesive and refuse to honor the warranty. Always buy a product specifically rated for glue-down if you want warranty protection.
Can I glue the edges together instead of gluing the whole subfloor? Yes! This is actually a fantastic compromise for spill-prone rooms like kitchens. You run a tiny, continuous bead of specialized PVA wood glue inside the groove of the plank before you click the next one in. The floor still “floats” over the subfloor, but the glued seams create an incredibly tight, water-resistant seal across the top.
How long does the adhesive smell last? If you use a standard polyurethane adhesive, you might notice a strong chemical odor for 48 to 72 hours. Keep your windows wide open and run ceiling fans. If you purchase a modern Low-VOC or Zero-VOC adhesive, the smell will be minimal and should dissipate within a single day.