
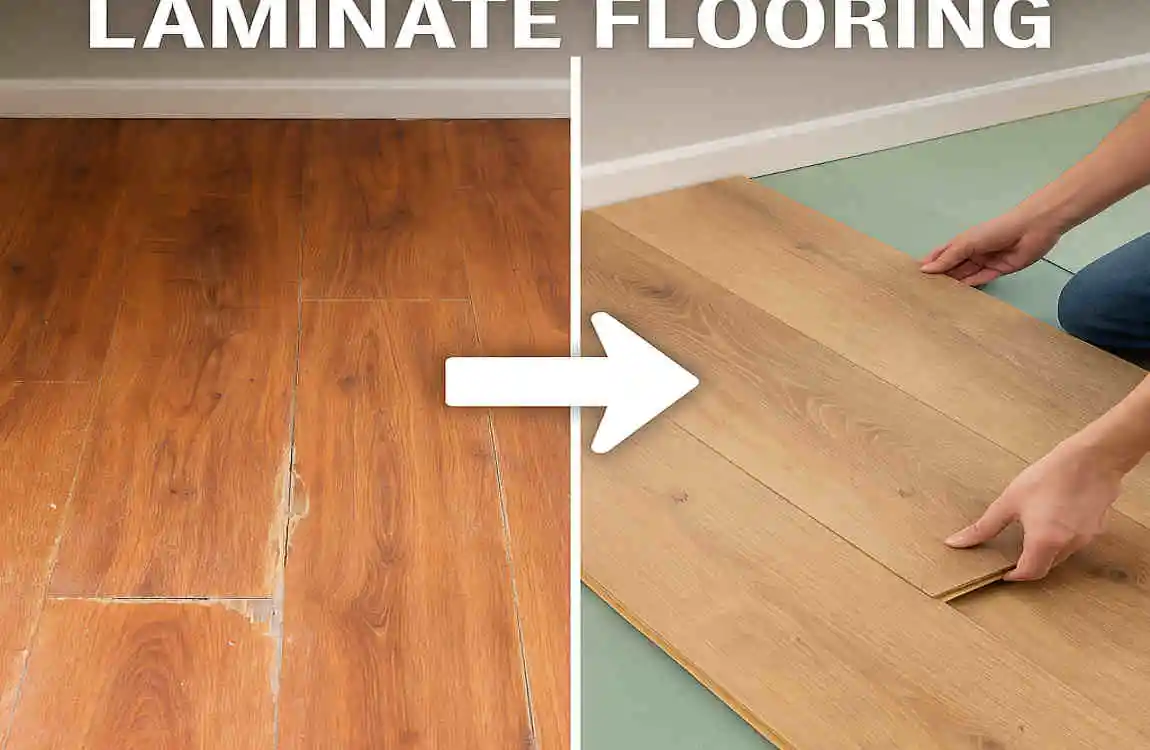
Updating your home’s flooring can completely transform its aesthetic and even increase its value. If you’re currently living with old laminate flooring, you might be wondering what to do with it and how to replace it.
Assessing Your Current Laminate Flooring
Inspecting for Damage and Wear
Before deciding what to do with your old laminate flooring, assess its condition. Start by closely inspecting the flooring for any signs of damage, such as cracks, chips, or warping. Pay attention to high-traffic areas, as these are more likely to show wear and tear.
Determining Repair or Removal
Once you’ve identified any issues with your laminate flooring, you’ll need to decide whether to repair or remove it. If the damage is minimal and localized, you can replace a few planks and extend the life of your flooring. However, if the damage is widespread or the laminate flooring is outdated, it’s time to consider removing it and installing new flooring.
Tools and Materials for Assessment
To properly assess your laminate flooring, you’ll need a few basic tools and materials. These include a flashlight, a measuring tape, and a notepad to record your observations. If you’re unsure about the condition of your subfloor, you may also need a screwdriver or putty knife to check for any signs of damage or moisture.
Step-by-Step Guide on Removing Old Laminate Flooring
Safety Preparations
Before you start removing your old laminate flooring, it’s essential to take some safety precautions. Wear protective gear, such as gloves, safety glasses, and a dust mask, to protect yourself from debris and dust. Clear the room of any furniture or obstacles, and cover any vents or doorways to prevent dust from spreading to other areas of your home.
Step-by-Step Removal Method
Removing old laminate flooring can be a straightforward process if you follow these steps:
- Start at the edge: Begin by carefully prying up the first plank at one edge of the room using a flat pry bar or a putty knife. Be gentle to avoid damaging the subfloor.
- Work in sections: Once you’ve removed the first plank, continue working your way across the room, eliminating planks in sections. Use a hammer and pry bar to gently lift the planks, taking care not to damage the tongue-and-groove edges.
- Remove underlayment: After removing the laminate planks, you’ll need to remove the underlayment. This may be attached to the subfloor with adhesive, so use a scraper or putty knife to remove it carefully.
- Clean the subfloor: Once all the laminate and underlayment have been removed, thoroughly clean the subfloor to prepare it for your new flooring. Use a vacuum or broom to remove any debris, and fill any gaps or cracks with a self-leveling compound.
Minimizing Dust and debris
Removing old laminate flooring can create a lot of dust and debris, but there are a few tips to help minimize the mess:
- Use a shop vacuum or dust collection system to capture dust as you work.
- Place a plastic sheet or drop cloth at the room’s entrance to catch any debris as you exit.
- Work in small sections, cleaning up as you go, to prevent dust from spreading.
Tools for Efficient Removal
To efficiently remove your old laminate flooring, you’ll need a few essential tools:
- Crowbar or pry bar
- Hammer
- Utility knife
- Putty knife or scraper
- Shop vacuum or dust collection system
What to Do with Old Laminate Flooring
Once you’ve removed your old laminate flooring, you’ll need to decide what to do with it. Here are a few ideas for resizing, recycling, and reusing your old laminate:
- Resize: If your laminate planks are in good condition, you can cut them down to size and use them for smaller projects, such as a backsplash or accent wall.
- Recycle: Check with your local recycling center to see if they accept laminate flooring. Some facilities may be able to recycle the material, reducing waste and helping the environment.
- Reuse: Get creative with your old laminate by repurposing it into furniture, such as a tabletop or shelving. You can also use smaller pieces as coasters or trivets.
Eco-Friendly Disposal and Repurposing
When disposing of your old laminate flooring, consider eco-friendly options. Here are a few ideas for responsibly disposing of and repurposing your old laminate:
- Donate or sell: If your laminate flooring is still in good condition, consider donating it to a local charity or selling it to someone who can give it a new life.
- Repurpose: Get creative with your old laminate by using it for DIY projects, such as wall art, picture frames, or even a doghouse.
- Recycle: If your local recycling center accepts laminate flooring, use it to keep the material out of landfills.
By choosing eco-friendly disposal and repurposing options, you can help reduce waste and minimize your environmental impact.
Choosing the Right New Flooring Type
Popular Flooring Types
When it comes to replacing your old laminate flooring, you have a wide range of options. Here are some of the most popular flooring types:
- Hardwood: Hardwood flooring is a timeless choice that adds warmth and elegance to any space. It’s durable and can last for decades with proper care, but it can be more expensive than other options.
- Vinyl plank: Vinyl plank flooring is a budget-friendly option that mimics the look of hardwood or stone. It’s water-resistant, easy to Install, and comes in a wide range of styles and colors.
- Tile: Tile flooring is durable and versatile, suitable for any room of your home. It’s easy to clean and maintain, but it can be cold and hard underfoot.
- Carpet: Carpet flooring is a cozy and comfortable option that’s perfect for bedrooms and living rooms. It’s available in a wide range of colors and textures, but it can be more challenging to clean and maintain than other options.
- Engineered wood: Engineered wood flooring is a more affordable alternative to solid hardwood. It’s made with a thin layer of real wood bonded to a plywood base, making it more stable and moisture-resistant.
Pros and Cons of Each Type
Each flooring type has its own set of pros and cons, so it’s essential to consider your specific needs and preferences when making a decision. Here’s a quick overview of the pros and cons of each type:
Flooring Type: Pros and Cons
Hardwood is Durable, timeless, and adds value to your home. Expensive, prone to water damage, and requires regular maintenance.
Vinyl plank: Budget-friendly, water-resistant, easy to Install. Not as durable as hardwood, it can be prone to scratching.
Tile: Durable, easy to clean, versatile. Cold and hard underfoot, it can be slippery when wet.
Carpet is Cozy and comfortable, available in a wide range of colors and textures. It can be challenging to clean and maintain, and it may harbor allergens.
Engineered wood is more affordable than hardwood, stable, and moisture-resistant. Not as durable as solid hardwood, it may not be suitable for high-moisture areas.
Recommendations Based on Room Type and Needs
When choosing new flooring, it’s essential to consider the specific needs of each room in your home. Here are some recommendations based on room type and household needs:
- Kitchen and bathroom: For these high-moisture areas, consider water-resistant flooring options such as vinyl plank or tile.
- Living room and dining room: In these high-traffic areas, durable options like hardwood or engineered wood are a good choice.
- Bedrooms: For a cozy, comfortable feel, consider carpeting.
- Basement: If you’re finishing your basement, consider water-resistant options like vinyl plank or engineered wood to protect against moisture.
Choosing New Flooring with Old Laminate Removal in Mind
When selecting your new flooring, keep in mind the context of your old laminate removal. If you’re looking to minimize the work involved in the transition, consider a flooring type that can be installed directly over your existing subfloor. Vinyl plank and engineered wood are both good options for this, as they can often be installed without additional underlayment.
Professional Installation vs. DIY Flooring Installation
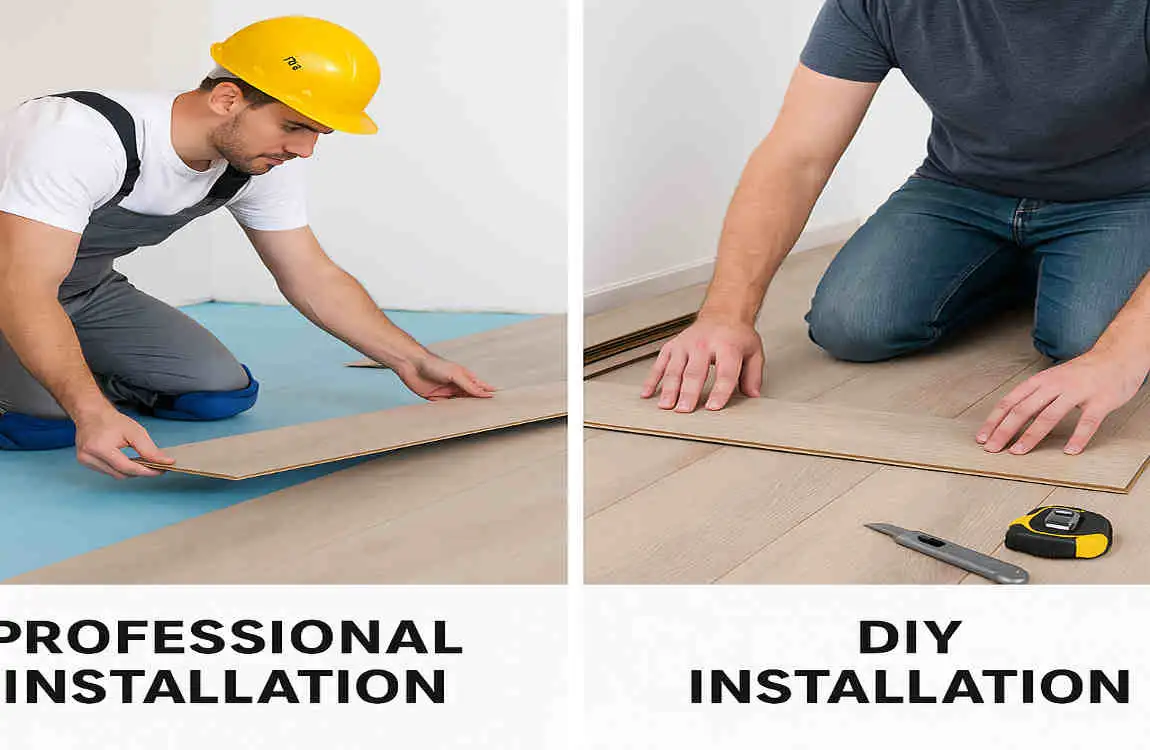
Benefits of Hiring Professionals
Hiring professional flooring installers can offer several benefits, including:
- Expertise: Professional installers have the knowledge and experience to ensure your new flooring is installed correctly and efficiently.
- Time savings: Hiring professionals can save you time and effort, as they can typically complete the job faster than a DIY project.
- Warranty and guarantees: Many professional flooring companies offer warranties and guarantees on their work, giving you peace of mind and protection against potential issues.
Cost Savings and Challenges of DIY
While hiring professionals can be convenient, a DIY flooring installation can offer cost savings and a sense of accomplishment. However, there are some challenges to consider:
- Tools and skills: DIY flooring installation requires specialized tools and skills, which can be a learning curve for beginners.
- Time and effort: A DIY project can take longer and require more effort than hiring professionals, especially if you’re new to flooring installation.
- Potential for mistakes: Without proper knowledge and experience, DIY installations can be prone to errors, which can lead to costly repairs down the line.
Tools and Skills for DIY Installation
If you decide to take on a DIY flooring installation, you’ll need to gather the necessary tools and develop the required skills. Some essential tools for DIY flooring installation include:
- Measuring tape
- Utility knife
- Hammer
- Pry bar
- Flooring cutter or saw.
- Tapping block
- Spacers
In terms of skills, you’ll need to learn to measure and cut your flooring properly, and to Install it according to the manufacturer’s instructions. Online tutorials and how-to guides can be helpful resources for learning these skills.
Planning a Smooth Transition
To ensure a smooth transition from your old laminate flooring to your new flooring, it’s essential to plan. Here are a few tips for a seamless transition:
- Prepare the subfloor: Before installing your new flooring, make sure the subfloor is clean, level, and free of debris and old adhesive.
- Acclimate the flooring: Allow your new flooring to acclimate to the room’s temperature and humidity for at least 48 hours before installation.
- Follow the manufacturer’s instructions: Each flooring type has specific installation requirements, so be sure to follow them carefully.
- Plan for transitions: If you’re installing different kinds of flooring in adjacent rooms, plan for smooth transitions between them. You may need to use transition strips or other accessories to create a seamless look.
Maintaining Your New Floors for Longevity
Simple Maintenance Tips
To keep your new floors looking their best and lasting for years to come, follow these simple maintenance tips:
- Sweep or vacuum regularly: Sweep or vacuum your floors regularly to remove dirt, dust, and debris that can scratch or dull the surface.
- Clean up spills immediately: If you spill something on your floor, clean it up as soon as possible to prevent staining or damage.
- Use the right cleaning products: Use cleaning products specifically designed for your flooring type to avoid damaging the surface. Avoid using harsh chemicals or abrasive cleaners.
- Place mats and rugs: Use them in high-traffic areas and at entryways to help protect your floors from dirt and moisture.
Extending the Life and Beauty of Your Investment
By following proper maintenance techniques, you can extend the life and beauty of your new flooring investment. Regular cleaning and care can help prevent scratches, stains, and other damage, keeping your floors looking like new for years to come.
Recommended Products and Cleaning Techniques
For specific recommendations on cleaning products and techniques, consult the manufacturer’s guidelines for your flooring type. Some general recommendations include:
- Hardwood: Use a hardwood floor cleaner and a microfiber mop to clean your floors gently. Avoid using too much water, as this can damage the wood.
- Vinyl plank: Use a vinyl floor cleaner and a damp mop to clean your floors. Avoid using abrasive cleaners or scrub brushes, as these can scratch the surface.
- Tile: Use a tile and grout cleaner and a soft-bristle brush to clean your floors. For stubborn stains, you may need to use a more heavy-duty cleaner, but be sure to test it in an inconspicuous area first.
- Carpet: Vacuum your carpets regularly to remove dirt and debris. For deeper cleaning, use a carpet cleaner or hire a professional carpet cleaning service.
- Engineered wood: Use an engineered wood floor cleaner and a microfiber mop to clean your floors gently. Avoid using too much water, as this can damage the wood.