
Imagine this: You walk into your kitchen or living room, and instead of the firm, smooth surface you expect, you hear a squelch. You look down and see a pool of water spreading across your beautiful floors. Maybe it was a sudden pipe burst, a leaking dishwasher, or even a pet accident that went unnoticed for too long. Your heart sinks because you know laminate and water usually don’t mix.
Don’t panic! While laminate flooring is notorious for being moisture-sensitive, a spill doesn’t have to mean a total f. However, you do need to act fast. The core of most laminate planks is made of wood fibers that act like a sponge.
What Is Laminate Flooring?
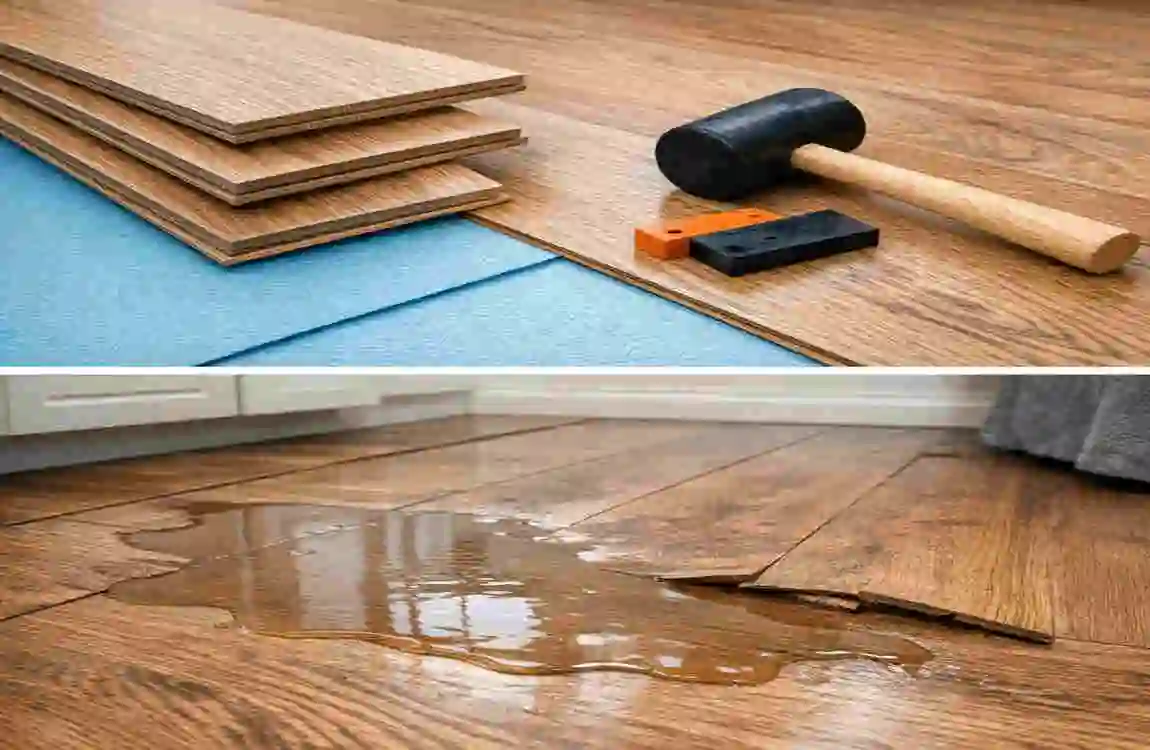
Laminate flooring is a marvel of engineering, but it has a “weak heart.” It is typically composed of several layers: a wear layer on top, a photographic layer that looks like wood, and a High-Density Fiberboard (HDF) core. This HDF core is the part that causes trouble. Unlike luxury vinyl planks, which are often 100% waterproof, standard laminate is essentially compressed wood.
There are two main types you might have in your home:
- Standard Laminate: Highly susceptible to moisture.
- Water-Resistant Laminate: Often features waxed edges or special coatings to slow down water penetration, but even these aren’t “flood-proof” usually sneaks underneath through the click-lock seams or the expansion gaps left near your walls Once the water gets under the planks, it gets trapped between the laminate and the underlayment, creating a humid “sandwich” that won’t dry on its own.
Signs of Water Damage
How do you know if the water has actually done damage? Sometimes the surface looks fine, but the trouble is brewing underneath. Look for these tell-tale signs:
- Cupping or Warping: The edges of the planks start to lift higher than the center.
- Buckling: The planks actually lift off the subfloor because they have expanded so much that they have nowhere else to go.
- Spongy Feel: When you walk on the floor, it feels soft or “bouncy.” Odors: A musty, earthy smell is a major red flag for mold growth. Help you decide how fast you need to move, check out this quick reference table:
SignCauseUrgency Level
Buckling edges , Moisture expansion in the HDF core, High (Act within 24 hrs)
Musty/Moldy smell, Subfloor rot or active mold growth, Critical (Immediate action)
Surface bubbling, Core delamination (layers separating). Replace now (Irreversible)
Visible pooling, active leak, or major spill. High (Stop source first)
Tools and Materials Needed
You don’t necessarily need to hire a professional crew with thousands of dollars of equipment to handle a small to medium leak. You can often find what you need at a local hardware store or even in your own garage.
The Essential DIY Drying Kit:
- Wet-Dry Vacuum: This is your best friend for sucking up standing water.
- High-Volume Fans: Standard box fans work, but industrial “air movers” are much better.
- Dehumidifier: Essential for pulling moisture out of the air and the wood.
- Moisture Meter: This tool tells you exactly how wet the floor is, so you don’t have to guess.
- Pry Bar and Hammer: For gently removing baseboards and planks.
- Microfiber Towels: For sipping up surface moisture.
- Mold Killer/Inhibitor: To treat the subfloor before putting the planks back.
Budget Breakdown: If you are doing this yourself, a basic kit (towels, fans, and a rented dehumidifier) might cost you under $100. If you decide to buy professional-grade air movers and a high-end moisture meter, you could be looking at $300+.
Step-by-Step Guide: How to Dry Laminate Flooring
Now, let’s get to work. Follow these steps to give your flooring the best chance of Survival.
Stop the Water Source
You’d be surprised how many people start mopping while the pipe is still dripping! Identify the source of the water. Is it a burst pipe under the sink? A leaking refrigerator line? Or did a window get left open during a storm?
Shut off the main water valve if necessary. Once the flow has stopped, use your wet-dry vac or heavy-duty towels to sop up every bit of standing water on the surface—the less water that sits on the seams, the less that will soak into the core.
Assess the Extent of the Damage
You need to know how far the water traveled. Water is sneaky; it can run under the planks and travel several feet away from the original spill.
Gently lift your baseboards or shoe molding near the affected area. This allows you to see the edges of the laminate. Use a moisture meter to check the planks and the subfloor. Ideally, your subfloor should have a moisture reading of less than 15% before you even think about reinstalling the floor. If flooding is widespread (like an entire basement) or you see black mold, it’s time to stop and call the pros.
Remove and Dry the Planks
If water has gone under the floor, you must take the planks up. Drying from the top down rarely works for laminate because the plastic wear layer acts as a vapor barrier, trapping water beneath it.
Start at the wall or a doorway. Use your pry bar to carefully lift the first plank. Most modern laminates use a click-lock system. Angle the planks up to unlock them without breaking the delicate “tongue and groove” edges.
Dry the Subfloor Thoroughly
This is the most critical step in drying laminate flooring. If the subfloor (the wood or concrete under your laminate) stays wet, it will rot, or mold will grow, and your new floor will fail within months.
Set up a combination of fans and a dehumidifier. You want to create a “wind tunnel” effect across the floor. Aim for at least 72 hours of continuous airflow.
- Cross-ventilate: If the weather is dry outside, open windows.
- Elevate: If you have a crawlspace or basement below, check whether that area needs drying as well.
- Monitor: Check the moisture levels daily with your meter. Don’t rush this!
Reinstall and Seal
Once your moisture meter confirms the subfloor is dry (usually under 12-15%) and your planks haven’t warped into “U” shapes, you can put them back.
If some planks are swollen or the edges are “peeling,” don’t try to save them. Replace them with spare planks you kept from the original installation. As you reinstall, you might want to apply a laminate seam sealant to joints in high-risk areas, such as kitchens, to provide a bit of extra protection for the future.
Post-Drying Inspection
After the floor is back down, walk over it. Do you hear new squeaks? Does it feel “crunchy”? This could mean there is still debris or slight warping. Keep an eye (and nose) on the area for the next 1-2 weeks to ensure no mold odors develop.
Common Mistakes to Avoid
When homeowners try to figure out how to dry laminate flooring, they often make a few classic errors that end up costing them more in the long run.
- Ignoring the Source: If you dry the floor but don’t fix the slow leak behind the dishwasher, you’ll be doing this all over again next week. Rushing the Reinstall: It is tempting to put the room back together after 24 hours because you want your house back. Don’t. Trapped moisture is the #1 cause of mold.
- Using Heat Guns: You might think a heat gun or hair dryer will speed things up. In reality, extreme heat can melt the photographic layer or cause the glue in the HDF core to fail. Stick to fans and dehumidifiers.
- Skipping Ventilation: If you run fans in a sealed room without a dehumidifier, you’re just moving wet air around. You need to remove the moisture from the environment—Prevention Tips for Your Laminate Floors.
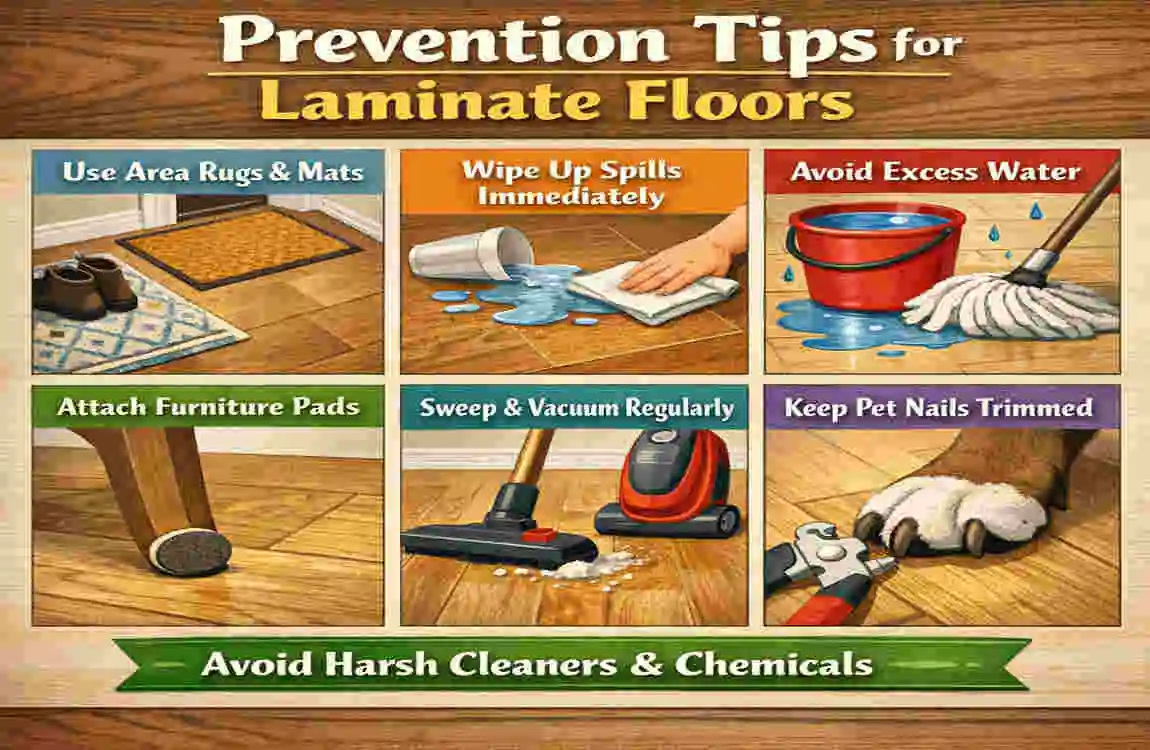
The best way to handle water damage is to prevent it from happening in the first place. While you can’t predict a pipe bursting, you can minimize the risk.
- Use Mats in Wet Zones: Place high-quality, waterproof mats in front of the kitchen sink, refrigerator ice maker, and entryways.
- Prompt Cleanup: Make it a rule in your house—if you spill a glass of water, it gets wiped up immediately.
- Control Humidity: Keep your home’s humidity between 40% and 60%. If it’s too humid, the laminate can absorb moisture from the air, causing it to expand. Upgrade: If you are replacing a floor in a bathroom or laundry room, consider waterproof laminate or luxury vinyl plank (LVP) instead of standard laminate.
When to Call Professionals
Sometimes, a DIY approach isn’t enough. You should call a restoration professional if:
- The water is “black” (sewage) or “gray” (dishwasher/washing machine waste).
- The water has soaked into the drywall or structural wall studs.
- You see visible mold colonies spreading.
- The affected area is larger than a single room.
Professional drying typically costs between $2 and $5 per square foot. In contrast, a full replacement can easily exceed $10 per square foot when labor and materials are factored in. FAQs.
How long does it take to dry laminate flooring? Typically, it takes 3 to 7 days to dry the planks thoroughly and the subfloor. This depends on the amount of water and the efficiency of your dehumidifier. Can laminate be saved after water damage?** Yes, but only if you act within the first 24-48 hours and the water hasn’t caused the layers of the plank to separate (delamination).
Is water under the laminate covered by insurance? Often, yes. If the damage was “sudden and accidental” (like a pipe burst), your homeowners’ insurance may cover the drying and replacement costs. Slow leaks or “seepage” are usually not covered.
Can I dry the floor without taking it up? Only for very minor surface spills. If water has reached the subfloor, the planks must be removed to prevent mold. Conclusion.
Dealing with water under your floors is stressful, but knowing how to dry laminate flooring properly can save you thousands of dollars. The key is speed and thoroughness. Don’t just dry the surface; get underneath, pull up those planks, and make sure that subfloor is bone-dry before you even think about finishing the job.
By following this guide, you are taking the best steps possible to protect your home’s value and your family’s health. Have you ever dealt with a flooring flood? Share your story or tips in the comments below! If you’re feeling overwhelmed, don’t hesitate to reach out to a local floor restoration expert to ensure the job is done right.
Frequently Asked Questions: How to Dry Laminate Flooring
If you are dealing with a sudden spill or a leak, you probably have a few urgent questions. Here is a quick guide to the most common concerns regarding how to dry laminate flooring effectively.
What is the first thing I should do if my laminate floor gets wet? You must act fast because time is your biggest enemy when dealing with moisture . Immediately use absorbent towels, cloths, or a wet-dry vacuum to remove every bit of standing water from the surface . The longer the water sits, the more likely it is to seep into the seams and cause warping or buckling .
Can I dry water under laminate without taking the floor up? In most cases, you cannot get the area completely dry without removing the floor boards . Laminate is usually installed as a “floating floor,” which makes it easier to disassemble without professional help . If you leave water trapped underneath, you risk rotten or moldy subfloors, which can lead to expensive abatement costs later .
How do I dry the planks and the subfloor once they are exposed? The best method is to lay the removed boards flat to dry in a separate, dry area . To speed up the process for the subfloor, position high-volume fans and dehumidifiers strategically to move air across the wet surface and pull moisture out of the material .
How can I tell if the floor is actually dry? Don’t guess! Use a moisture meter to check the levels in both the laminate planks and the subfloor . This tool helps you determine if the area is safe for reinstallation or if you need to continue running your fans to prevent mold growth .
What is the best way to clean laminate to avoid water damage? To keep your floors safe during routine maintenance, avoid excessive mopping with a soaking wet mop . Instead, use a damp mop and always dry the floor immediately afterward to ensure no moisture lingers in the cracks . For extra peace of mind, you can also look into water-resistant sealants for added protection .