
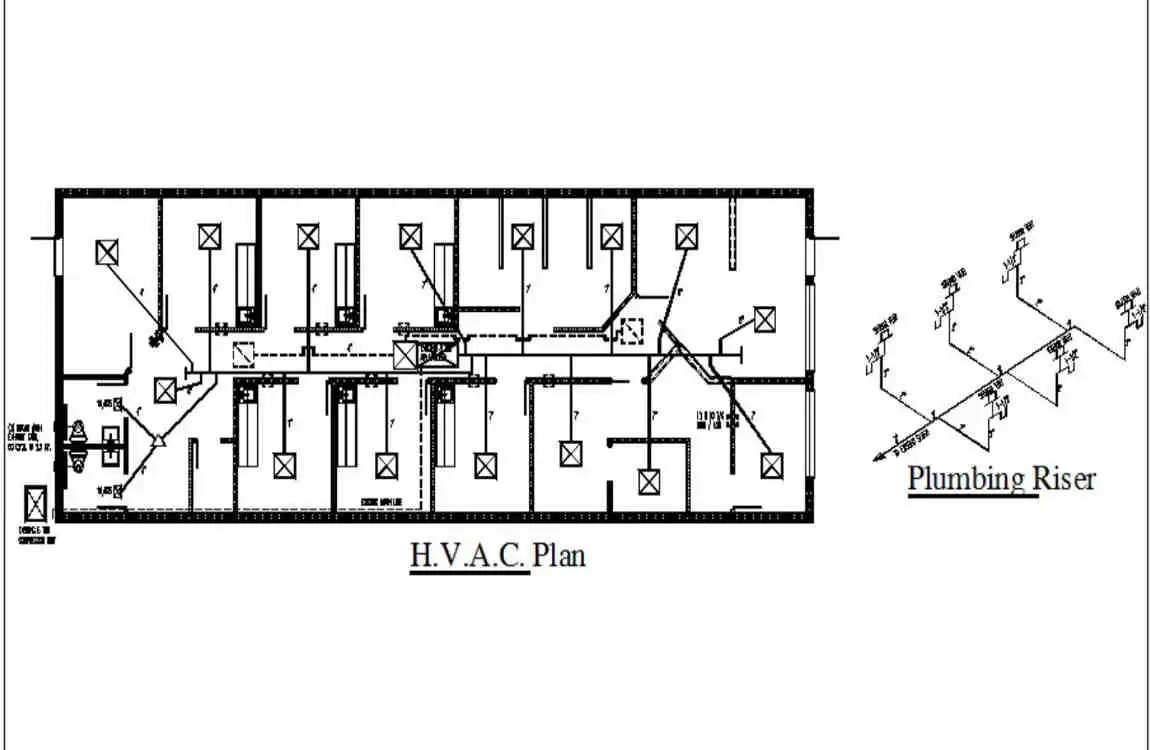
A riser diagram in home plumbing is a simplified vertical schematic that shows how the plumbing pipes and systems, such as water supply and waste lines, run between floors in a building. It visually represents the layout of vertical pipes called risers that carry water or waste to and from fixtures on multiple levels, helping to clarify the plumbing system’s structure and connections in an easy-to-understand way. This diagram is crucial for planning, installation, and maintenance, making it easier to identify pipe routes, sizes, and connections without complex scaling or 3D views.
What Is a Riser Diagram in Home Plumbing?
A riser diagram is a simplified, vertical representation of your home’s plumbing system. It shows how pipes run vertically through different floors of a building, connecting water supply lines and drainage systems to various fixtures and appliances.
The Primary Purpose
The primary purpose of a riser diagram is to provide a clear, easy-to-follow visual guide of how plumbing flows through multiple levels. Unlike detailed construction drawings that show exact measurements and precise locations, riser diagrams are more conceptual in nature. They help you understand the big picture without getting lost in technical details.
Components of a Riser Diagram
To truly understand a riser diagram, you need to know what you’re looking at. Let’s break down the key components that make up these helpful plumbing blueprints.
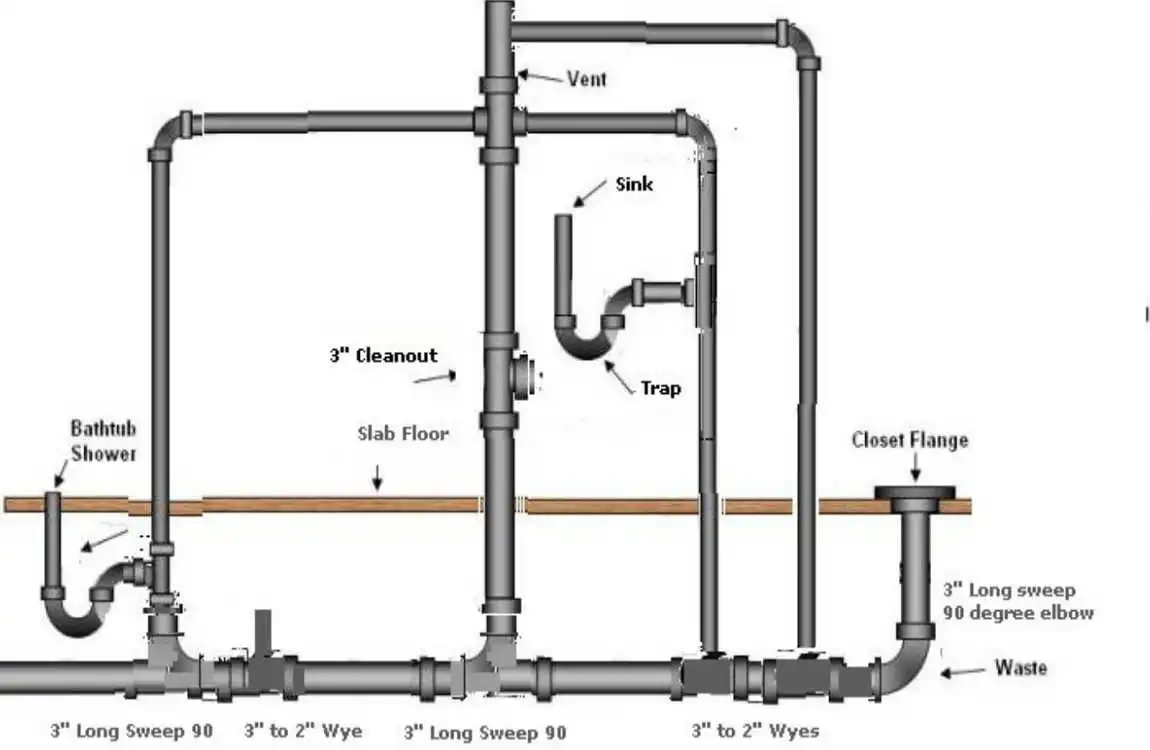
Valves, Traps, and Vents
These critical components ensure your plumbing system works safely and efficiently:
Valves control water flow and allow you to shut off water to specific areas for repairs. They’re shown as small symbols along the pipelines.
Traps are U-shaped pipe sections under sinks and other fixtures that hold water to prevent sewer gases from entering your home. They appear as curved sections in the diagram.
Vents allow air into the drainage system, enabling water to flow freely and preventing vacuum conditions. These are shown as pipes extending upward, often through the roof.
How These Components Work Together
All these elements form an integrated system. Supply risers bring pressurized water up from the main line. Branch pipes distribute it to fixtures on each floor. After use, wastewater flows through traps into drain risers, which carry it down to the sewer or septic system. Meanwhile, vents ensure that proper air pressure is maintained throughout the house system.
Understanding how these components interact helps you see your plumbing as a cohesive whole rather than a confusing tangle of pipes.
How to Read a Riser Diagram

Reading a riser diagram might seem intimidating at first, but it’s actually relatively straightforward once you know what to look for. Let’s walk through the process step by step.
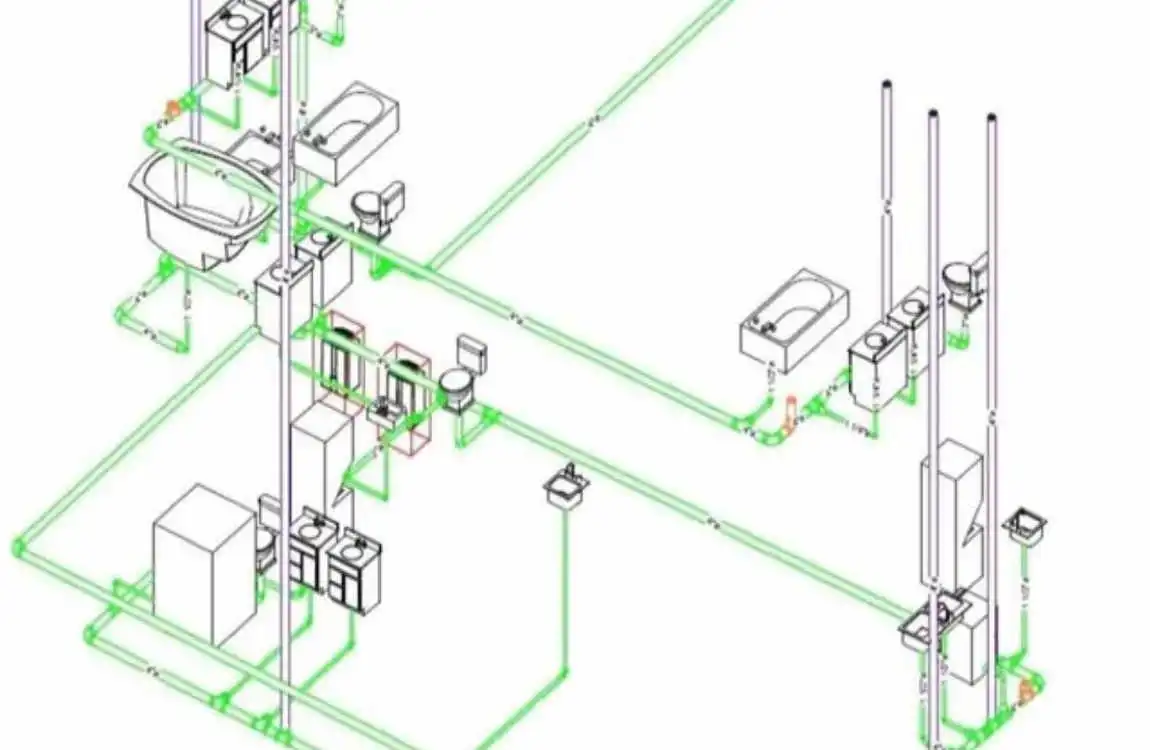
Identify the Main Vertical Lines
Start by locating the main vertical pipes running through the center of the diagram. These represent your primary risers. You’ll typically see separate lines for water supply (often shown in one color or line style) and drainage (shown differently).
The diagram typically shows multiple floors stacked vertically, allowing you to see how pipes connect from the basement to the roof.
Locate Fixtures on Each Floor
Find the symbols representing fixtures branching off from the main risers. Each floor will have its own set of connections. Notice which fixtures share risers and which have dedicated lines.
For example, all bathrooms on different floors connect to the same vertical drain stack, a common feature in efficient plumbing design.
Identify Key Components
Look for the valves, traps, and vents we discussed earlier. Pay attention to the location of shut-off valves—this information is crucial if you ever need to make repairs.
Notice where vent pipes extend upward to ensure proper drainage throughout the house system.
Understand the Connections
See how branch lines connect to the main risers. These connections illustrate the relationships between different parts of the system. Understanding these connections helps you trace water flow and identify potential problem areas.
Tips for Beginners
Start simple: Don’t try to understand everything at once. Focus on one floor or one type of pipe (supply or drainage) at a time.
Use the legend: Most diagrams include a legend or key explaining what each symbol means. Keep this handy as you study the diagram.
Compare to your home: If possible, walk through your house and try to match the fixtures and pipe locations in the diagram with the actual fixtures and pipe locations.
Ask questions: If something doesn’t make sense, don’t hesitate to ask a plumber or experienced DIYer for clarification.
With practice, reading riser diagrams becomes second nature, and you’ll be able to quickly assess your home’s plumbing system at a glance.
Common Mistakes to Avoid When Using or Creating Riser Diagrams
Even with the best intentions, it’s easy to make mistakes when working with riser diagrams. Being aware of common pitfalls helps you avoid costly errors.
Misreading Symbols or Flow Directions
One of the most frequent mistakes is confusing symbols or misinterpreting the direction of water flow. Always check the diagram’s legend and pay close attention to directional arrows.
Remember: supply lines typically flow upward and outward, while drain lines flow downward. Getting this backward can lead to serious misunderstandings about how your system works.
Ignoring Building Codes
Building codes exist for good reasons—they ensure safety and proper function. When creating or modifying plumbing based on a riser diagram, always verify that your plans comply with local codes.
Standard code requirements include:
- Minimum pipe sizes for different fixtures
- Proper venting for all drains
- Required trap configurations
- Appropriate materials for different applications
Failing to follow codes can result in failed inspections, costly corrections, and even hazardous conditions, such as sewer gas infiltration.
Overlooking Venting or Drainage Details
Proper venting is crucial for drainage systems to work correctly, yet it’s often overlooked in amateur diagrams. Without adequate venting, drains can gurgle, flow slowly, or create vacuum conditions that pull water out of traps.
Similarly, drainage slope matters tremendously. While this isn’t always shown on simplified riser diagrams, remember that horizontal drain pipes must slope downward at the correct angle (typically 1/4 inch per foot) to function correctly.
Not Updating Diagrams After Changes
Your home’s plumbing may change over time through renovations or repairs. Failing to update your riser diagram means it no longer accurately represents your system, which can cause confusion during future projects.
Keep your diagrams up to date by noting any modifications, additions, or repairs that occur.