
Hey there! Have you ever wondered which type of paint for the bathroom ceiling is best? Well, you’re not alone. Bathrooms can be challenging environments for paint, with moisture, mold, and peeling common issues. That’s why it’s crucial to choose the right paint for your bathroom ceiling.
Understanding Bathroom Ceiling Conditions
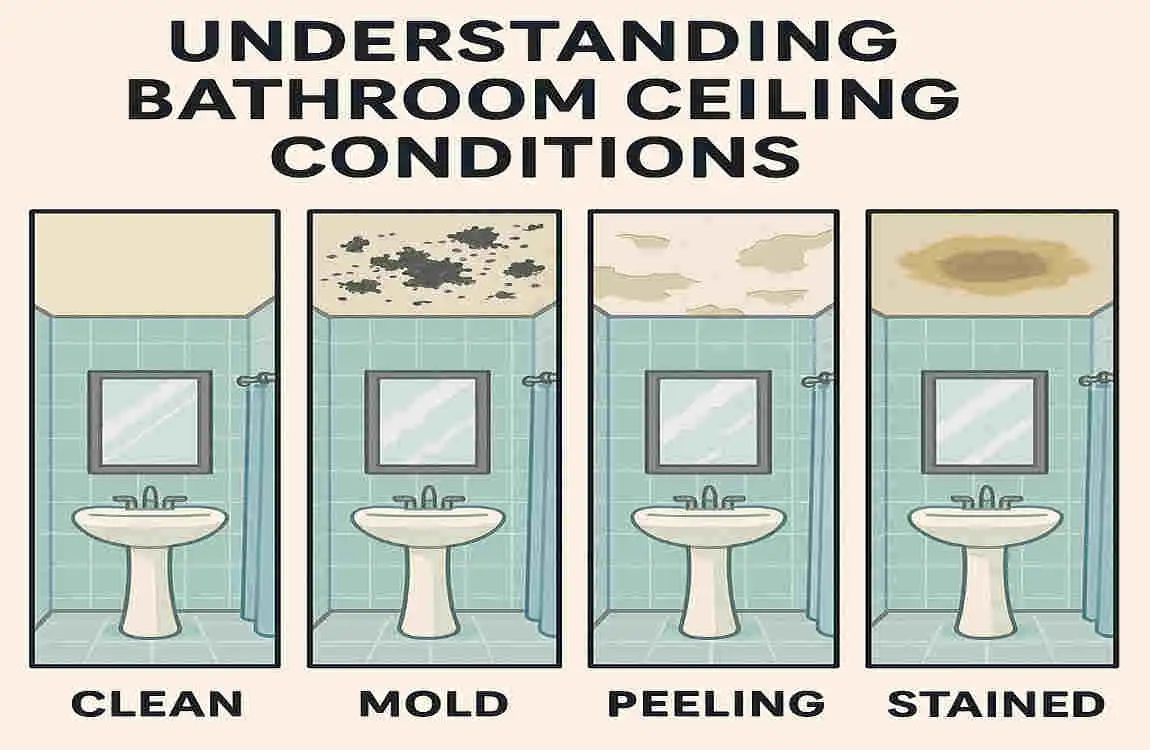
Why Bathroom Ceilings Are Prone to Moisture and Mold
Bathrooms are notorious for their high humidity levels. Every time you take a shower or bath, steam rises and condenses on the ceiling. This constant exposure to moisture creates the perfect breeding ground for mold and mildew.
Common Problems Caused by Using the Wrong Paint Types
If you use the wrong type of paint on your bathroom ceiling, you might face serious issues. Regular interior paint can quickly start to peel, bubble, or grow mold in this damp environment. Not only does this look unsightly, but it can also lead to health hazards and structural damage.
The Role of Ventilation and Humidity Control in Paint Performance
Proper ventilation is key to keeping your bathroom ceiling paint in top shape. Using exhaust fans and opening windows can help reduce the amount of moisture in the air. This, in turn, will help your paint last longer and perform better.
Key Features to Look for in Bathroom Ceiling Paint
Moisture Resistance: What It Means and Why It’s Critical
When it comes to bathroom ceiling paint, moisture resistance is the name of the game. This means that the paint can withstand the constant exposure to steam and humidity without peeling or bubbling. It’s a must-have feature for any bathroom ceiling paint.
Mold and Mildew Resistance to Prevent Health Hazards and Damage
Mold and mildew are not just unsightly; they can also pose serious health risks. That’s why it’s essential to choose a paint with mold- and mildew-resistant additives. These special ingredients help prevent the growth of these harmful substances on your bathroom ceiling.
Durability and Ease of Cleaning for Bathroom Environments
Bathroom ceilings take a beating from steam, humidity, and cleaning products. That’s why you need a paint that’s tough enough to handle it all. Look for a paint that’s durable and easy to clean, so you can keep your bathroom ceiling looking fresh and new.
Waterproof vs. Water-Resistant Paints: Clarify the Difference
You might have heard the terms “waterproof” and “water-resistant” thrown around when it comes to paint. But what’s the difference? Waterproof paint creates a barrier that prevents water from penetrating the surface. In contrast, water-resistant paint can withstand some exposure to moisture but may eventually succumb to heavy or prolonged contact with water. For bathroom ceilings, water-resistant paint is usually sufficient.
Low VOC and Eco-Friendly Considerations for Indoor Air Quality
Did you know that some paints can release harmful chemicals into the air? These are called volatile organic compounds (VOCs), and they can affect indoor air quality and your health. That’s why it’s a good idea to choose a low-VOC or eco-friendly paint for your bathroom ceiling. Not only will you be protecting your ceiling, but you’ll also be creating a healthier environment for you and your family.
What Type of Paint for Bathroom Ceiling? Detailed Breakdown
Semi-Gloss Paint: Moisture Resistance, Shine, and Easy Cleaning
Semi-gloss paint is a popular choice for bathroom ceilings, and for good reason. This type of paint offers excellent moisture resistance, making it perfect for humid environments. It also has a shiny finish that’s easy to clean and helps to brighten up the space.
Satin Finish Paint: Balance of Sheen and Durability
If you’re looking for a paint that strikes a balance between sheen and durability, satin finish paint might be the way to go. This type of paint has a soft, velvety appearance that’s less shiny than semi-gloss but still easy to clean. It’s also durable enough to withstand the rigors of a bathroom ceiling.
Mold-Resistant Paint: Additives and Chemicals Used
Mold-resistant paint is formulated to prevent mold and mildew growth on your bathroom ceiling. This type of paint contains special additives and chemicals that create an inhospitable environment for these harmful substances. If you live in a particularly humid climate or have had mold issues in the past, mold-resistant paint is a great option.
Elastomeric Paint: Flexibility and Waterproofing Benefits
Elastomeric paint is a special type of paint that’s designed to be flexible and waterproof. This makes it an excellent choice for bathroom ceilings, as it can expand and contract with temperature changes and resist moisture. Elastomeric paint is typically more expensive than other types, but it can be worth the investment for its superior performance.
Specialty Bathroom Ceiling Paints: Formulated for High Humidity
There are also specialty paints on the market that are specifically formulated for bathroom ceilings. These paints are designed to withstand the high humidity and moisture levels found in bathrooms. They often combine features such as moisture and mold resistance and durability. If you want the best of the best for your bathroom ceiling, a specialty paint might be the way to go.
Top-Rated Moisture-Resistant and Mold-Proof Paint Brands
When choosing a paint for your bathroom ceiling, go with a brand you can trust. Here are some top-rated options that are known for their moisture resistance and mold-proof properties:
- Benjamin Moore Aura Bath & Spa: This paint is specifically formulated for bathrooms and offers excellent moisture resistance and mold protection. It’s available in a variety of finishes, including semi-gloss and satin.
- Sherwin-Williams Bath Paint: Another trusted brand in the paint world, its Bath Paint is designed to withstand the rigors of a bathroom environment. It’s mold and mildew-resistant and available in a range of colors.
- Behr Premium Plus Ultra: Behr’s Premium Plus Ultra paint is an excellent choice for bathroom ceilings, thanks to its moisture resistance and durability. It’s also available in a variety of finishes, including semi-gloss and satin.
Here’s a quick comparison of these top-rated brands:
Brand Key Features Price Range
Benjamin Moore Aura Bath & Spa: Moisture resistance, mold protection, available in semi-gloss and satin finishes; $50- $70 per gallon.
Sherwin-Williams Bath Paint , Mold and mildew resistance, available in a range of colors $40-$60 per gallon
Behr Premium Plus Ultra: Moisture resistance, durability, available in semi-gloss and satin finishes. $30-$50 per gallon.
Of course, the best paint for your bathroom ceiling will depend on your specific needs and preferences. Be sure to read customer reviews and talk to experts at your local paint store to find the perfect option for you.
How to Prepare Your Bathroom Ceiling Before Painting
Before you can start painting your bathroom ceiling, you need to make sure it’s properly prepared. Here are the steps you should follow:
Steps for Cleaning and Preparing the Surface
First things first, you need to clean your bathroom ceiling. Use a mixture of warm water and mild detergent to remove any dirt, grime, or mold. Be sure to scrub the surface thoroughly and rinse with clean water.
If you have any mold or mildew, you’ll need to treat it with a mold-killing solution before painting. Follow the manufacturer’s instructions carefully and allow the solution to fully dry before proceeding.
Priming: Why It’s Necessary and Choosing the Right Primer for Bathrooms
Once your ceiling is clean and dry, it’s time to apply a primer. Primer helps to create a smooth, even surface for painting and can also help to prevent mold and mildew growth. When choosing a primer for your bathroom ceiling, look for one that’s designed explicitly for high-humidity areas.
Repairing Cracks, Peeling, and Water Damage Before Painting
If your bathroom ceiling has cracks, peeling paint, or water damage, you’ll need to repair them before painting. Use a putty knife to scrape away any loose paint or debris, then fill the damaged areas with a patching compound. Allow the compound to dry completely before sanding it smooth.
Step-by-Step Guide to Painting a Bathroom Ceiling
Now that your bathroom ceiling is prepared correctly, it’s time to start painting. Here’s a step-by-step guide to help you get the job done right:
Tools and Materials Needed
Before you begin, make sure you have all the necessary tools and materials on hand. You’ll need:
- Paint roller and extension pole
- Paint tray
- High-quality paintbrush
- Painter’s tape
- Drop cloths
- Ladder or step stool
- Your chosen bathroom ceiling paint
Technique Tips for Even Application and Minimizing Drips in Humid Spaces
When painting your bathroom ceiling, it’s essential to use the proper technique to ensure an even application and minimize drips. Start by applying painter’s tape around the edges of the ceiling to protect the walls. Then, use a high-quality paintbrush to “cut in” along the edges and corners.
Next, use a paint roller attached to an extension pole to apply the paint to the rest of the ceiling. Work in small sections, using a “W” or “M” pattern to ensure even coverage. Be sure to maintain a wet edge as you work to avoid lap marks.
In humid environments, it’s essential to work quickly and efficiently to minimize the risk of drips. If you do notice any drips or runs, use a paintbrush to smooth them out before they dry.
Recommended Drying Times and Ventilation Practices
After you’ve finished painting your bathroom ceiling, it’s essential to let the paint dry properly. Most bathroom ceiling paints will be dry to the touch within 1-2 hours, but it’s best to wait at least 24 hours before using the bathroom again.
During the drying process, keep the bathroom well-ventilated. Open windows and use exhaust fans to help remove any fumes and moisture from the air. This will allow the paint to dry faster and more evenly.
How Many Coats to Apply for Maximum Protection
For maximum protection and coverage, most bathroom ceiling paints will require two coats. Be sure to allow the first coat to dry completely before applying the second coat. Use the same technique as before, working in small sections and maintaining a wet edge.
Maintenance Tips to Extend the Life of Bathroom Ceiling Paint
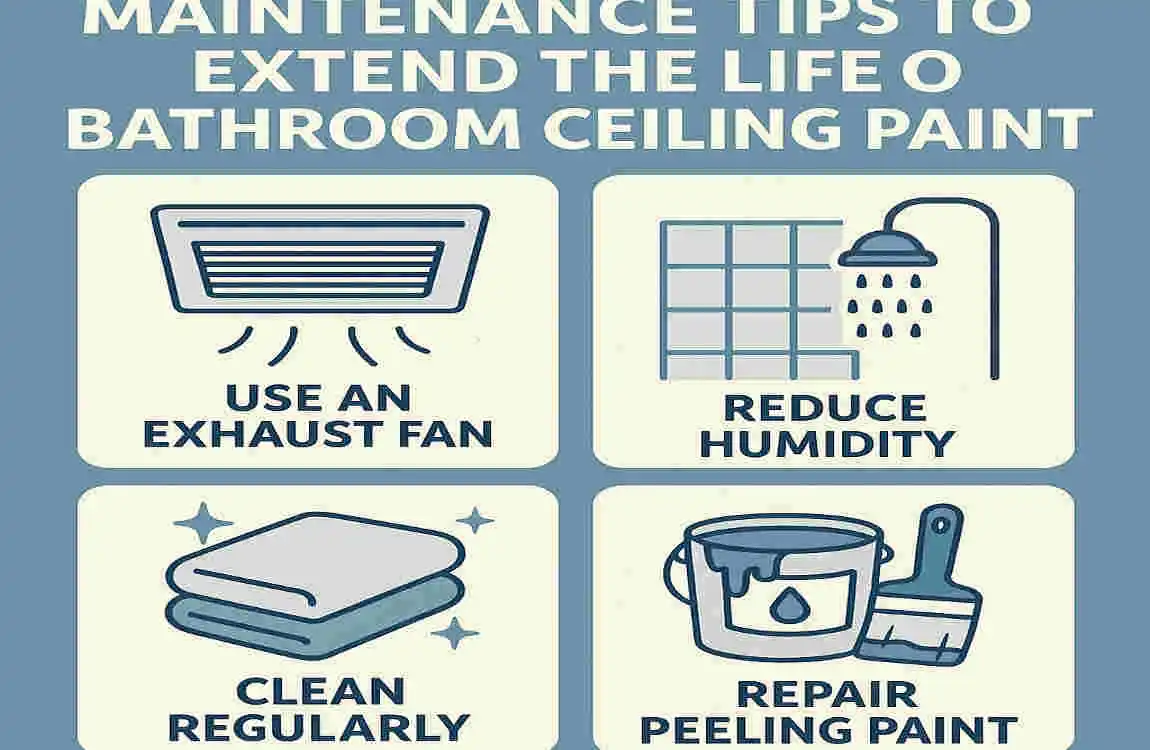
Once you’ve painted your bathroom ceiling, you’ll want to keep it looking fresh and new for as long as possible. Here are some maintenance tips to help extend the life of your paint:
Routine Cleaning Techniques Without Damaging Paint
To keep your bathroom ceiling clean, use a soft, damp cloth or sponge to wipe away any dirt or grime gently. Avoid using harsh chemicals or abrasive cleaners, as these can damage the paint. If you notice any mold or mildew, use a mild solution of water and vinegar to spot-treat the affected areas.
Managing Humidity and Moisture to Protect Paint Quality
One of the biggest threats to bathroom ceiling paint is humidity and moisture. To protect your paint, use exhaust fans and open windows to keep the bathroom well-ventilated. Consider using a dehumidifier to help control indoor humidity.
When and How to Touch Up Paint to Avoid Mold and Peeling
Over time, you may notice that your bathroom ceiling paint starts to show signs of wear and tear. If you notice any peeling, cracking, or mold growth, it’s essential to touch up the paint as soon as possible to prevent further damage.
To touch up your bathroom ceiling paint, start by cleaning the affected area with a mild detergent and water. Once the area is dry, use a small paintbrush to apply a thin layer of paint. Be sure to use the same type and color of paint that you used initially, and allow the touch-up to dry completely before using the bathroom again.
Common Mistakes to Avoid When Painting Bathroom Ceilings
When painting bathroom ceilings, there are a few common mistakes you’ll want to avoid. Here are some of the biggest pitfalls to watch out for:
Choosing the Wrong Type of Paint for Humidity
One of the biggest mistakes you can make is choosing the wrong type of paint for your bathroom ceiling. Regular interior paint won’t hold up in a bathroom’s humid environment. Be sure to select a paint designed for high-humidity areas, such as a semi-gloss, satin, or mold-resistant finish.
Skipping Surface Preparation or Primer
Another common mistake is skipping the critical step of surface preparation and priming. Without proper preparation, your paint may not adhere properly to the ceiling, leading to peeling and bubbling. Be sure to clean the ceiling thoroughly, treat any mold or mildew, and apply a high-quality primer before painting.
Overlooking Ventilation Needs
Ventilation is key when painting a bathroom ceiling. If you don’t keep the bathroom well-ventilated during and after painting, the paint may not dry properly, leading to a sticky or tacky finish. Be sure to open windows and use exhaust fans to keep the air circulating.
Using Flat or Matte Paints That Absorb Moisture
Finally, avoid using flat or matte paint on your bathroom ceiling. These types of paints tend to absorb moisture, which can lead to peeling and mold growth. Stick with a semi-gloss, satin, or other moisture-resistant finish for the best results.