
Plumbing systems are the unsung heroes of every household, quietly working behind the scenes to ensure everything flows smoothly. While most homeowners focus on visible components like faucets or sinks, there’s one vital but often overlooked element: the plumbing vent.
Without proper venting, your plumbing system can face significant issues—slow drainage, foul odors, and even more severe health hazards. So, where should a home plumbing vent be located? This question is crucial for homeowners who want a well-functioning and efficient plumbing system.
Understanding Plumbing Vents and Their Purpose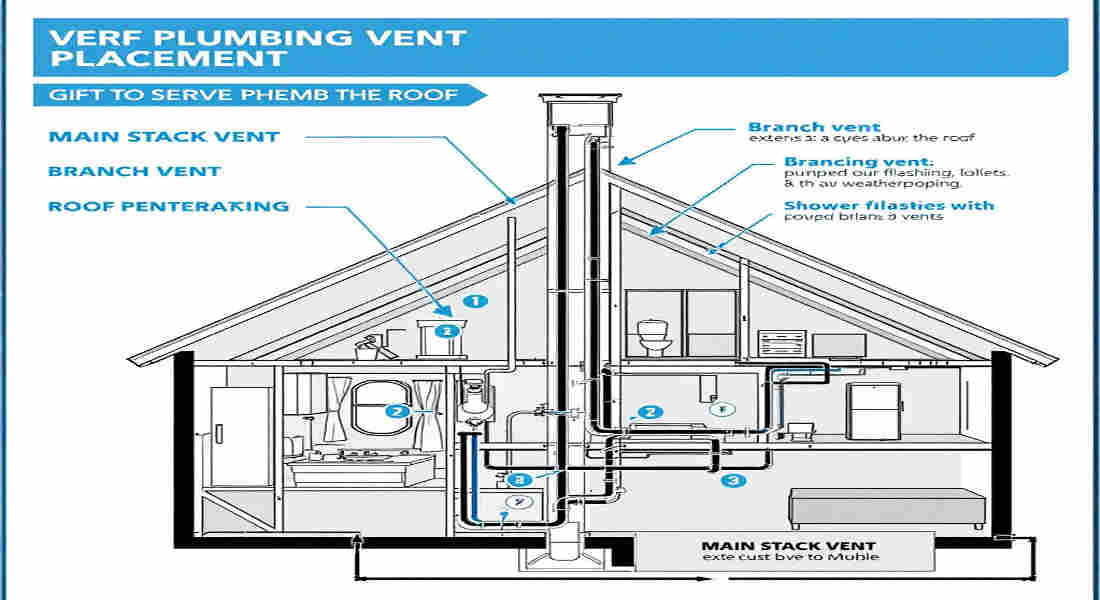
What is a Plumbing Vent?
A plumbing vent, also known as a vent stack or a vent pipe, is an essential part of your home’s drainage system. It’s not just about removing wastewater; it’s about maintaining balance in your pipes by allowing air to flow freely.
Think of your plumbing vent as the “lungs” of your drainage system. Just like we require air to breathe, your pipes need proper ventilation to function effectively.
Why Are Plumbing Vents Necessary?
Plumbing vents serve multiple purposes that contribute to the smooth operation of your plumbing system:
- Air Circulation
- Vents allow fresh air to enter the drainage system, which helps maintain consistent water flow and prevents vacuum effects.
- Pressure Equalization
- When water flows down a drain, it creates negative pressure. Without proper venting, this can lead to noisy gurgling drains or even water getting sucked out of nearby traps.
- Preventing Sewer Gas Entry
- Vents release harmful sewer gases outside your home, preventing them from entering your living spaces and causing unpleasant odors or health issues.
Common Problems Caused by Improper Vent Placement
Improper venting can wreak havoc on your plumbing system. Here’s what can go wrong:
- Slow Drainage: Without proper airflow, water and waste can take much longer to exit your pipes.
- Foul Odors: Poor vent placement can cause sewer gases to seep into your home.
- Frequent Clogs: Insufficient venting can lead to airlocks, which make drains more prone to blockages.
Understanding these basics sets the stage for comprehending why vent placement is so crucial.
Key Factors Influencing Plumbing Vent Placement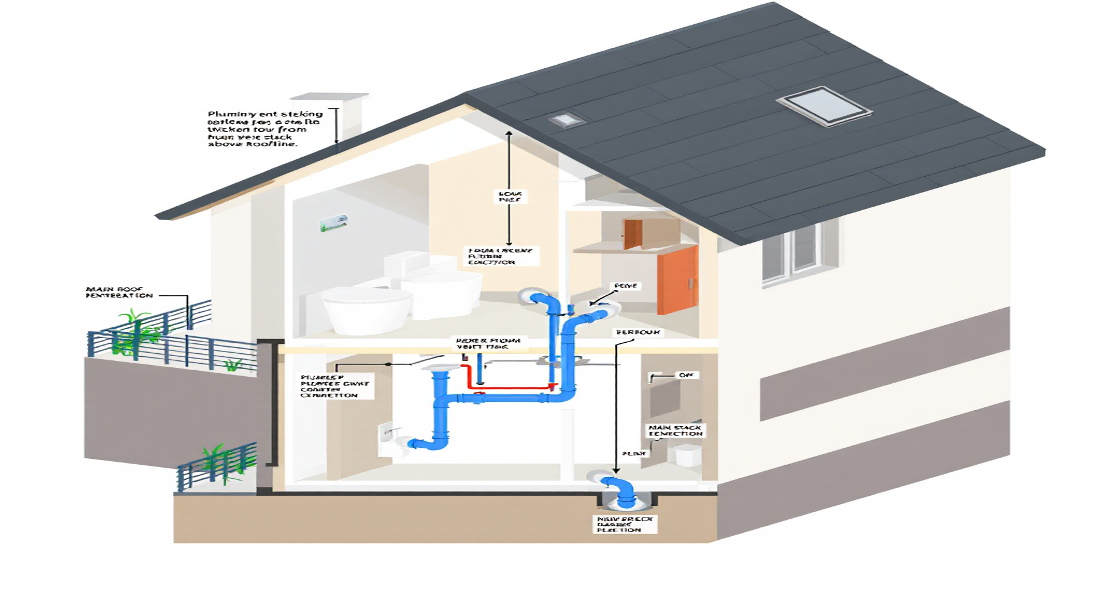
Proximity to Plumbing Fixtures
Proper vent placement begins with its location relative to your fixtures. Vents should be installed close enough to prevent airlocks and maintain smooth drainage.
You may also read (plumbing pipes at home).
- Recommended Distance: Most plumbing codes recommend placing vents within 5 to 6 feet of the fixture drain.
- Why It Matters: If a vent is too far, the pressure inside the pipes can fluctuate, leading to slow drainage and gurgling sounds.
Vertical Placement and Roof Penetration
Plumbing vents are typically installed vertically, extending through the roof to release sewer gases safely into the atmosphere.
- Height Requirements: Vents should extend at least 6 inches above the roofline to prevent debris, water, or critters from entering.
- Alternative Directions: In cases where vertical placement is impractical, horizontal venting can be used, though it requires additional considerations to ensure effectiveness.
Avoiding Vent Placement Near Windows and Air Intakes
One crucial rule of vent placement is to keep it away from windows, doors, and air intakes.
- Why? Sewer gases released from vents can easily re-enter your home if placed too close to these openings.
- Recommended Distance: Most building codes require vents to be at least 10 feet away from such openings.
Local Plumbing Code Requirements
Every region has its own plumbing codes that dictate vent placement specifics.
- Consult Professionals: Adhering to local requirements avoids fines, ensures safety, and guarantees efficiency.
- Why It’s Important: Plumbing codes are designed to protect your home and its occupants from structural or health-related risks.
Environmental and Structural Considerations
Placement isn’t just about functionality—it’s also about practicality.
- Weather Exposure: Ensure vents are installed in areas that minimize exposure to strong winds, ice, or snow accumulation.
- Ease of Maintenance: Place vents in accessible locations to make cleaning or repairs easier.
Types of Plumbing Venting Systems and Their Placement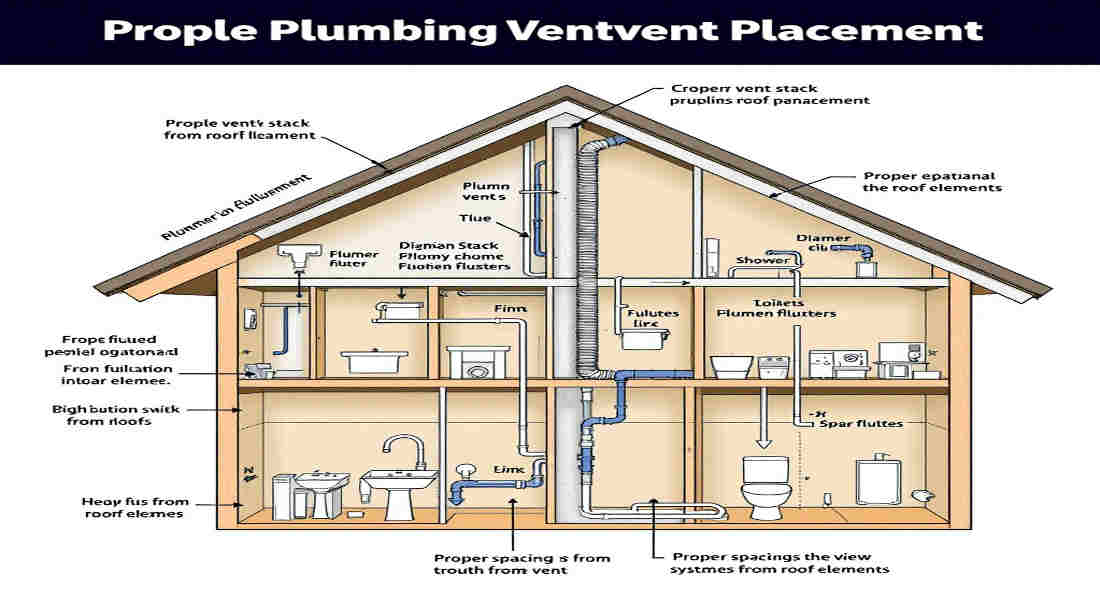
When it comes to plumbing vents, there’s no one-size-fits-all solution. Here’s a closer look at the main types:
Traditional Vertical Vent Stacks
These are the most common types of vents, installed vertically and connected directly to the drainage system.
- Where to Place Them: Typically, they run through walls and exit through the roof.
- Advantages: Reliable and effective for large systems with multiple fixtures.
Horizontal Vents
Horizontal vents are less common but still used in specific situations.
- When to Use Them: In homes where vertical venting isn’t feasible due to structural limitations.
- Key Considerations: Ensure a slight upward slope to prevent water from pooling inside the vent.
Air Admittance Valves (AAVs)
AAVs are an alternative to traditional vent stacks, especially in retrofits or tight spaces.
- What They Do: They allow air into the system when needed and close to prevent gas escape.
- Limitations: They can’t replace all venting needs and aren’t allowed in some jurisdictions.
Relief Vents and Circuit Vents
These are specialized venting systems used in homes with complex layouts or multiple fixtures.
- Placement Tips: Ensure they’re properly connected to the main vent stack for maximum efficiency.
- Best Practices: Consult a professional plumber for intricate systems requiring circuit venting.
Connecting Branch Vents to Main Vent Stack
Branch vents connect individual fixtures to the main vent stack.
You may also read (clean plumbing pipes at home).
- Optimal Layout: Design a layout that minimizes pipe length while maintaining proper slopes.
- Why It Matters: Poor connections can result in restricted airflow and drainage issues.
Step-by-Step Guide to Planning and Installing Plumbing Vents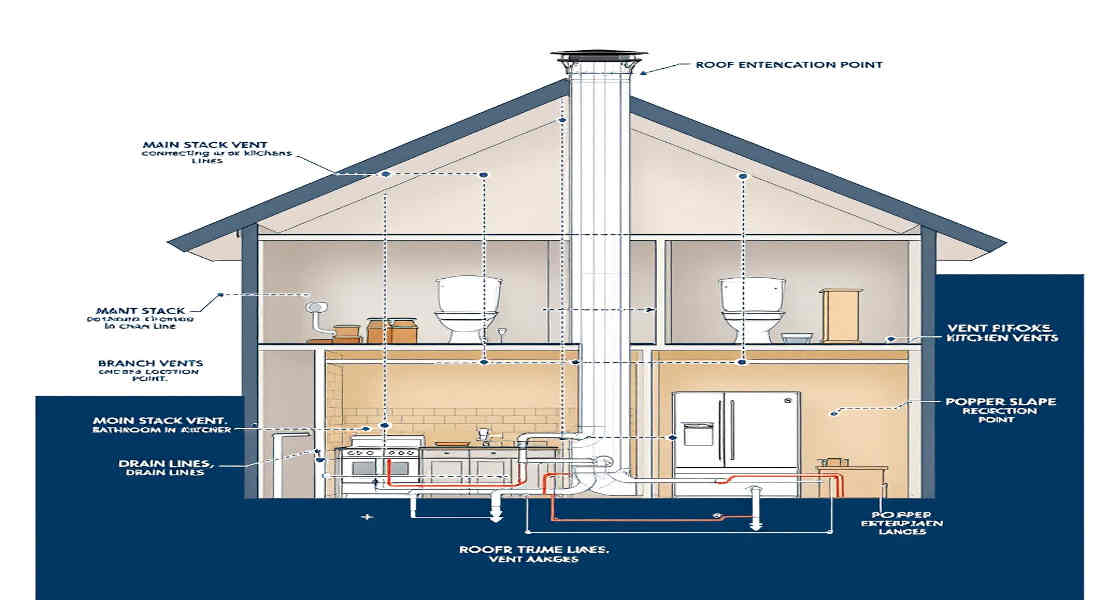
Below is a step-by-step guide to help you plan and install plumbing vents efficiently:
Review Local Plumbing Codes
Research your area’s plumbing regulations to ensure compliance.
Map Out Plumbing Fixtures
Create a detailed diagram of your fixtures and drainage routes.
Determine Optimal Vent Locations
Place vents as close to fixtures as possible to maintain efficiency.
Plan Vent Pipe Routes
Decide whether vents will run vertically through the roof or use alternative pathways.
Install Vent Pipes
Ensure proper slopes and secure connections to prevent leaks.
Connect Branch Vents
Attach branch vents to the main stack while maintaining adequate airflow.
Test the System
Check for proper drainage and airflow to confirm effective venting.
Call a Professional (If Needed)
For complex systems, don’t hesitate to consult an experienced plumber.
Common Mistakes to Avoid in Plumbing Vent Placement
Avoid these common pitfalls to ensure your venting system works as intended:
- Placing vents too far from fixtures
- Installing vents too low above the roofline
- Ignoring local plumbing codes
- Blocking vents with debris or structural elements
Benefits of Proper Plumbing Vent Placement
When done correctly, plumbing vent placement offers numerous advantages:
- Efficient Drainage: Eliminates airlocks and ensures smooth water flow.
- Odor Prevention: Keeps harmful sewer gases out of your home.
- System Longevity: Reduces wear and tear, preventing costly repairs.
You may also read (home cutting concrete for plumbing).