
Electrical wiring is the backbone of every home, big or small. In the age of modern technology and smart home systems, having a safe, efficient, and up-to-date electrical setup is more important than ever. For small houses, wiring can be even more critical due to limited space and the need for strategic planning to maximize efficiency.
Understanding the Basics of Electrical Wiring in Small Houses
Before you roll up your sleeves and tackle your home’s wiring, it’s essential to understand the basics. Wiring isn’t just about connecting wires—it’s a system that powers your home safely and efficiently.
What is Electrical Wiring?
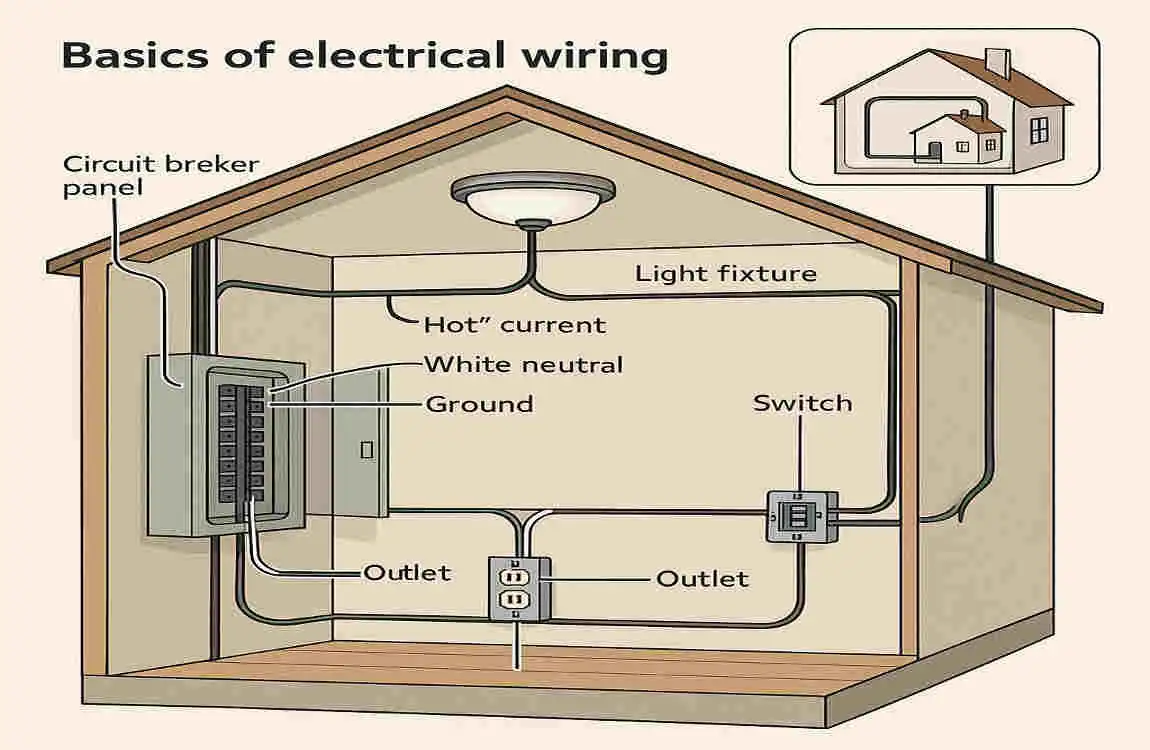
At its core, electrical wiring is a network of interconnected components that distribute power throughout your house. These components include:
- Circuits: Pathways for electrical current.
- Breakers: Safety devices that prevent overloading.
- Wires: Conductors that carry electricity.
- Outlets and Switches: Access points for appliances and lighting.
Key Electrical Terms You Should Know
As a homeowner, knowing these terms can make the process less intimidating:
- Voltage: The force that drives electrical current.
- Amperage (Amps): The amount of current flowing through a circuit.
- Grounding: A safety measure that prevents electrical shocks.
- GFCI (Ground Fault Circuit Interrupter): A device that protects against electrical hazards in wet areas.
Electrical Codes and Regulations for 2025
In 2025, electrical codes have evolved to accommodate modern living, energy efficiency, and safety. Some key updates include:
- Mandatory GFCI outlets in kitchens, bathrooms, and outdoor areas.
- The use of arc-fault circuit interrupters (AFCIs) to prevent electrical fires.
- Updated guidelines for smart home wiring and renewable energy integration.
Pro Tip: Always check your local electrical codes before starting any wiring project. Compliance isn’t just a legal requirement—it’s a safety necessity.
Planning Your Electrical Wiring Layout
A well-thought-out wiring plan is the foundation of a successful project. In small houses, careful planning ensures every square foot is used effectively.
Why is a Wiring Plan Important?
A detailed plan helps you:
- Avoid Overloading Circuits: Distribute power evenly to prevent tripped breakers.
- Anticipate Future Needs: Plan for additional appliances or smart devices.
- Stay Organized: Know where every outlet, switch, and fixture will go.
Assessing Your Electrical Needs
Start by listing all the devices and appliances you’ll use in your home. Think about:
- How many outlets do you need in each room?
- Where you’ll place lighting fixtures.
- Special areas, such as the kitchen, where power demand is higher.
Mapping Out Circuits and Fixtures
Here’s a simple approach to mapping your layout:
Area Recommended Circuits
Living Room 1-2 circuits for outlets and lighting.
Kitchen: Separate circuits for the refrigerator, microwave, and outlets.
Bathroom: GFCI outlets and a lighting circuit.
Bedroom 1 circuit for outlets and lighting.
Pro Tip: Use energy-efficient lighting and appliances to save power and reduce your utility bills.
Tools and Materials Needed for Wiring a Small House
Having the right tools and materials can make the difference between a smooth project and a frustrating one.
Essential Tools for Wiring
Here’s a checklist of tools you’ll need:
- Wire Strippers: To remove insulation from wires.
- Multimeter: To test voltage and continuity.
- Fish Tape: To pull wires through walls.
- Voltage Tester: For safety checks.
Recommended Wires and Cables for 2025
In 2025, these are the top choices for small house wiring:
- Copper Wires: Durable and conductive.
- Low-Voltage Cables: Ideal for smart home systems.
- Aluminum Wires: Lightweight and cost-effective.
Safety Components
Don’t overlook safety essentials like:
- Circuit Breakers: To prevent overloading.
- GFCI Outlets: For wet areas.
- RCDs (Residual Current Devices): To detect and deter electrical leaks.
Step-by-Step Guide on How to Wire a Small House
Now that you’ve planned and gathered your tools, it’s time to get started. Follow these steps for a safe and efficient wiring process.
Preparing the Workspace
- Turn off the power at the main panel to avoid accidents.
- Wear protective gear, such as insulated gloves and goggles.
- Obtain the necessary permits from your local authority.
Running Main Service Cables
- Connect the main service cables from the utility line to your electrical panel.
- Use conduit pipes to protect cables from damage.
Installing Circuit Breakers
- Mount the breaker panel in an accessible location.
- Label each breaker to indicate its corresponding circuit.
Wiring Individual Circuits
For each room, wire the circuits as follows:
- Lighting Circuits: Use 14-gauge wire for standard lighting.
- Outlet Circuits: Use 12-gauge wire for outlets.
- Kitchen and Bathroom: Use GFCI outlets and dedicated circuits.
Grounding the System
- Connect all ground wires to the grounding bar in the breaker panel.
- Install grounding rods outside the house for added safety.
Connecting Switches and Fixtures
- Strip the wire ends and connect them to the terminals on switches and outlets.
- Secure wires with wire nuts and test connections to ensure proper functionality.
Performing Final Inspections
- Test all circuits with a multimeter to ensure they’re working correctly.
- Schedule an inspection with a licensed electrician to confirm compliance with local codes.
Latest Techniques and Technologies in 2025 Electrical Setup
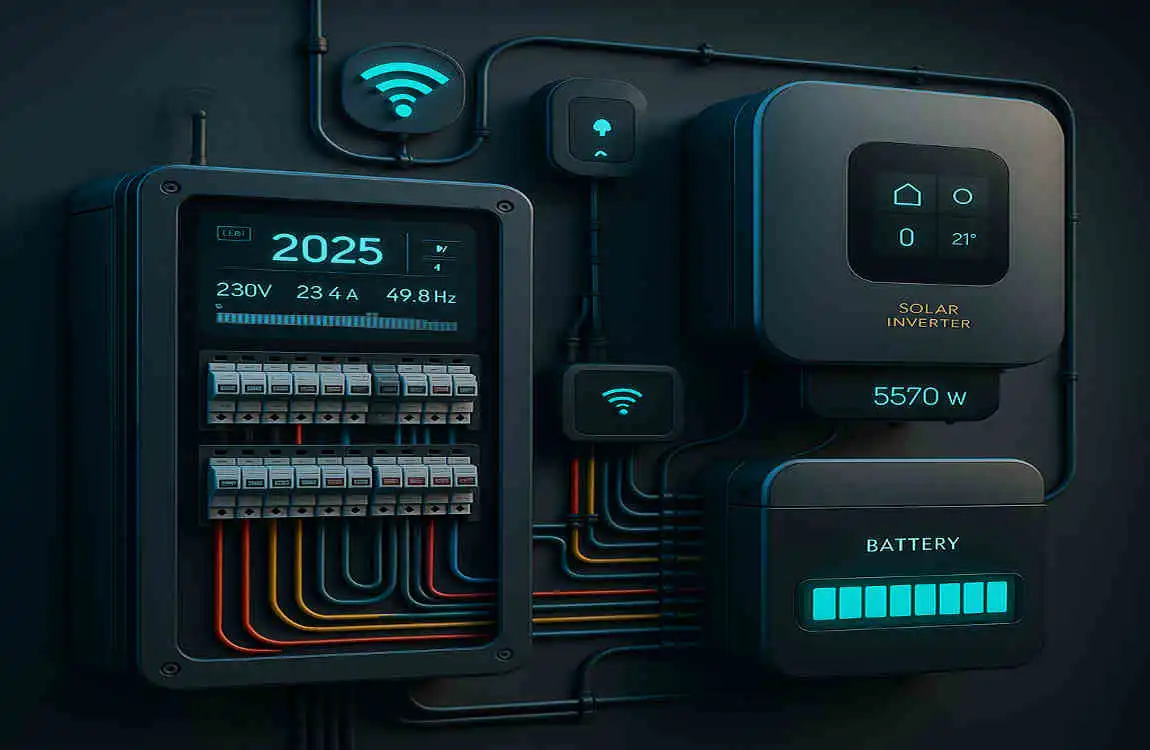
The future of wiring is here, and it’s all about smart technology and energy efficiency.
Smart Wiring Solutions
- Smart Switches and Outlets: Control lights and appliances remotely.
- Smart Panels: Monitor energy usage in real-time.
Wireless Controls and IoT
- Use wireless hubs to control devices without physical switches.
- Integrate IoT (Internet of Things) devices for seamless automation.
Renewable Energy Integration
- Install solar-ready wiring for future upgrades.
- Use energy storage systems to reduce reliance on the grid.
Common Mistakes to Avoid When Wiring a Small House
Even experienced DIYers can make these mistakes. Here’s how to avoid them:
- Overloading Circuits: Calculate load capacity to prevent tripping breakers.
- Using the Wrong Wire Gauge: Match the wire gauge to the circuit’s amperage.
- Ignoring Code Requirements: Always follow local codes to ensure safety.
Hiring Professionals vs DIY: What You Need to Know
When to Hire a Professional
- If you’re unfamiliar with electrical systems.
- For complex projects like main service installations.
Cost Comparison
While DIY wiring can save money, hiring a professional ensures compliance and safety. Here’s a rough comparison:
Option Cost Pros Cons
DIY Wiring $500-$1,000 Cost-effective Requires time and skills
Hiring a Pro $2,000-$5,000 Professional results Higher cost
Maintenance Tips for Your Small House Electrical System
Keep your system in top shape with these tips:
- Perform routine checks for loose connections or damaged wires.
- Upgrade old wiring to meet 2025 standards.
- Watch for signs of electrical problems, such as flickering lights or burning smells.