
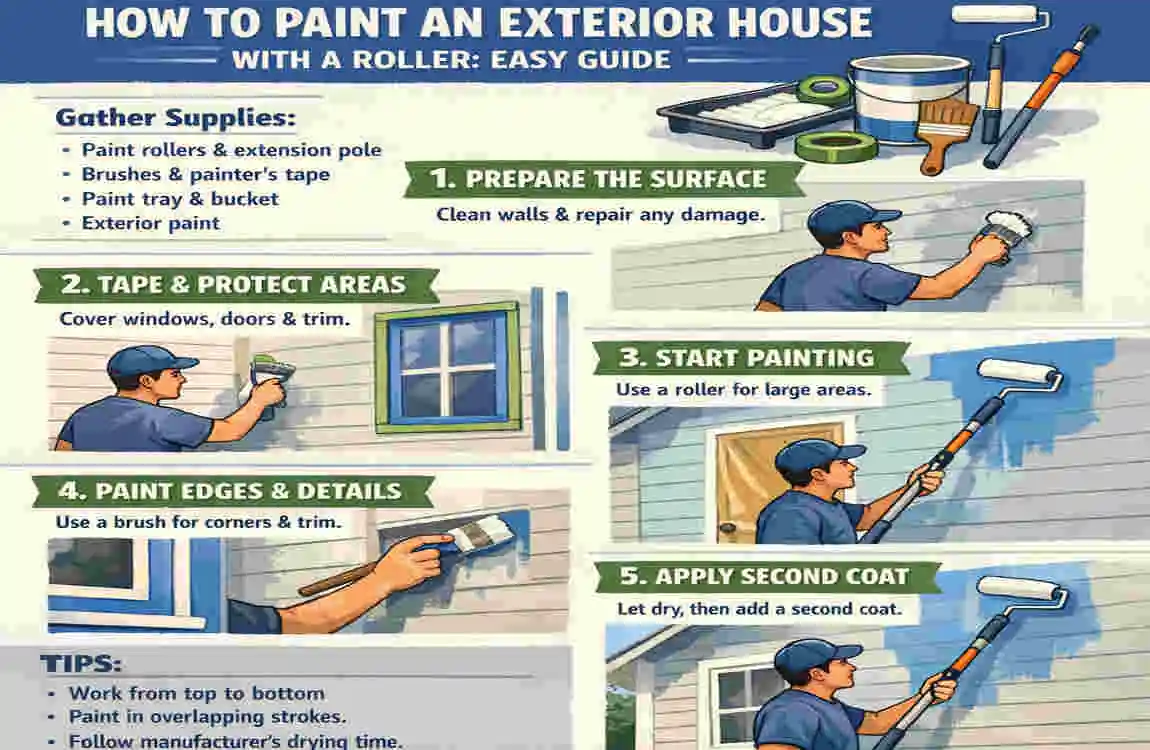
If you are planning to refresh your home’s outside look, a roller can be a very practical tool. It helps you cover large surfaces faster than a brush and can give you a neat finish when used properly.
Still, painting the outside of a house is not just about rolling paint on the wall. Preparation matters just as much as the painting itself. If the surface is dirty, peeling, or damaged, the new paint may not last.
Can You Paint an Exterior House With a Roller?
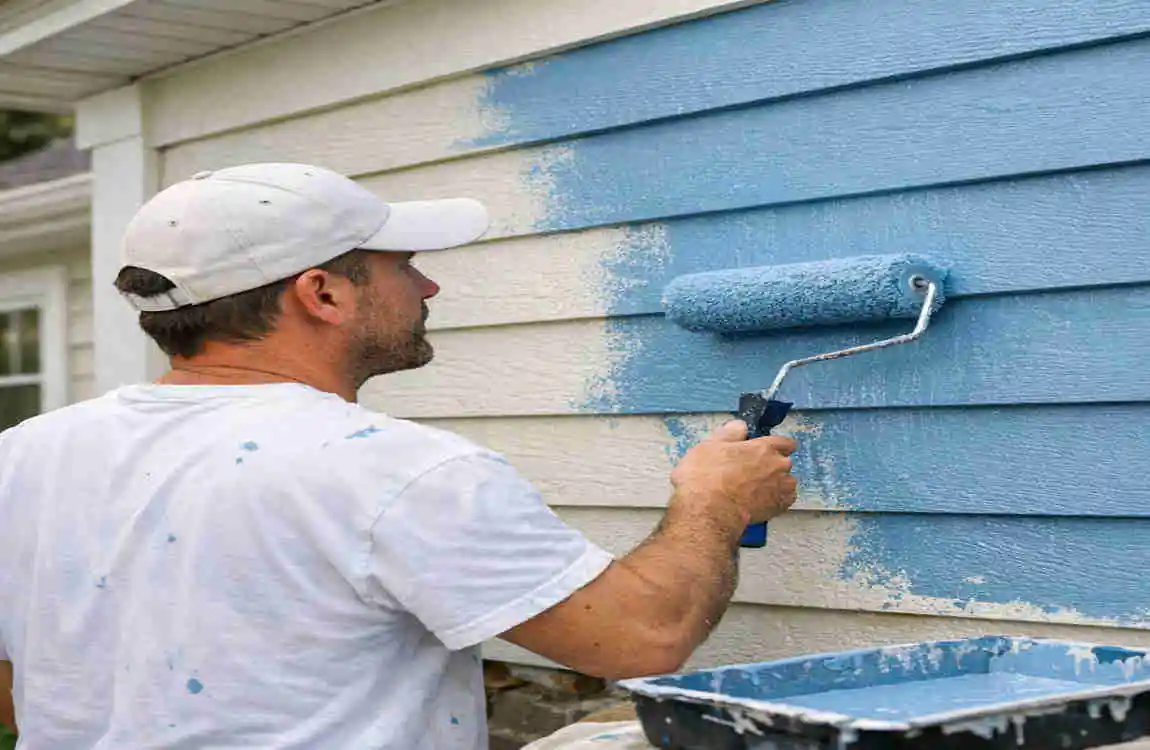
Yes, you can paint many exterior surfaces with a roller. In fact, it is one of the easiest ways to cover broad areas when you want steady, controlled application.
A roller works well on surfaces like:
- Wood siding
- Stucco
- Concrete
- Brick
- Fiber-cement siding
That said, a roller is not always the only tool you will need. For trim, corners, narrow strips, and detailed areas, a brush is usually better. In some projects, a sprayer may also be used for speed, but rollers are often easier for DIY work because they give you more control.
The best results often come from using a roller and brush together. You roll the large open areas and brush the edges and details.
Tools and Materials You Need
Before you start, gather everything first. That saves time and keeps the job moving smoothly.
Essential Painting Tools
You will need:
- Exterior paint roller
- Roller frame
- Extension pole
- Paint tray
- Paintbrush
- Scraper
- Sandpaper
- Drop cloths
- Painter’s tape
- Ladder or approved access equipment
An extension pole is especially helpful because it lets you reach higher spots without climbing up and down as often.
Paint and Preparation Materials
You should also have:
- Exterior-grade primer
- Exterior house paint
- Caulk
- Wood filler
- Cleaning supplies
- Protective gear
Using the right outside paint matters a lot. Exterior paint is designed to withstand sun, rain, wind, and temperature fluctuations.
Choosing the Right Roller Nap
The roller nap is the thickness of the fabric on the roller sleeve. This affects how much paint the roller holds and how well it reaches textured areas.
Exterior Surface Suggested Roller Nap Best Use
Smooth siding 3/8–1/2 inch Even finish
Lightly textured siding 1/2–3/4 inch Better coverage
Stucco 3/4–1 inch Textured surfaces
Rough masonry 1–1 1/4 inch Deep texture
A thicker nap works better on rough surfaces because it can reach into small grooves and bumps. A shorter nap is better for smoother siding.
How to Prepare an Exterior House for Painting
Good preparation is the foundation of a good paint job. If you rush this part, the finish may look uneven or start failing sooner than expected.
Inspect the Exterior
Walk around the house and look closely at the surface. Check for:
- Peeling paint
- Cracks
- Damaged siding
- Mildew
- Dirt and stains
Look at windows, doors, trim, and any repaired areas too. If you find damage, fix it before painting. Paint should go on a sound surface, not one that is loose or broken.
Clean the Exterior Surface
Paint sticks best to a clean wall. Remove dirt, dust, cobwebs, and loose debris first.
In some cases, pressure washing can help. It can remove built-up grime faster than hand washing. But the house must dry completely before you start painting.
If the wall is still damp, the paint may not bond properly. That can lead to bubbling, peeling, or poor coverage.
Scrape and Sand Loose Paint
Any peeling or flaking paint should be removed. If you paint over unstable old paint, the new coat will not solve the problem.
Use a scraper to remove loose pieces, then sand the rough edges. The goal is to create a smooth transition between old paint and bare surface.
This step may feel slow, but it helps the final finish look much better.
Repair Cracks and Gaps
Use exterior caulk to fill small cracks and gaps. Wood filler can help with minor holes or surface damage.
Let the repairs cure fully before painting. If you paint too soon, the patched areas may not hold up well.
Protect Windows, Doors, Plants, and Other Areas
Use drop cloths to protect the ground and landscaping. Cover areas you do not want painted with painter’s tape or plastic sheeting.
This matters around:
- Windows
- Doors
- Outdoor lights
- Decks
- Plants and shrubs
A little protection now saves a lot of cleanup later.
Choose the Right Exterior Paint
Select Exterior-Grade Paint
Do not use interior paint outside. Interior paint is not designed to withstand weather, sunlight, or temperature fluctuations.
Exterior paint is stronger and more durable. It is built to resist fading, cracking, and moisture issues much better.
Choose a Suitable Sheen
Sheen affects how the finished paint looks and how easy it is to clean.
- Flat: Hides surface flaws well
- Satin: Good balance of appearance and durability
- Semi-gloss: Easier to clean, often used for trim and doors
For siding, many homeowners choose satin or flat. For trim and doors, semi-gloss is often a good choice.
Check the Weather Before Painting
Weather can make or break your project. Try to paint when conditions are calm and dry.
Avoid:
- Rain
- High humidity
- Extreme heat
- Strong wind
Always check the paint label for the recommended temperature range. If it is too hot, too cold, or too damp, the paint may not apply or dry correctly.
How to Paint Exterior House With a Roller: Step-by-Step
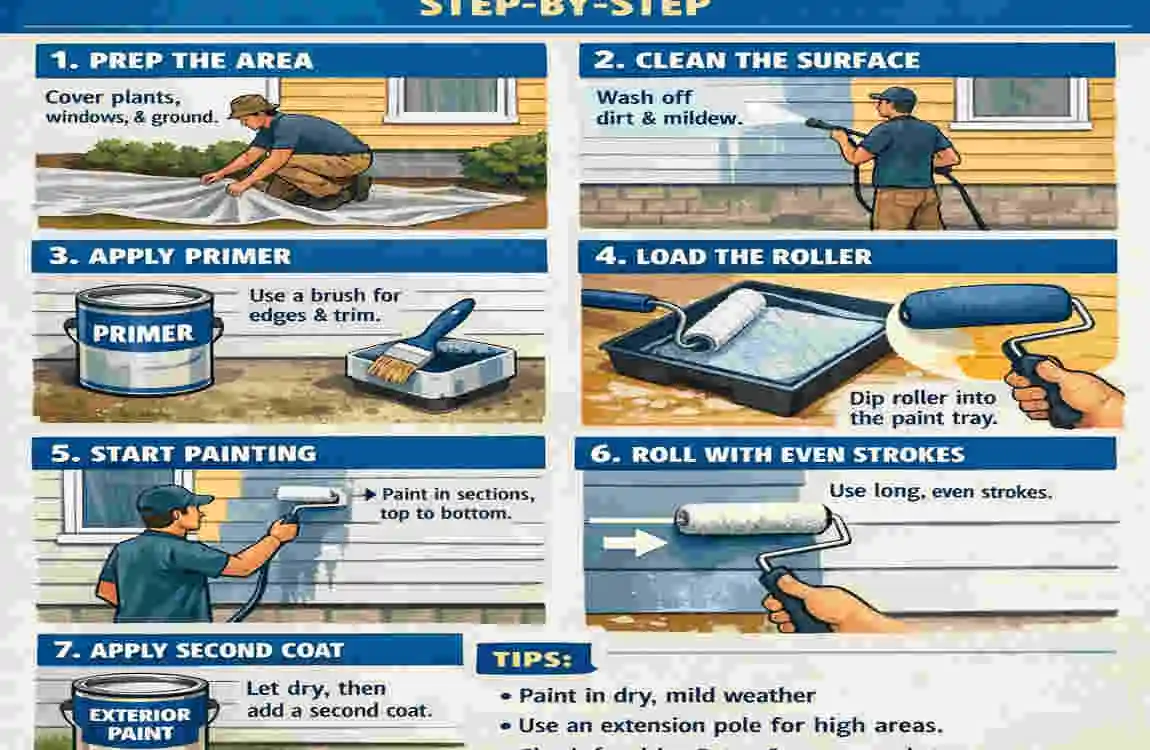
Prepare Your Work Area
Set up your paint tray, rollers, brushes, and extension pole. Place drop cloths under the area you will paint.
Make sure the space is safe and easy to move around in. If you need a ladder, position it carefully and follow all safety rules.
Prime the Surface
Primer helps paint stick better and gives you a more even finish. It is especially useful on:
- Bare wood
- Repaired areas
- Stained spots
- New siding
If the surface has never been painted or has large repaired sections, primer is usually worth the extra step. Let it dry according to the product instructions.
Load the Roller Correctly
Pour paint into the tray. Roll the sleeve through the paint until it is evenly coated, then roll off the extra.
Do not leave it dripping, but do not squeeze it too dry either. A properly loaded roller gives better coverage and reduces streaks.
Start With Smaller Sections
Work in manageable sections so the paint stays wet while you blend it. This helps prevent lap marks.
If you try to cover too much area at once, the edge of one section may dry before you blend into the next. That can show in the final finish.
Roll the Paint Onto the Exterior
Use smooth, overlapping strokes. Apply even pressure and keep the motion steady.
Do not press too hard. Pressing hard can actually remove paint from the roller instead of helping coverage.
Try to move across the wall in a consistent pattern so the finish looks even from side to side.
Paint Around Trim and Edges
Use a brush for corners, narrow strips, and trim work. This process is often called cutting in.
After brushing the edges, blend the brushed and rolled areas while the paint is still wet. That gives the wall a more finished look.
Apply the Second Coat
One coat may not be enough, especially if you changed the color a lot or the surface was rough.
Most exterior projects look better with two coats. Wait for the first coat to dry based on the manufacturer’s instructions, then apply the second coat evenly.
Step 8: Inspect Your Work
When you finish, walk around the house and look for:
- Missed spots
- Drips
- Runs
- Thin areas
- Uneven coverage
Fix small issues while the paint is still workable, if possible. It is easier to touch up early than after the paint has fully cured.
Tips for Getting a Smooth Finish With a Roller
Keep a Wet Edge
A wet edge means you keep the paint from drying before you blend the next section. This helps prevent visible lines or lap marks.
If one area starts drying too fast, you may see where one section ends and another begins.
Do Not Overload the Roller
Too much paint can create problems such as:
- Drips
- Runs
- Uneven texture
- Waste
A roller should be full enough to cover well, but not so full that it becomes messy.
Use Even Pressure
Try to keep the same pressure as you move. If you press too hard, the finish may look patchy. If you press too lightly, coverage may be thin.
Smooth painting usually comes from rhythm, not force.
Work in Sections
This is one of the simplest ways to keep control. Finish one section, blend it well, and then move on.
That approach helps you stay organized and makes the final result cleaner.
Avoid Painting in Direct, Harsh Sunlight
Strong sunlight can dry paint too quickly. When that happens, it becomes harder to blend strokes and avoid marks.
If possible, paint on the shaded side of the house first or choose a time of day when the sun is less intense.
Use Quality Equipment
A good roller sleeve makes a noticeable difference. Cheap tools may shed fibers, hold paint poorly, or leave an uneven finish.
A better roller can save time and give you smoother coverage.
Common Mistakes When Painting an Exterior With a Roller
Painting Over Dirty or Peeling Surfaces
This is one of the biggest mistakes. If the surface is dirty or peeling, the new paint will not last as long.
Preparation is not optional. It is part of the job.
Using the Wrong Roller Nap
A short nap on a rough surface may miss texture. A thick nap on a smooth wall may look too heavy.
Always match the nap to the surface.
Applying Paint Too Thickly
More paint does not always mean better coverage. Thick coats can sag, run, or dry unevenly.
Thin, even coats are usually better than one heavy coat.
Ignoring Drying and Recoat Times
Rushing the next coat can ruin the finish. If the first coat is not ready, the second coat may lift it or cause uneven drying.
Follow the label instructions carefully.
Painting in Poor Weather
Rain, humidity, wind, and extreme temperatures can all create problems.
A dry day with moderate conditions is usually best.
Neglecting Safety
Exterior painting often means ladders, higher surfaces, and outdoor conditions. Stay careful.
Always wear protective gear and use safe equipment.
Roller vs. Brush vs. Paint Sprayer for Exterior Painting
MethodBest ForMain AdvantageLimitation
Roller Large flat or textured areas Fast coverage Not ideal for tight areas
Brush Trim, corners, details Precise application Slower for large surfaces
Sprayer Large surfaces Very fast application Requires masking and more control
For many homeowners, the best solution is a roller and brush together. The roller handles the big surface areas, and the brush handles the detail work.
A sprayer can be fast, but it usually needs more masking and more careful handling.
How Long Does It Take to Paint a House Exterior With a Roller?
The time depends on several things:
- House size
- Number of stories
- Surface condition
- Number of coats
- Weather
- How many people are helping
- How much prep work is needed
A small, simple home may go faster. A large house with peeling paint, repairs, and multiple coats will take longer.
One important thing to remember is that preparation often takes as long as painting itself. That is normal.
If you want a better finish, do not rush the prep stage.
How Much Paint Do You Need for an Exterior House?
Paint coverage depends on the product, the surface texture, and the condition of the wall.
Start by estimating the paintable area. Then subtract windows and doors where appropriate. Rough surfaces like stucco or masonry usually need more paint than smooth siding.
Also, try to buy paint from the same color batch when possible. That helps keep the color more consistent across the house.
Always check the manufacturer’s coverage estimate before buying. It is the easiest way to avoid running short.
How to Clean Up After Exterior Painting
Clean Rollers and Brushes
Clean your tools right after use. The cleaning method depends on whether you used water-based or oil-based paint.
Proper cleaning helps you reuse the tools later and keeps them in better shape.
Remove Painter’s Tape
Take the tape off at the right time so the edges stay neat. If you wait too long, the tape may pull at the fresh paint.
Move slowly and carefully.
Store Leftover Paint
Seal leftover paint tightly and label the can with the color and date. This makes future touch-ups much easier.
Keep the can in a dry, safe place away from heat and children.
Safety Tips for Exterior House Painting

Safety should always come first.
- Use ladders correctly
- Do not paint in unsafe wind or storm conditions
- Wear eye and skin protection
- Keep paint away from children and pets
- Follow all product safety instructions
- Stay aware of footing and balance
Even simple painting jobs can become risky if you rush or ignore the basics.
Frequently Asked Questions
Can you paint an entire house exterior with a roller?
Yes. You can paint many exterior surfaces with a roller, especially broad siding areas. Trim and details usually still need a brush.
What type of roller is best for exterior house paint?
It depends on the surface. Smooth siding usually needs a shorter nap, while stucco and rough masonry need a thicker nap.
Is it better to roll or spray exterior house paint?
Rolling is often easier for DIY projects. Spraying can be faster, but it usually needs more masking and control.
How many coats of exterior paint should I apply?
Two coats are often recommended, but always follow the paint manufacturer’s instructions.
Can I paint exterior siding with a roller?
Yes, many siding types work well with a roller, including wood, fiber-cement, and some textured surfaces.
Should I use primer before painting an exterior house?
Primer is especially helpful on bare wood, repaired areas, and stained spots. It can improve adhesion and finish quality.
How long should exterior paint dry before applying a second coat?
Drying times vary by product and weather. Check the label before recoating.
| Step | What to Do | Helpful Tip |
|---|---|---|
| Prepare the Surface | Clean walls and remove dirt, dust, and loose paint. | Let the surface dry completely. |
| Protect Areas | Cover windows, doors, plants, and fixtures. | Use painter’s tape for clean edges. |
| Choose the Right Roller | Use an exterior-rated roller with the correct nap. | A thicker nap works better on textured surfaces. |
| Apply Primer | Prime bare wood, patched areas, or stained surfaces. | Allow the primer to dry before painting. |
| Load the Roller | Dip the roller into paint and remove excess on the tray. | Avoid soaking the roller. |
| Paint in Sections | Roll paint using overlapping strokes. | Work from top to bottom for even coverage. |
