
When it comes to upgrading or renovating your bathroom, knowing how to install shower home plumbing fixtures is a valuable skill. Whether you’re replacing outdated fixtures or building a new bathroom, proper installation is essential for functionality, durability, and aesthetics. Done right, it prevents leaks, ensures smooth water flow, and enhances the overall look of your bathroom.
Why Proper Installation Matters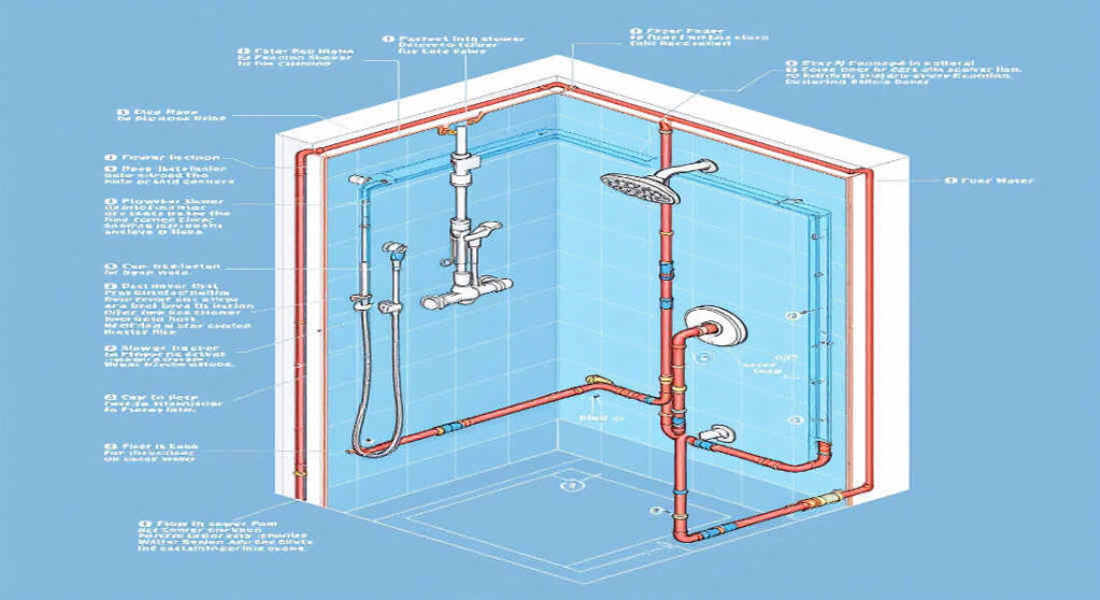
Installing shower plumbing fixtures may seem straightforward, but there are a lot of details that can make or break the process. Proper installation ensures:
- Leak Prevention: Incorrectly installed fixtures can lead to water leaks, which may cause wall damage or mold growth.
- Efficient Water Flow: Proper alignment and secure connections ensure consistent water pressure and temperature.
- Enhanced Aesthetics: Modern fixtures can transform the look of your bathroom, making it more functional and visually appealing.
Now, let’s dive into the details, starting with what shower plumbing fixtures are and why choosing the right ones is critical.
Understanding Shower Plumbing Fixtures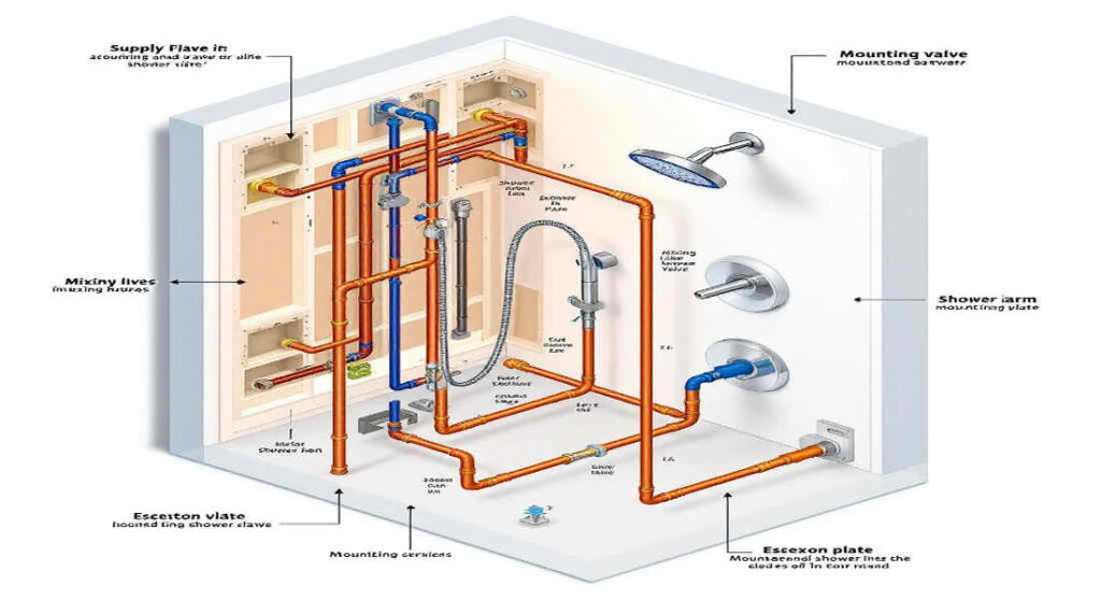
To successfully install shower fixtures, it’s important to first understand what they are and their role in your plumbing system.
You may also read (how do i check for leaks in my home pool).
What Are Shower Plumbing Fixtures?
Shower plumbing fixtures are the hardware components that control water flow into your shower. These include:
- Shower Valves: Control the water temperature and flow.
- Showerheads: Distribute water in different spray patterns.
- Handles: Allow you to adjust water pressure and temperature.
- Tub Spouts: Direct water flow into the bathtub (if applicable).
Types of Shower Fixtures
There are various types of shower fixtures to choose from, depending on your preferences and plumbing system:
- Fixed Showerheads: Traditional, wall-mounted showerheads.
- Handheld Showerheads: Attached to a flexible hose for versatile use.
- Rain Showerheads: Large overhead showerheads for a luxurious feel.
- Diverter Valves: This allows you to switch between a showerhead and a tub spout or handheld unit.
Choosing the Right Fixtures
When selecting fixtures for your bathroom, consider:
- Compatibility: Ensure the fixtures fit your existing plumbing system.
- Material and Finish: Opt for durable materials like chrome, stainless steel, or brass.
- Water Efficiency: Look for fixtures with a WaterSense label to save water without compromising performance.
Tools and Materials Needed for Installation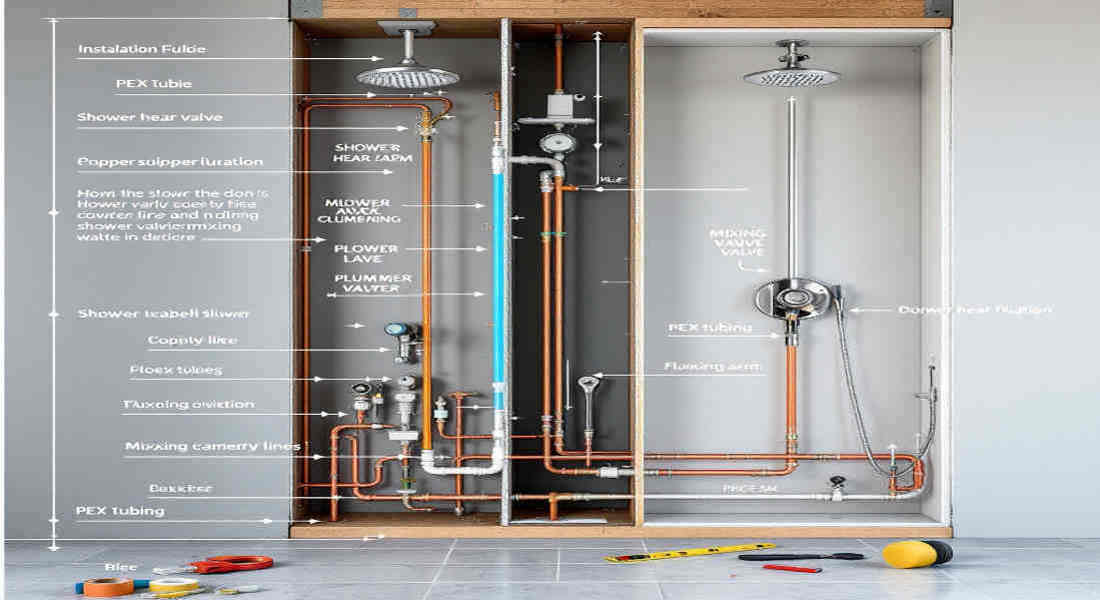
Before you begin, gather all the tools and materials you’ll need to install your shower plumbing fixtures. Having everything on hand will save time and reduce frustration.
Essential Tools
- Adjustable wrench
- Pipe cutter
- Screwdrivers (flathead and Phillips)
- Plumber’s tape (Teflon tape)
- Soldering kit (for copper pipes)
- Silicone sealant
- Level
You may also read (history of white house plumbing).
Materials
- New shower valve
- Showerhead
- Trim plate
- Handles
- Tub spout (if applicable)
- Pipes (PVC, PEX, or copper)
Safety Equipment
- Safety goggles
- Gloves
- Dust mask (if cutting drywall or tiles)
Preparation Tips
- Turn Off Water Supply: Always shut off the water supply before starting work.
- Clear the Area: Remove any obstacles around the shower to create a safe workspace.
- Check for Leaks: Inspect your existing plumbing for leaks or damage before installation.
Preparing for Installation
Proper preparation is key to a smooth installation process. Follow these initial steps to set yourself up for success.
Shut Off the Water Supply
Locate the main water shutoff valve or the dedicated valve for your bathroom. Could you turn it off to stop the water flow?
Drain Remaining Water
Open the faucets and shower to drain any water left in the pipes. This ensures a dry workspace.
Remove Old Fixtures
Carefully remove the existing shower fixtures. Use a wrench or screwdriver to loosen connections. Be mindful not to damage the surrounding wall or plumbing.
Inspect Existing Plumbing
Check for signs of corrosion, leaks, or cracks in the pipes. Address any issues before proceeding to avoid future problems.
Step-by-Step Guide: How to Install Shower Home Plumbing Fixtures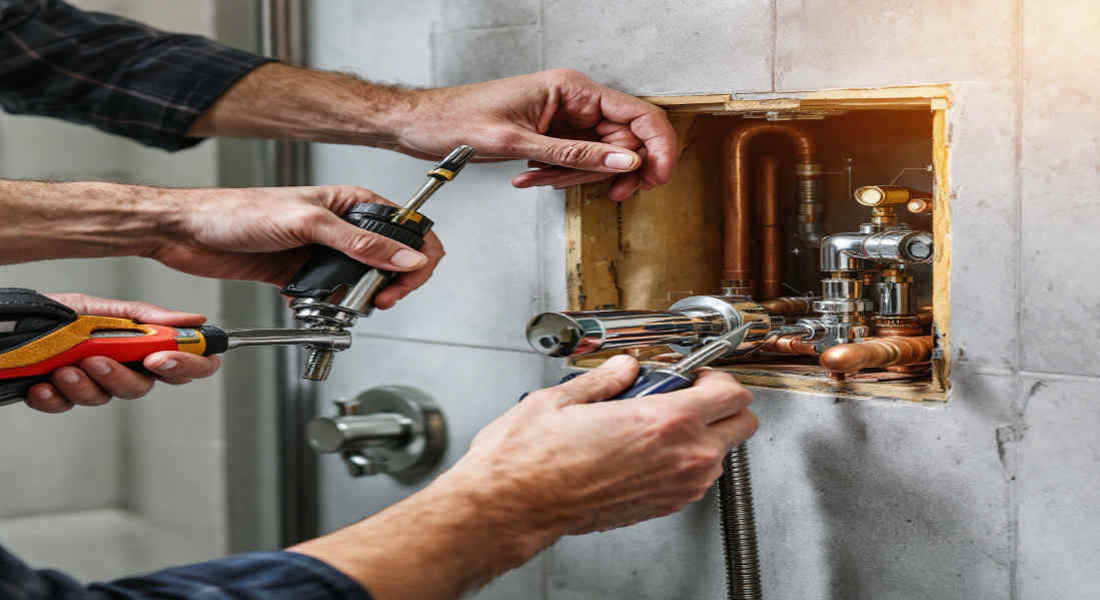
Installing the Shower Valve
- Access the Plumbing: If there’s no access panel, cut an opening in the wall behind the shower.
- Remove the Old Valve: Use a wrench or pipe cutter to disconnect the old valve.
- Install the New Valve: Follow the manufacturer’s instructions. Solder copper pipes or use adhesive for PVC/PEX connections.
- Secure the Valve: Ensure it’s positioned correctly and tightly secured to avoid leaks.
Connecting the Water Supply Lines
- Identify the hot and cold water lines.
- Wrap the plumber’s tape around the threaded fittings to create a watertight seal.
- Connect the supply lines to the new valve, ensuring proper alignment.
Attaching the Showerhead and Shower Arm
- Apply the plumber’s tape to the shower arm threads.
- Screw the showerhead onto the arm by hand, then tighten gently with a wrench.
Installing the Handle and Trim Plate
- Attach the trim plate to the wall using screws.
- Secure the handle to the valve stem with a set screw.
Installing or Replacing the Tub Spout
- Threaded Spouts: Wrap threads with plumber’s tape and screw in place.
- Slip-On Spouts: Tighten the spout using the included screw.
Sealing Around Fixtures
- Apply a thin bead of silicone sealant around the trim plate and handle.
- Use your finger or a tool to smooth the sealant for a clean finish.
Testing and Troubleshooting
Testing the Installation
- Turn the water supply back on and check for leaks at all connections.
- Test water pressure and temperature to ensure proper functionality.
Troubleshooting Common Issues
- Leaks: Tighten connections or reapply the plumber’s tape.
- Inconsistent Temperature: Adjust the valve or check for debris in the pipes.
- Low Water Pressure: Clean the showerhead or check for blockages.
If problems persist, consider consulting a professional plumber.
Maintenance Tips for Shower Plumbing Fixtures
To keep your shower fixtures in excellent condition, follow these maintenance tips:
- Inspect regularly for leaks or corrosion.
- Clean showerheads to prevent mineral buildup.
- Replace worn-out washers or seals.
- Tighten loose connections as needed.
You may also read (home plumbing and why is it-important).