
Capping off home plumbing is an essential task to safely seal water lines during home repairs or renovations. This step-by-step guide will walk through the process of shutting off the water supply, cutting the pipes, and securely installing caps to prevent leaks and water damage, ensuring a smooth and protected plumbing project.
Understanding Plumbing Caps and Their Purpose
What Is Capping Off Plumbing?
Let’s start with the basics. Capping off plumbing means sealing the end of a pipe to prevent water from flowing through it. Picture it like putting a cork in a bottle—you’re creating a permanent or temporary barrier that stops water in its tracks.
When you cap a pipe, you’re essentially telling the water, “This road is closed.” The cap acts as a dead-end sign for your plumbing system. It’s a straightforward concept, but the execution requires attention to detail and the right materials.
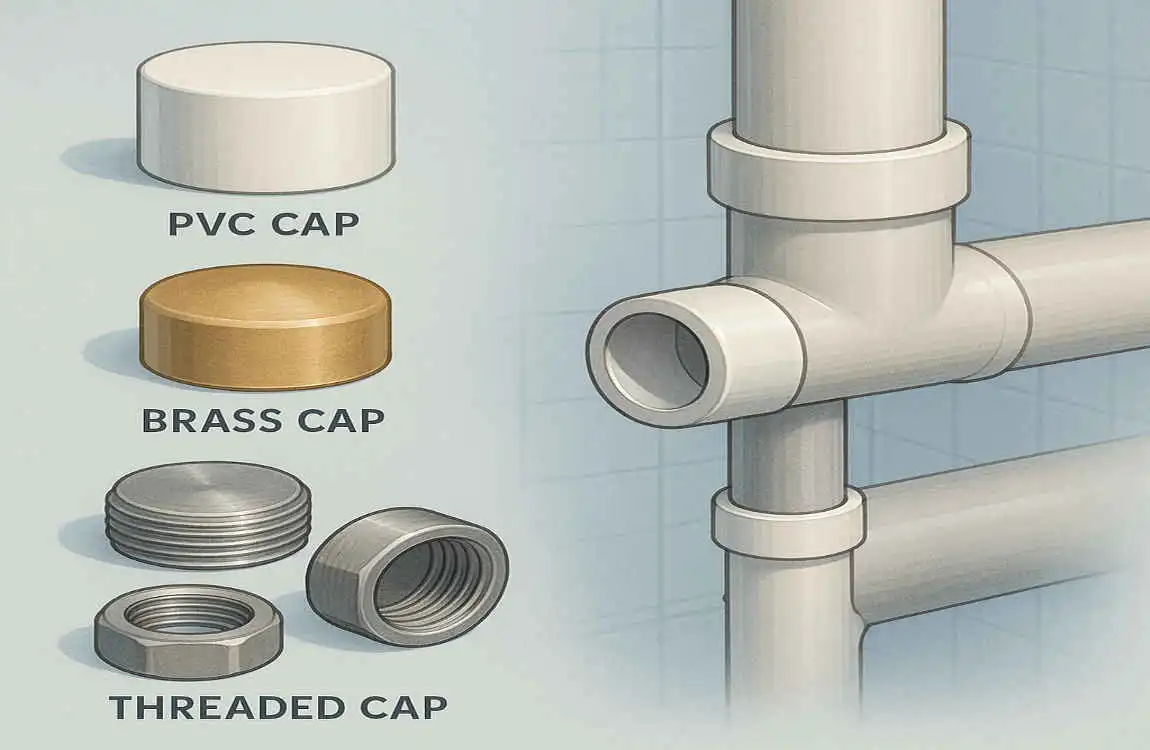
Different Types of Plumbing Caps
Not all caps are created equal. The plumbing world offers various options, each designed for specific situations and pipe materials. Here’s what you need to know:
Push-fit caps are the easiest to install. You literally push them onto the pipe end, and internal grippers hold them in place. They’re perfect for beginners and temporary solutions.
Threaded caps screw onto pipes with matching threads. These create highly secure seals and are best suited for permanent installations. You’ll often find them on metal pipes.
Solvent-weld caps use special Glue to create a chemical bond with PVC or CPVC pipes. Once attached, they become part of the pipe itself—talk about commitment!
Compression caps use a nut-and-ferrule system to create a tight seal. They’re versatile and work on various pipe materials without requiring special tools.
Common Scenarios Requiring Plumbing Caps
Life throws homeowners various situations that call for capping pipes. Kitchen renovations often top the list. Maybe you’re removing that old garbage disposal or relocating your dishwasher. Each abandoned water line must be properly capped.
Bathroom remodels present similar challenges. Removing a bidet, relocating a toilet, or eliminating a second sink all leave behind pipes that need attention. Without proper caps, these open lines become ticking time bombs for water damage.
Sometimes, you’re dealing with damaged sections of pipe. Rather than replacing an entire run, you might cap off the damaged portion temporarily while planning a permanent fix. Winter preparation for vacation homes also requires strategic capping to prevent frozen pipe disasters.
Tools and Materials Needed to Cap Off Home Plumbing
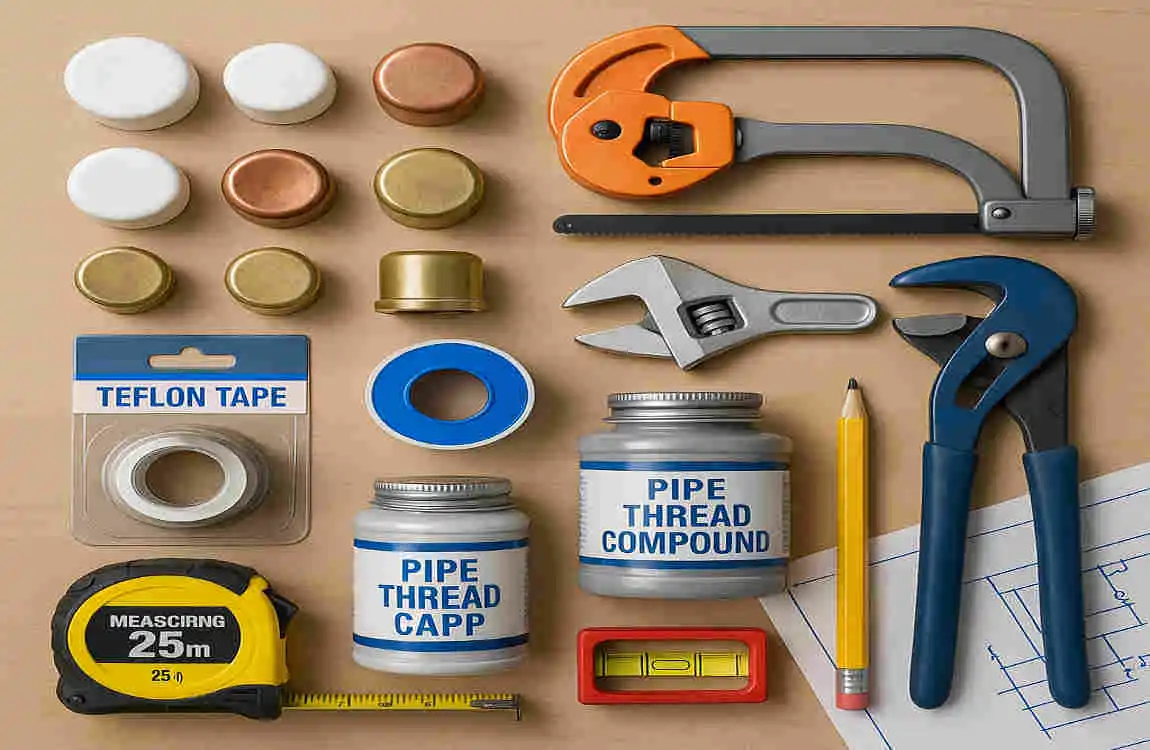
Essential Tools for the Job
Before diving into your capping hous project, let’s gather your arsenal. Having the right tools makes the difference between a smooth operation and a frustrating struggle.
Your pipe cutter is your best friend efor this job. Whether you choose a wheel-type cutter for copper or a ratcheting cutter for PVC, this tool ensures clean, straight cuts. Hacksaw works too, but it requires more elbow grease and careful attention to keep cuts square.
Don’t forget your adjustable wrenches. You’ll need at least two – one to hold the pipe steady and another to tighten threaded caps. Channel-lock pliers serve as great backup tools for gripping and turning.
Plumber’s tape (also called Teflon tape) is absolutely essential for threaded connections. This thin, white tape wraps around threads to create watertight seals. Always keep a roll handy – it’s inexpensive insurance against leaks.
Choosing the Right Cap Material
Pipe Material, Best Cap Installation Method, Durability
Copper Copper push-fit or soldered Push-on or solder Permanent
PVC/CPVC Solvent-weld or threaded Glue or screw Permanent
Galvanized Steel Threaded steel Screw with tape , Very durable
PEX PEX crimp or push-fit Crimp or push Long-lasting
Cast Iron Rubber compression Tighten bands Temporary to permanent
Safety Equipment and Precautions

Your safety matters more than any plumbing project. Safety glasses protect your eyes from debris when cutting pipes. Trust me, one metal shaving in your eye will make you a believer in eye protection.
Work gloves protect your hands from sharp pipe edges and improve your grip on tools. Choose ones that balance protection with dexterity—you still need to handle small parts.
Keep towels and a bucket nearby. Even after draining pipes, residual water often surprises you. Having these ready prevents water damage to floors and belongings.
Identify the Pipe to Be Capped
Locating the Correct Pipe
Finding the right pipe might seem obvious, but homes hide complex plumbing networks behind walls and under floors. Start by following the visible portions of your plumbing system. Trace lines from fixtures back to central supply lines.
Your home’s blueprints are goldmines of information. If you have them, they’ll show exactly where pipes run and what they service. No blueprints? Don’t worry. Most plumbing follows logical paths—straight lines and right angles whenever possible.
Sometimes, you need detective work. Turn on faucets one at a time while someone watches the pipes. You can feel temperature changes in hot water lines or slight vibrations in active pipes. This hands-on approach helps identify which pipe serves which fixture.
Importance of Water Shutoff
Here’s a rule you should tattoo on your brain: always shut off the water before working on plumbing. Always. No exceptions. Even if you think the pipe is dry, even if it hasn’t been used in years—shut off the water.
Find your main water shutoff valve. It’s usually near where the water line enters your home—basement, crawl space, or utility room. Turn it clockwise until it stops. That’s it – you’ve just prevented a potential flood.
After shutting off the main valve, open faucets at the highest and lowest points in your home. This releases pressure and helps drain the pipes. Let them run until the water stops flowing completely.
Identifying Pipe Materials
Different pipes require different capping approaches, so identifying your pipe material is crucial. Copper pipes have that distinctive reddish-brown color and feel solid when tapped. They’re common in homes built from the 1960s onward.
PVC pipes are white plastic and feel hollow when tapped. CPVC looks similar but has a slightly yellowish tint. Both are lightweight and common in newer construction.
Galvanized steel pipes are silver-gray and magnetic. They feel heavy and solid. If your home was built before 1960, you might encounter these throughout your plumbing system.
Turn Off the Water Supply
Detailed Shutdown Instructions
Let’s walk through the shutdown process step by step. First, locate your main shutoff valve. In warm climates, check outside near an external wall. In cold climates, look in the basement or utility room.
Turn the valve handle clockwise (righty-tighty) until it won’t turn anymore. Ball valves only need a quarter turn – the handle should be perpendicular to the pipe when closed. Gate valves require multiple turns.
Don’t force a stuck valve. Apply penetrating oil, wait a few minutes, then try again. If it still won’t budge, you might need professional help. Forcing it could break the valve, creating a bigger plumbing problem.
Draining the System
After shutting off the water, you need to drain what’s left in the pipes. Open all faucets in your home, starting from the top floor and working down. This creates air passages that help water drain more completely.
Don’t forget about appliances! Run your dishwasher and washing machine briefly to clear their lines. Flush toilets need to be emptied. The goal is to remove as much water as possible from your plumbing system.
Place buckets under the pipe you’re planning to cap. Even “empty” pipes often hold surprising amounts of water. Having containers ready prevents water damage and makes cleanup easier.
Safety Precautions
Water and electricity don’t mix. If you’re working near electrical outlets or appliances, turn off the power to that area at your circuit breaker. Better safe than sorry when it comes to electrical hazards.
Communicate with everyone in your home. Put a note on the main shutoff valve saying “DO NOT TURN ON – PLUMBING WORK IN PROGRESS.” You don’t want someone unknowingly turning the water back on while you’re mid-project.
Keep your phone handy and save a plumber’s number. While this guide prepares you well, unexpected situations can arise. Having professional backup ready provides peace of mind.
Prepare the Pipe End
Cutting the Pipe Cleanly
A clean cut sets the stage for a successful cap installation. Measure twice, cut once – this old carpenter’s saying applies perfectly to plumbing. Mark your cutting point with a permanent marker, ensuring you’re leaving enough pipe for the cap to grip.
For copper pipes, use a tubing cutter for best results. Place the pipe in the cutter’s jaw, tighten until the cutting wheel contacts your mark, then rotate the blade around the pipe. Tighten slightly after each rotation until the pipe separates cleanly.
PVC and CPVC pipes cut easily with a ratcheting PVC cutter or fine-toothed saw. If using a saw, create a guide by wrapping tape around the pipe where you’ll cut. This helps keep your cut straight and square.
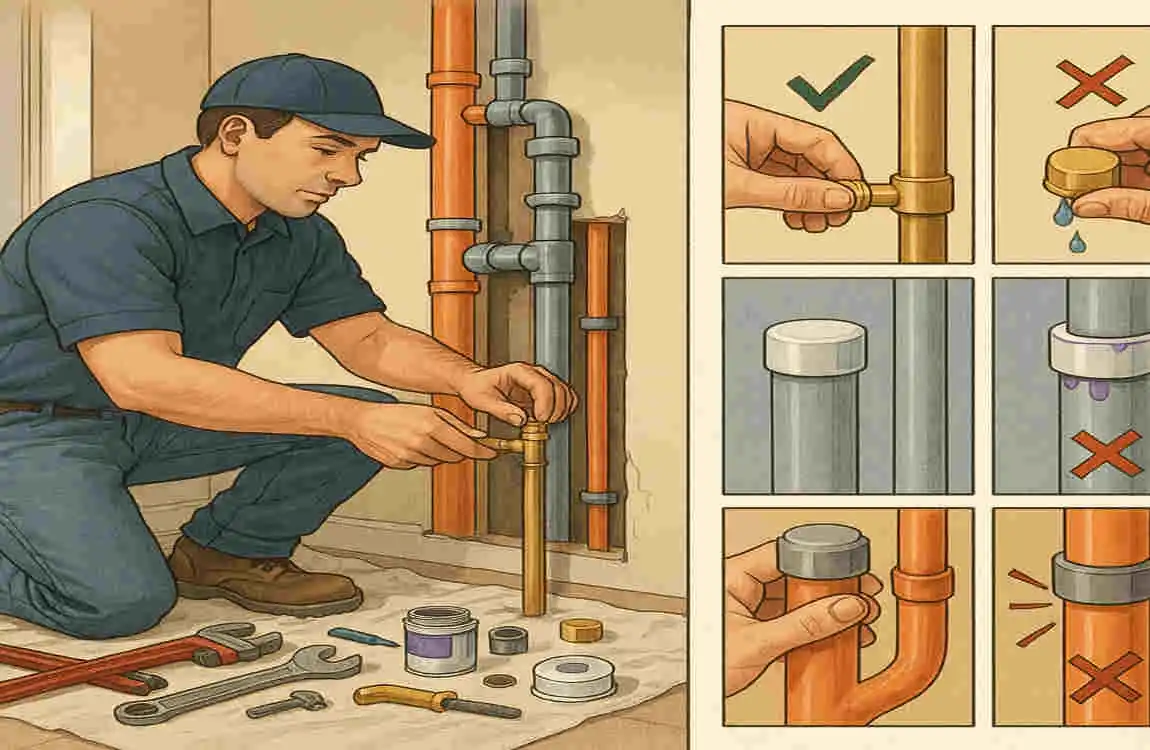
Apply Plumbing Caps Properly
Push-On Cap Installation
Push-on caps are beginner-friendly and perfect for temporary solutions. Start by checking that the cap size matches your pipe diameter. These caps rely on precise sizing for proper sealing.
Push the cap onto the pipe end with steady, even pressure. You should feel resistance as the internal O-ring engages the pipe. Continue pushing until the pipe reaches the stop inside the cap – usually about an inch deep.
Threaded Cap Installation
Threaded caps require a bit more finesse but create incredibly secure seals. First, wrap plumber’s tape around the pipe threads. Start at the second thread from the end, wrapping clockwise (the direction you’ll turn the cap).
Apply three to four layers of tape, pulling it snug as you wrap. The tape should conform to the thread grooves. Avoid overwrapping – too much tape can prevent proper threading or even crack female fittings.
Thread the cap on by hand first, ensuring it starts straight. Once hand-tight, use a wrench for the final turns. Stop when you feel firm resistance – overtightening can damage threads or crack fittings.
Solvent-Weld Cap Installation
Solvent welding creates permanent bonds that are ideal for PVC and CPVC pipes. Prime both surfaces first (if required by your cement type). The primer softens the plastic, preparing it for bonding.
Apply cement liberally to both the pipe end and inside the cap. Work quickly – the cement sets fast. Push the cap onto the pipe with a slight twisting motion until fully inserted.
Hold the cap in place for 30 seconds to prevent it from pushing off. The cement creates pressure as it activates. Wipe away excess cement immediately – it can weaken the pipe if left to pool.
Test the Seal
Turning Water Back On
Testing time! But don’t just flip that main valve wide open. Please turn it on slowly, about a quarter turn at a time. This gradual approach prevents water hammer and gives you time to react if something’s wrong.
Listen carefully as water fills the pipes. You’ll hear air escaping through open faucets – that’s normal. What you don’t want to hear is hissing or spraying near your newly capped pipe.
Keep someone stationed at the cap while another person controls the valve. Clear communication prevents scrambling if a leak appears. “Stop,” “slowly,” and “full on” should be your vocabulary during this critical phase.
Checking for Leaks
With water restored, scrutinize your cap. Look for obvious drips first, then check for subtle signs of leakage. Sometimes leaks appear as barely visible beading around the cap edge.
Dry the area thoroughly with a towel, then place a dry paper towel beneath the cap. Wait 15 minutes and check the paper towel. Even tiny leaks will show as wet spots. This method catches slow leaks you might otherwise miss.
Feel around the cap with your fingers. Sometimes you’ll feel moisture before seeing it. Check not just the cap itself but also nearby joints – pressure changes can reveal weaknesses elsewhere in the system.
Fixing Common Issues
If you discover a leak, don’t panic. Turn off the water and assess the situation. For push-on caps, try removing and reinstalling, checking for debris on the pipe or in the cap.
Threaded caps might need more plumber’s tape. Remove the cap, thoroughly clean off the old tape, and reapply with an extra layer or two. Ensure you’re wrapping in the correct direction – clockwise when looking at the pipe end.
For persistent leaks in solvent-welded caps, you should cut off the cap and start over. This sounds drastic, but it’s better than dealing with water damage later. Use a new cap and ensure surfaces are spotless and dry.