
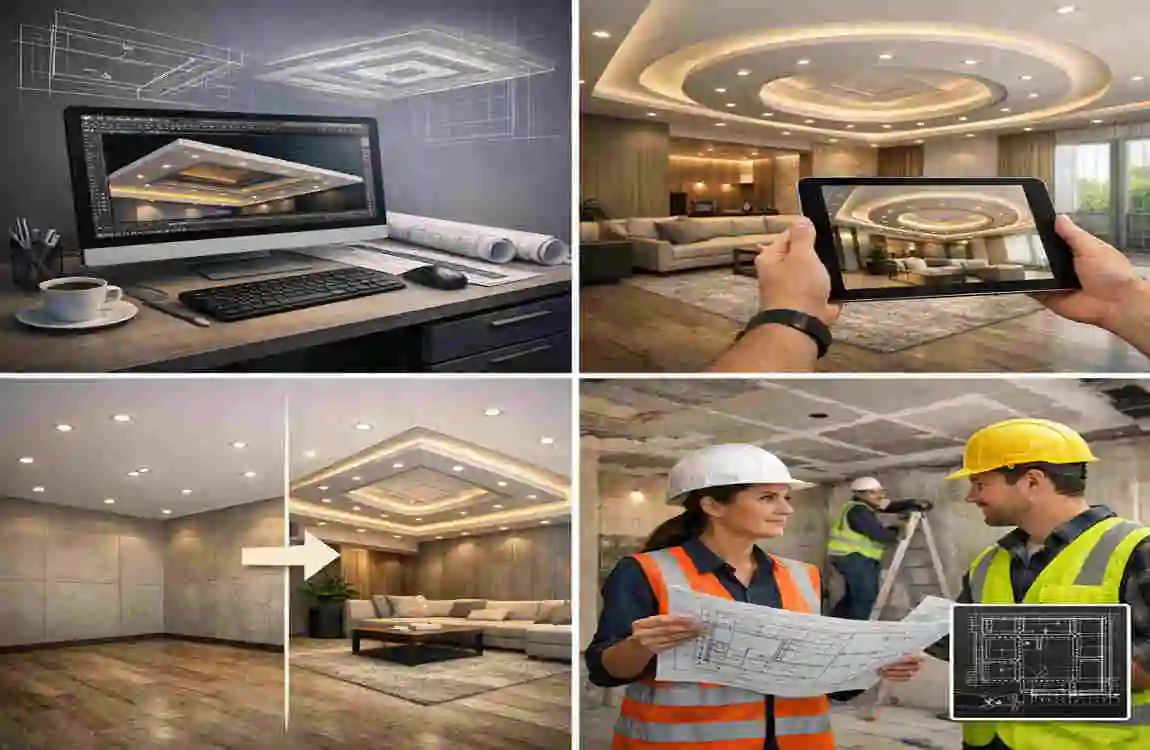
Have you ever walked into a room, looked up, and felt immediately inspired? That is the power of a well-designed ceiling. Often called the “fifth wall,” the ceiling is frequently overlooked in residential design, yet it has the potential to completely transform the atmosphere of a modern home. Whether you are an aspiring architect, an interior designer, or a homeowner ready to renovate, mastering ceiling design in AutoCAD for house projects is your gateway to creating breathtaking interiors.
Why Choose AutoCAD for Ceiling Designs
When it comes to drafting and design, AutoCAD remains the gold standard for a reason. Why not just sketch it out on paper? The answer lies in precision and scalability.
Ceiling design in AutoCAD for house projects lets you move beyond simple sketches into accurate construction documentation. AutoCAD excels in both precise 2D drafting and 3D modelling. This dual capability is crucial because ceilings are inherently three-dimensional—they have depth, recesses, and protrusions that are hard to convey in a flat drawing.
The Power of Layers and Blocks
One of the massive benefits of using AutoCAD is the Layer system. You can separate your structural beams, electrical wiring, HVAC ducts, and decorative panels into different layers. This ensures that your design is not only beautiful but also functional and clash-free.
Furthermore, the use of Blocks allows for complex patterns to be repeated without redrawing them. Imagine designing a complex Victorian cornice; with AutoCAD, you draw it once, save it as a block, and place it instantly around the entire perimeter of the room.
Scalability and Fabrication
Whether you are designing for a cosy 10×10 bedroom or a massive open-plan living area, AutoCAD ensures scalability. You can easily stretch or scale designs without losing resolution or proportion. Plus, the files you create are compatible with modern fabrication tools. This means your digital design can be sent directly to CNC machines to cut wood or gypsum panels with zero error.
Essential AutoCAD Tools for Ceilings
Before we jump into the specific designs, let’s equip you with the right toolkit. You don’t need to know every single command in AutoCAD, but you do need to master a specific set of tools for effective ceiling design in a house.
The Basics: Drawing and Modifying
- LINE and POLYLINE: These are your bread and butter. You will use these to draw the perimeter of your ceiling and the basic grid layout.
- ARC and SPLINE: Modern houses often feature curves. These commands help you create smooth, organic shapes for vaults or circular trays.
- OFFSET: This is arguably the most used tool for ceilings. It allows you to create parallel lines perfectly, which is essential for creating steps, borders, and coves.
Texturing and Organisation
- HATCH: To make your design readable, you need to show materials. Use the HATCH command to represent gypsum, wood, or metal textures.
- BLOCK: As mentioned earlier, turn your light fixtures and decorative mouldings into blocks to keep your file size down and your workflow fast.
- LAYER: strictly organise your drawing. Keep your “Ceiling-Lights” separate from your “Ceiling-Gypsum.”
Going 3D
If you want to visualise the depth:
- EXTRUDE: Turn your 2D shapes into 3D objects.
- REVOLVE: Perfect for creating domes or circular lighting fixtures.
- EXPLODE: Use this carefully to break complex blocks down for editing.
Design 1: Minimalist Flat Ceiling
Let’s start with something sleek. The Minimalist Flat Ceiling is a staple in contemporary interior design. Clean lines and a smooth finish characterise it, and it usually features recessed lighting that makes the ceiling feel like it is floating. This design is perfect for living rooms where you want the furniture to be the focal point.
Why It Works
It creates a sense of space and airiness. By integrating LED strips or recessed cans, you eliminate the need for bulky chandeliers, keeping the visual field clear.
Mini-Tutorial
- Draw the Base Grid (50 words): Start by drawing the room perimeter using the RECTANGLE command. Create a grid layout using CONSTRUCTION LINES to ensure your lights will be perfectly symmetrical.
- Add Recessed Panels (100 words): Use the OFFSET command to create a border about 15-20cm from the wall. This acts as your “cove” or shadow gap. If you want a central recessed area, draw a smaller rectangle in the centre and use TRIM to clean up the lines. Use a HATCH pattern (like AR-SAND) to denote the gypsum texture.
- Insert Lighting Blocks (50 words): Don’t draw every light. Create one circle for a downlight, turn it into a BLOCK, and use the COPY or ARRAY command to place them along your grid lines.
Coffered Grid Ceiling
If you want to add a touch of luxury and architectural weight to a dining room or a library, the Coffered Grid Ceiling is your best bet. This style features a grid of indented panels (coffers) framed by beams. It sounds complex, but AutoCAD makes it easy.
The Aesthetic
Coffered ceilings add instant drama and depth. They can be made of wood for a warm, traditional look, or painted white gypsum for a “modern farmhouse” vibe.
Mini-Tutorial
- Sketch Grid Framework (80 words): Begin with your room perimeter. Use the DIVIDE command on your wall lines to mark out equal segments for your beams. Connect these points using the LINE command to create a checkerboard grid.
- Apply 3D Extrusions (100 words): This is where it gets fun. If working in 3D, use the PRESSPULL or EXTRUDE command. Pull the “beams” down by 150mm. Leave the inner squares (the coffers) higher up. If working in 2D, use distinct lineweights. Make the beam edges thick and the inner coffer lines thin to simulate depth.
- Texture with Materials (70 words): Use the HATCH command again. Select a wood grain pattern for the beams if you are going for a rustic look, or a solid gradient fill to represent shadow depth in the 2D drawing.
Tray Step Ceiling
The Tray Step Ceiling, often called an inverted or recessed ceiling, features a centre section several inches or feet higher than the perimeter. This is the go-to design for master bedrooms, as it draws the eye upward and adds a sense of vertical volume.
Creating Depth
The magic here is in the “steps.” You can have a single tray or multi-tiered trays for a dramatic effect.
Mini-Tutorial
- Outline Tiers with OFFSET (60 words): Draw your room boundary. Select the rectangle and use OFFSET. Type in your distance (e.g., 400mm) and click inside. Repeat this process for however many “steps” you want in your tray design.
- Bevel Edges with FILLET (90 words): Sharp 90-degree corners can sometimes look too harsh. Use the FILLET command with a radius setting (e.g., R 100) to round off the corners of your inner rectangles. This creates a softer, more elegant transition between the ceiling levels, perfect for a relaxing bedroom environment.
- Embed Cove Lighting (80 words): Between your steps, you’ll want hidden lighting. Draw a small “L” shape profile in the cross-section view to represent the hidden lip where the LED strip sits. In the plan view, represent this with a dashed line using the LINETYPE command to indicate hidden geometry.
Vaulted Curved Ceiling
For open kitchens, lofts, or living rooms with high roofs, a Vaulted Curved Ceiling mimics the high-end aesthetic of cathedrals or industrial conversions. This design moves away from rigid straight lines and embraces the flow of curves.
The Flow
Vaults can be barrel vaults (one curve) or groin vaults (intersecting curves). For ceiling designing in AutoCAD for a house, we will focus on a barrel vault.
Mini-Tutorial
- Use SPLINE for Curves (70 words): In your elevation or section view, do not use simple arcs. Use the SPLINE command. This allows you to click multiple control points to sculpt a perfect, organic curve that represents the roofline or the false ceiling curve.
- Loft Surfaces (100 words): If you are modelling this in 3D, draw the curved profile at one end of the room and the same profile at the other end. Use the LOFT command and select both profiles. AutoCAD will automatically generate a smooth surface connecting them, creating your vault.
- Add Faux Beams (80 words): To break up the large curved surface, add faux timber beams. Draw a rectangle in the section view representing the beam profile. Use the EXTRUDE command along a path (the curve of the ceiling) to make the beam follow the vault perfectly.
Geometric Pattern Ceiling
Who says ceilings have to be square? For kids’ rooms, home offices, or creative studios, a Geometric Pattern Ceiling using hexagons, triangles, or radial shapes brings playful energy to the space.
The Strategy
This design relies heavily on repetition. You create one shape and multiply it.
Mini-Tutorial
- Array Patterns with POLYGON (60 words): Type POLYGON. Choose the number of sides (e.g., 6 for a hexagon). Specify the centre and radius. Once you have one perfect shape, you don’t need to draw it again.
- Mirror and Array Repeats (100 words): Select your polygon. Use the ARRAY command (specifically Rectangular Array or Path Array) to tile the shape across the ceiling area. Adjust the spacing between columns and rows to create gaps for lighting or leave them touching for a honeycomb effect. Use EXPLODE if you need to delete specific shapes around the edges.
- Hatch Fills (90 words): To visualise different colours or panels, select alternating shapes. Apply a SOLID HATCH with different colours (using layer properties) to create a mosaic effect. This helps the client or contractor understand the colour scheme instantly.
False Drop Ceiling
In modern basements or utility rooms, you often need to hide ductwork and wiring. A False Drop Ceiling (or suspended ceiling) is the practical solution that can still look stylish.
Practicality Meets Design
This system usually consists of a metal grid suspended from the main structure that holds tiles or panels.
Mini-Tutorial
- Draw Suspension Grid (70 words): Create a layer named “Grid-T-Bar.” Draw a 600 x 600 mm (standard tile size) grid across the room. Centre the grid so the cut tiles at the edges are equal on both sides—this is a sign of professional drafting.
- Drop Panels with REGION (100 words): To make the tiles look like separate objects, use the REGION command on each grid square. This converts simple lines into planar objects. If viewing in 3D, you can set a very small thickness.
- Integrate Vents (80 words): Show where the AC comes out. Insert blocks for “Air Diffusers” or “Return Vents.” Snap them to the centre of your grid tiles. Use the ALIGN command to ensure they fit perfectly within the 600×600 square.
Ornate Plaster Ceiling
For entryways or formal dining rooms, blending modern design with classic elements creates a stunning contrast. An Ornate Plaster Ceiling features moulded roses, cornices, and intricate borders.
The Classical Touch
AutoCAD is great for this because you can import highly detailed blocks of classical motifs that would be impossible to draw by hand.
Mini-Tutorial
- Import Blocks (50 words): Do not try to draw a floral ceiling rose from scratch! Download a high-quality DWG block. Use the INSERT command to bring it into the centre of your room.
- Array Motifs (120 words): For the cornices (crown moulding), draw the path of your wall. Import a “Greek Key” or “Egg and Dart” pattern block. Use the MEASURE command with the Block option. Select your wall line (path), select your pattern block, and specify the distance. AutoCAD will automatically place the ornate pattern along the entire perimeter of the room, following every corner perfectly.
- 3D Relief (80 words): If you need to show the relief in a section view, ensure you use a detailed Profile Block. Use HATCH with a gradient setting to simulate the shadows cast by the curved moulding, making the 2D drawing pop.
LED Cove Ceiling
This is the ultimate design for home theatres and ambient living spaces. The LED Cove Ceiling focuses on indirect lighting that washes up walls or across the ceiling surface, creating a glow without visible bulbs.
The Mood Setter
The key here is drawing the “cove” accurately so the light bounces correctly.
Mini-Tutorial
- Profile Coves with ARC (60 words): In your section view, draw the floating ceiling edge. Use the ARC command to create a lip or a trough for the LED strip to sit in. Ensure the lip is high enough to hide the strip from the viewer’s eye level.
- Extrude Channels (100 words): Switch to an isometric view. Use BOUNDARY to create a polyline of your cove profile. Use SWEEP or EXTRUDE along the perimeter path of the room. This creates the physical channel for the light.
- Simulate Glow (90 words): In AutoCAD, you can’t “turn on” lights like in rendering software, but you can simulate it. Use a Gradient HATCH (Yellow to Transparent) fading out from the cove. This visually communicates to the contractor that “light comes from here.”
Resource: Look for “Lighting Detail CAD” files to see standard cove dimensions.
Slatted Wood Ceiling
Emphasise linear aesthetics with a Slatted Wood Ceiling. This is incredibly popular in eco-friendly and Scandinavian-style modern houses. It adds texture, warmth, and acoustic benefits.
Linear Warmth
The repetition of wood slats creates a visual rhythm that guides the eye.
Mini-Tutorial
- Linear Arrays (70 words): Draw a single slat (e.g., 40mm x 40mm). Use the ARRAY (Rectangular) command. Set the number of columns to 1, and the number of rows to cover your ceiling width. Adjust the “Between” distance to control the gap size.
- Taper Slats (100 words): For a dynamic look, don’t just use straight slats. Make them wave! Draw a curved path across the ceiling. Use the EXTRUDE command on your slat profile and select “Path.” Pick your curved line. Now your wood slats ripple across the ceiling like a wave.
- Acoustic Perforations (80 words): Often, black acoustic fabric is placed behind the slats. Create a layer called “Acoustic-Backing” and apply a dark, dense HATCH behind your slats to represent this material.
Parametric Modular Ceiling
Finally, for the tech-savvy homeowner or flexible home office, we have the Parametric Modular Ceiling. This uses AutoCAD’s advanced features to create tiles that can change shape or function.
Future-Proofing
This design uses “Dynamic Blocks,” which let you change a tile’s size or appearance with a single click.
Mini-Tutorial
- Parametric Blocks (60 words): Create a block for a ceiling tile. In the Block Editor, add “Parameters” (like Linear or Visibility). This allows you to drag a grip to resize the tile without redrawing it.
- Dynamic Arrays (100 words): Combine your dynamic block with an associative ARRAY. This means that if you change the room’s size, the array of tiles automatically updates to fill the space, adding or removing tiles as needed.
- Variant Swaps (90 words): Add a “Visibility State” to your block. Create three versions of the tile in the same block: one flat, one with a light, and one with a vent. Now, in your drawing, you can click any tile and select “Vent” from a dropdown menu to swap it instantly.
Resource: Search for “Dynamic Ceiling Blocks” to download pre-made parametric files.
Step-by-Step General Tutorial Workflow
Now that you have the designs, how do you actually execute a project from start to finish? Here is a universal workflow for ceiling designing in AutoCAD for house projects.
Setup and Base Layout
Before drawing a single line, check your units. Type UNITS and ensure you are set to Millimetres or Inches, depending on your region. Precision is key. Next, open your LAYER PROPERTIES. Do not draw everything on “Layer 0.” Create layers for:
- A-CLNG-GRID (The layout grid)
- A-CLNG-LGT (Lights)
- A-CLNG-PATT (Hatching/Texture)
- A-CLNG-DIMS (Dimensions)
Once your layers are set, XREF (External Reference) your floor plan into the drawing. This serves as your background. Trace the inner walls using a Polyline to define the ceiling boundary.
Sketching and Detailing
With your boundary defined, apply your design logic. Use construction lines to find the centre of the room. If doing a tray ceiling, offset your walls. If doing a grid, use the Divide command. Place your lighting blocks now, before you add texture. This ensures your lights are centred on panels or beams. Use DIMENSION tools to mark the height of the ceiling from the floor (e.g., “CLG HT: 2800mm”).
Render and Export
Once the geometry is done, apply your HATCH textures. Clean up overlapping lines using TRIM. Finally, move to the LAYOUT tab. Create a Viewport. Set your scale (e.g., 1:50). Plot your drawing to PDF. If you modelled in 3D, use the RENDER command to produce a realistic image of how the light interacts with the ceiling steps.
Advanced Tips for Modern Houses
To truly make your designs stand out in the modern market, you need to think beyond just shapes.
Sustainability Integration Modern houses prioritise eco-friendliness. In your notes section of the AutoCAD drawing, specify low-VOC paints and sustainable materials, such as bamboo, for slatted ceilings. Use the text tool to create a “Material Schedule” directly on the drawing.
Smart Lighting Coordination: Ceilings are the highways for smart home technology. If you have AutoCAD Electrical, use it to map out the circuit runs for smart LED drivers. Ensure you leave enough “plenum space” (the gap above the ceiling) for Wi-Fi routers or smart home hubs that need to be hidden but accessible.
Scaling for Room Sizes: A design that looks good in a mansion might look claustrophobic in a cottage. Always use the Annotative Scale feature in AutoCAD. This ensures that your text and dimensions automatically resize to remain readable, whether you are printing a detail of a cornice or a full plan of the living room.
Frequently Asked Questions (FAQ)
Here are quick answers to common questions about ceiling designing in AutoCAD for house projects to help you get started immediately.
What is the first step to designing a ceiling in AutoCAD?
Before drawing any creative patterns, you must establish the room’s boundary. Start by creating the floor layout using basic tools like LINE or RECTANGLE to define the walls . It is also crucial to set your units (Metric or Imperial) right at the beginning to ensure your dimensions are accurate for construction .
What is an RCP and why do I need it?
RCP stands for Reflected Ceiling Plan. In AutoCAD, this is a specialized drawing that shows the ceiling as if a mirror were placed on the floor reflecting upwards. It is the standard way to communicate lighting layouts, materials, and dimensions to builders .
Should I draw one large grid for the whole house?
No, that is a common mistake. It is better to create separate ceiling grids for each room rather than one giant grid covering the entire drawing area. Making a grid large enough to cover the biggest area for every room can cause performance issues in AutoCAD. Instead, use boundaries to define the specific size needed for each room .
Can I find pre-made ceiling blocks for different styles?
Yes! You don’t have to draw everything from scratch. There are many resources available where you can download precise AutoCAD drawings for intricate designs, including coffered, tray, and vaulted ceilings . These templates often include necessary details like material patterns and arrangement dimensions .
How do I account for lights and vents?
Before finalizing your false ceiling design, you must review the architectural requirements for utilities. You should incorporate layers specifically for lighting, ventilation, and other fixtures to ensure they fit within your design grid and don’t clash with structural elements .